
Threadville combines delightful countryside charm with puppet-inspired horror, resulting in a captivating mix of cute and creepy gameplay. Like any thrilling horror experience, it presents players with various challenges and puzzles while being pursued by unsettling puppet figures. This Threadville Act 1 walkthrough guide is designed to assist you if you find yourself stuck at any point in the game.
Ultimate Guide to Threadville Act 1
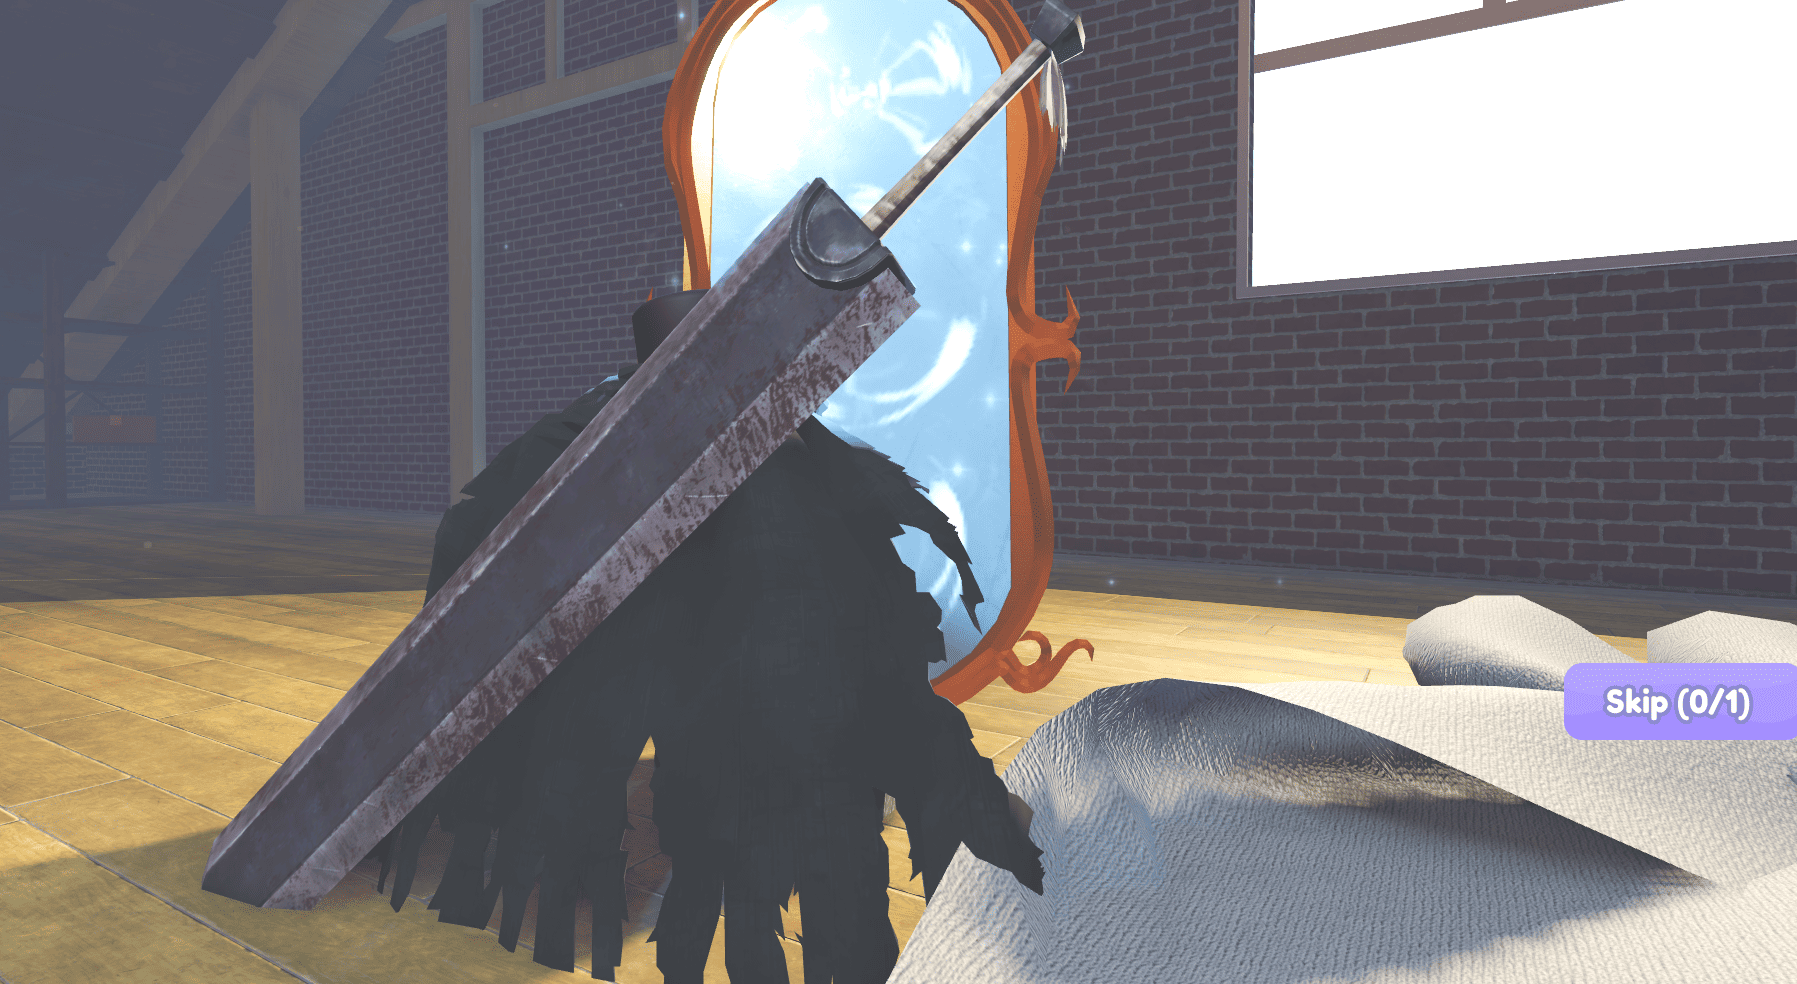
Begin your journey in Threadville from the main lobby where you can enter Act 1 lobbies with groups of 4 to 10 players, though playing solo remains a viable option. Upon entering an Act 1 lobby, you will witness a cutscene featuring your character in their grandmother’s attic, where you need to rummage through boxes to locate a sewing machine. Proceed to the mirror, which will transport you into the whimsical yet eerie world of Threadville populated by puppet characters.
Navigating the Labyrinth: Honey and Bees


After a brief cutscene, you’ll encounter your first characters in Threadville: the cheerful Oliver and the gothic queen Veena. Gaining access to the labyrinth requires you to stop by and give honey to the guard dog Rocky. Here’s a guide to do this:
- Begin by collecting a jar from the left basket.
- Navigate through the maze towards the honey icons displayed on your HUD, steering clear of bees. There will be one location directly ahead, another to the right, one to the left, and one behind you.
- Hold Shift to sprint, which consumes stamina, and use the E key to hide in the bushes if needed.
- Upon finding honey, equip your jar using its designated key (in this case, 1) and interact with the honey using E.
- Return to Oliver and Veena in the center, placing the honey in the appropriate basket using E.
- Repeat the steps of picking up another jar and emptying it twice more.
- There are multiple honey locations to choose from, providing the opportunity to explore while avoiding bees.
After securing all three honey jars, you’re ready to approach Rocky and make your way into the main town.
Assisting the Residents of Threadville


Engaging in brief dialogue opens up the ability to explore Threadville freely, enabling you to assist Charlotte, Veena, and Oliver with their mini-quests. It is highly advisable to complete all three quests before night sets in, as you will obtain helpful items from each quest for the upcoming horror segment. You’re allowed to retry all three quests:
- Assisting Charlotte: Engage in tetherball through quick-time events where you hit M1 when the ball comes to your side and a white circle meets the dim circle. Continue hitting until you achieve a complete spin. If victorious, Charlotte will leave behind a Camera, which can blind future monsters.
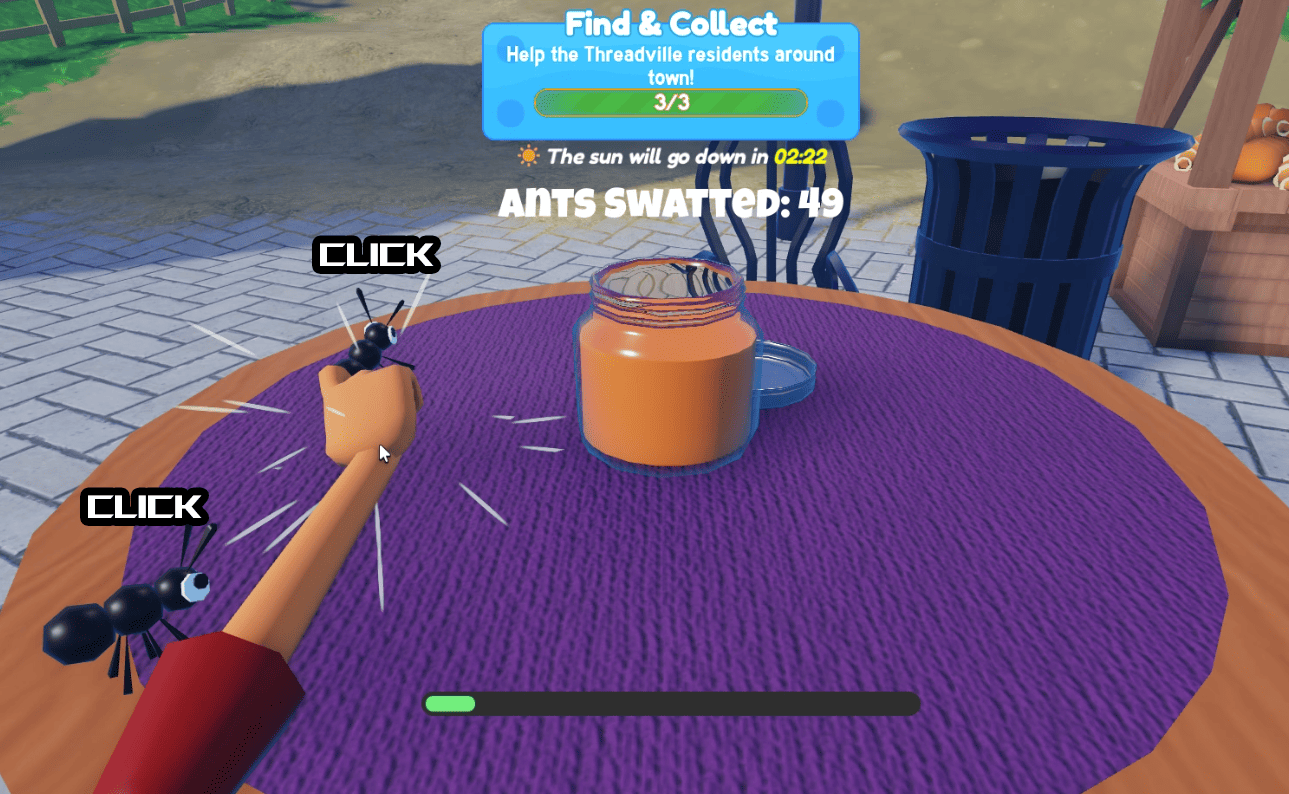
- Supporting Veena: A straightforward point-and-click task where you must click on all ants before they reach the honey. Winning grants you Tea that boosts your movement speed later.
- Helping Oliver: A simple two-match memory game where you seek two of the same vegetables. Begin at the top-left, gradually going through every veggie to find matches within limited turns. Winning earns you a Carrot that enhances your stamina.
After finishing all three quests, search for some Coins around the town, if time permits, before heading to Patty’s home, noticeably purple, positioned right above the town square. You’ll encounter a short cutscene before falling back asleep, only to awaken to something strange.
Power Box Fuse Puzzle Guide in Threadville


Upon waking and exiting, head to the exclamation point to discover a tape recorder. Suddenly, Rocky will emerge from his shed in monster form, initiating your first significant horror encounter. Here’s your action plan:
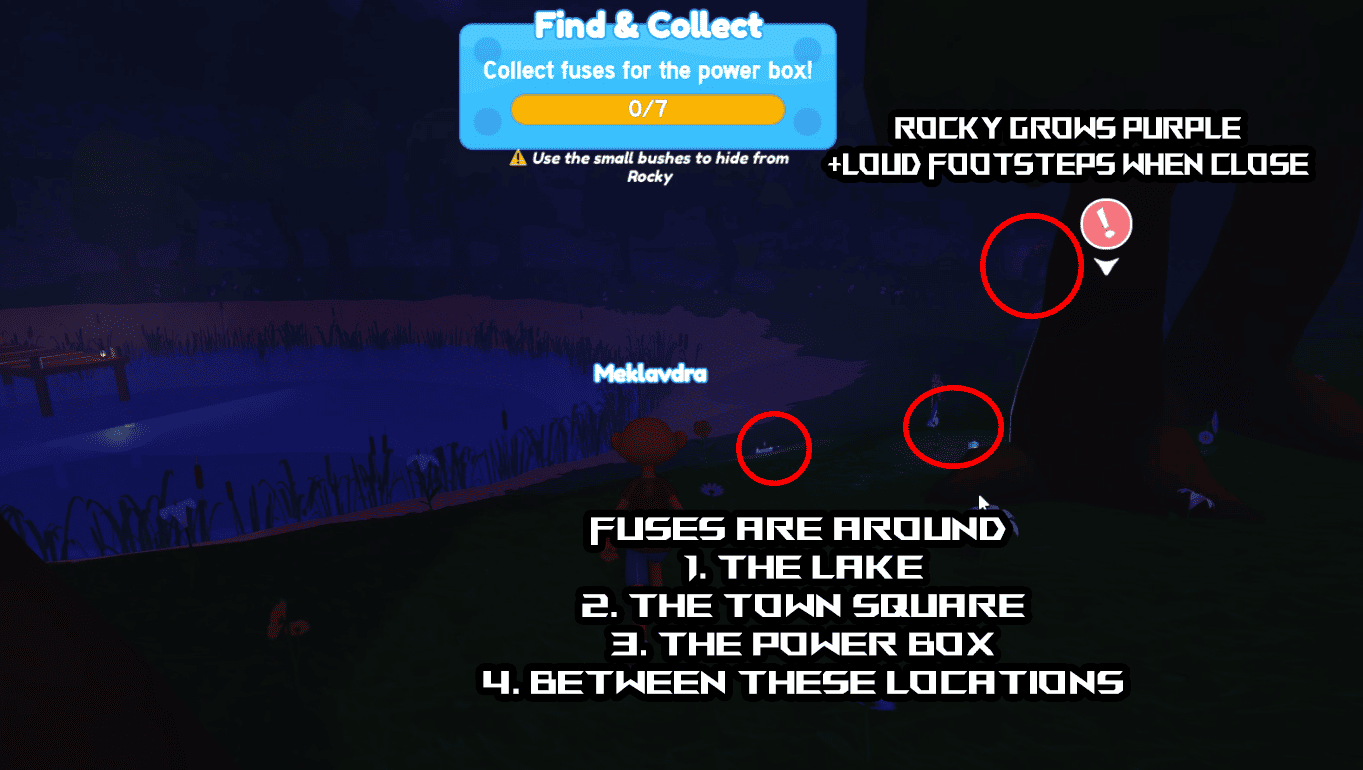
- Evade Rocky: Activate sound to hear Rocky’s footsteps as he approaches. Spot him by his purple aura and remain at a safe distance while collecting fuses. Utilize bushes for cover if he draws near. Be warned: If Rocky catches you at any moment, you’ll have to restart Act 1.
- Gather Useful Items: The Camera can temporarily blind Rocky, stunning him. Tea enhances your speed, and Carrots boost stamina. Bear in mind that both Tea and Carrots are single-use items.
- Locate Fuses & Power Box: Scattered shiny fuses can be found around the lake area, town square, and next to the Power Box, indicated on your HUD. Collect fuses, adding them to your inventory, and equip them before interacting with the Power Box by pressing E. Due to inventory limitations, you might need multiple trips for all seven fuses. Stay cautious of Rocky, especially when you hear loud footsteps nearby.
When all fuses are connected, a market quest will commence, and using a Lantern can provide additional light.
Hopscotch Puzzle Guide in Threadville

The hopscotch puzzle requires you to unlock the market door using a four-digit code. The solution relies on the hopscotch numbers visible in the tower square, as you’ll match the market door’s color-coded digits with those from the hopscotch table. Note that the colors and numbers are randomized for each player, so do not reference someone else’s solution.
For multiplayer: One player can convey the hopscotch colors and numbers through voice or chat. If you’re playing solo: Stand close to the hopscotch drawing in the town square to take a screenshot, then reference it at the market door to match colors with the numbers displayed. Once matched correctly, the door will unlock. Inside, you can converse with the Worm before collecting apples.
Apple Collection Puzzle Guide in Threadville
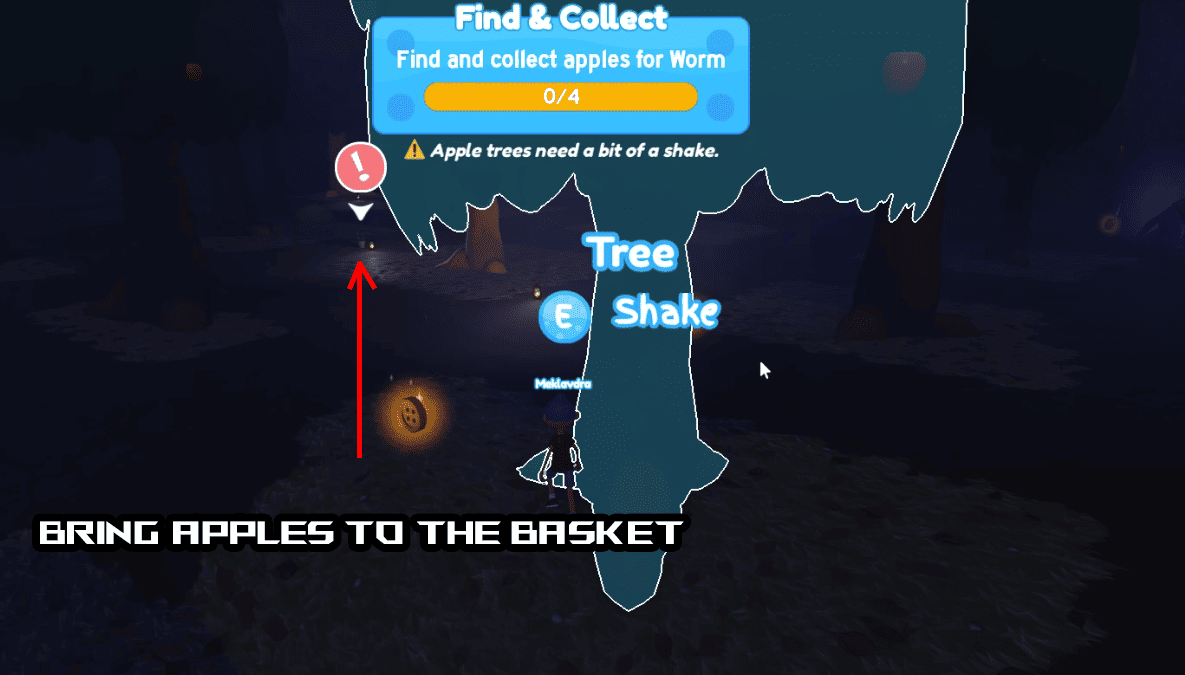
Upon entering the market for the first time and conversing with the Worm, you need to collect four apples:
- The apple tree and bucket are located behind the market, but be cautious, as Rocky will arrive from his patrol at the Town Square. Use bushes to hide.
- Interact with a tree using the E key to drop an apple. You can repeat this action for the same tree four times.
- Place each apple in the bucket located in the center while avoiding Rocky.
- This process must be repeated three more times, and be aware that any tree can drop an apple, but you can only carry one at a time.
Once all four apples have been gathered, take the bucket back to the Worm in the market. He will instruct you to collect some dirt next.
Dirt Collection Puzzle Guide in Threadville
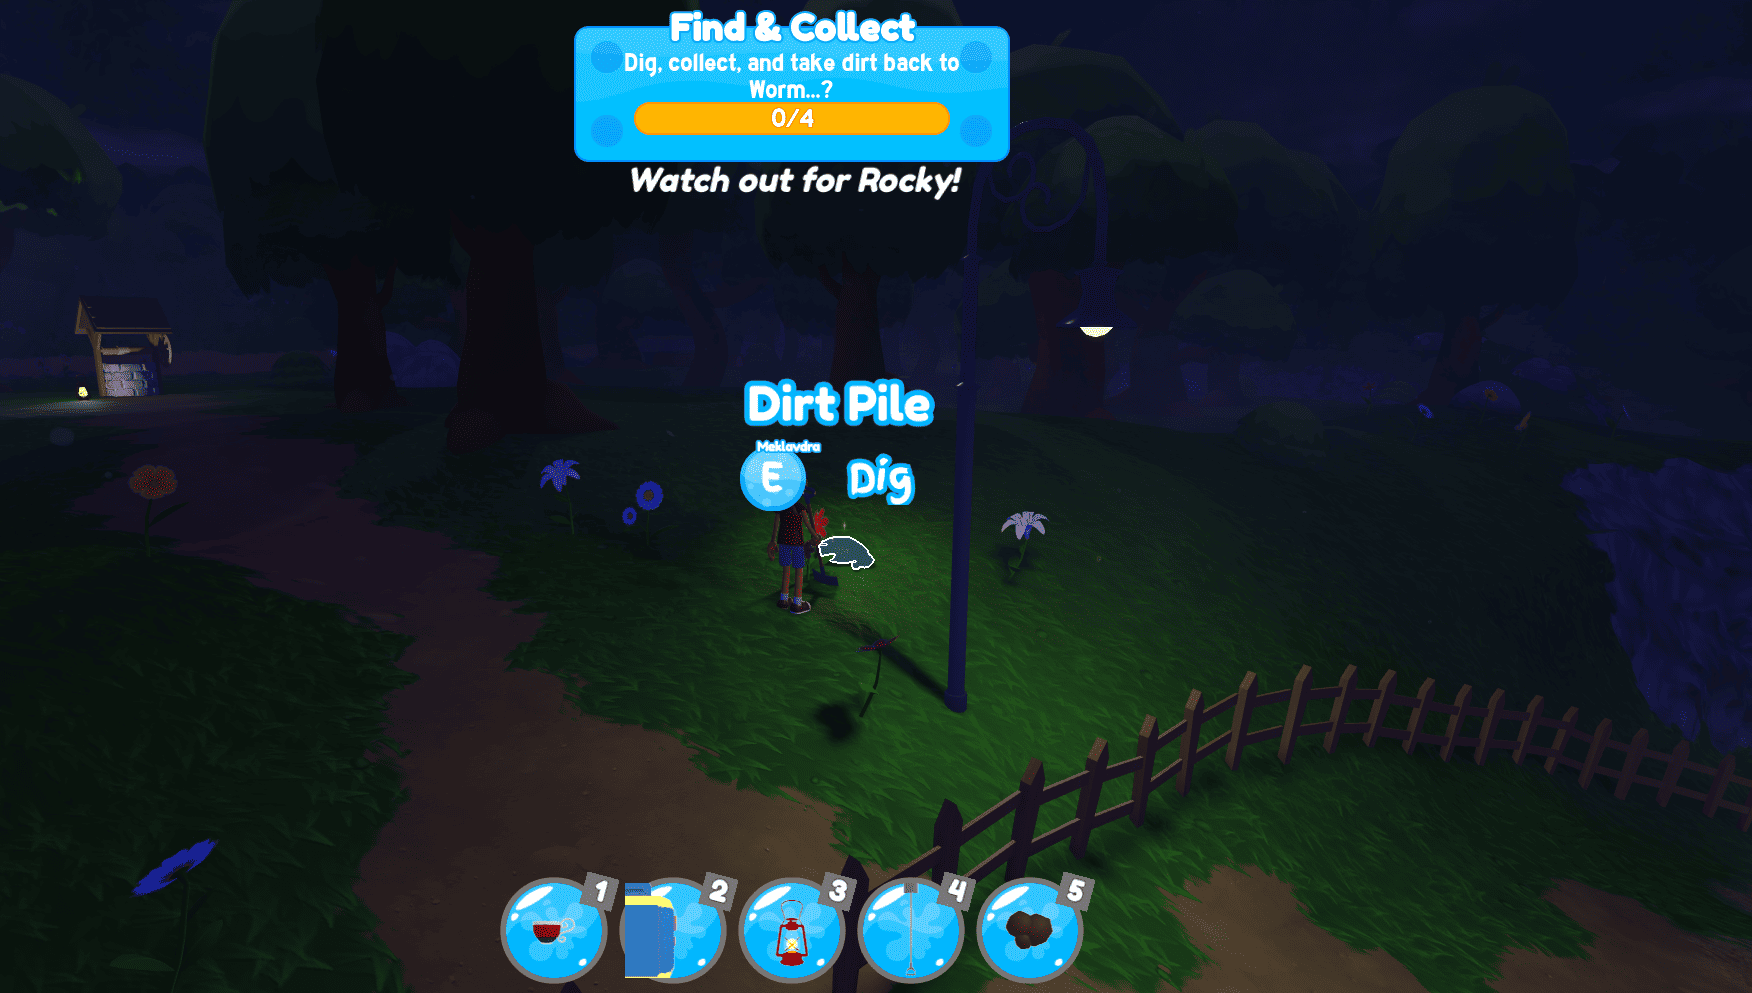
Now, it’s time to gather four pieces of dirt:
- Equip your shovel, and search outside the market for shiny dirt spots to dig. Only one Dirt item can be carried at a time for transport back to the Worm.
- Be aware that Rocky will initiate his running patrolling mode now; conserve your Stamina for fleeing if he gets near and make good use of bushes while readying your Camera for the unexpected.
- Using your Tea and Carrot will assist in this segment, as Rocky becomes significantly quicker here.
Once you have all four pieces of dirt, return them to the Worm for a cutscene. Afterward, you’ll need to visit the treehouse to retrieve Rocky’s lunchbox and eventually the key.
Rocky’s Lunchbox Puzzle Guide in Threadville


After the Worm’s cutscene, you’ll find yourself at the lake, tasked with finding picture puzzle pieces that display a six-digit code to unlock Rocky’s Lunchbox. As always, maintain distance from Rocky as he will patrol the area; use bushes and avoid detection. Follow these steps:
- Locate Picture Pieces: Search for paper puzzle pieces scattered around Rocky’s treehouse, on the ground, trees, fallen logs, and rocky hillsides. There are 16 pieces, but it’s not mandatory to collect them all, as you can reconstruct the numbers through guessing once you have a few laid out.
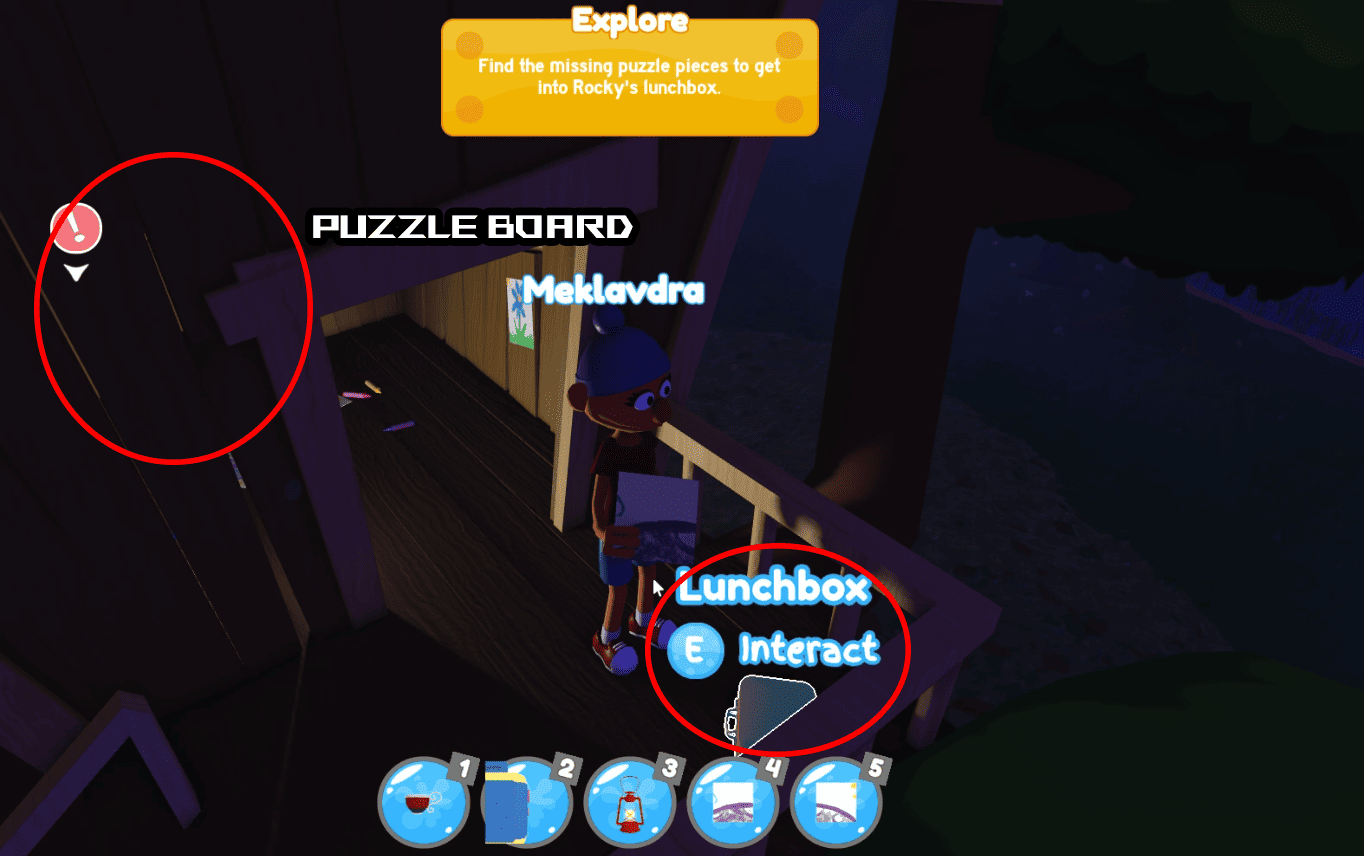
- Treehouse Interaction: While evading Rocky, go to the treehouse and place your discovered pieces on the puzzle board. This is also where the lunchbox resides, but it requires a six-digit code to access.
- Puzzle Board Strategy: The treehouse features a 4×4 board for your paper pieces. Assemble them to create a coherent image, usually depicting a mushroom house, while watching for the six numbers that emerge. Remember, numbers are randomized for each user! You don’t need all pieces to create a solution; some numbers can be inferred by their visible halves as you fit them together.
- Unlocking the Lunchbox: Once you discern all six numbers, interact with the lunchbox outside and enter the code to uncover a Fish inside.
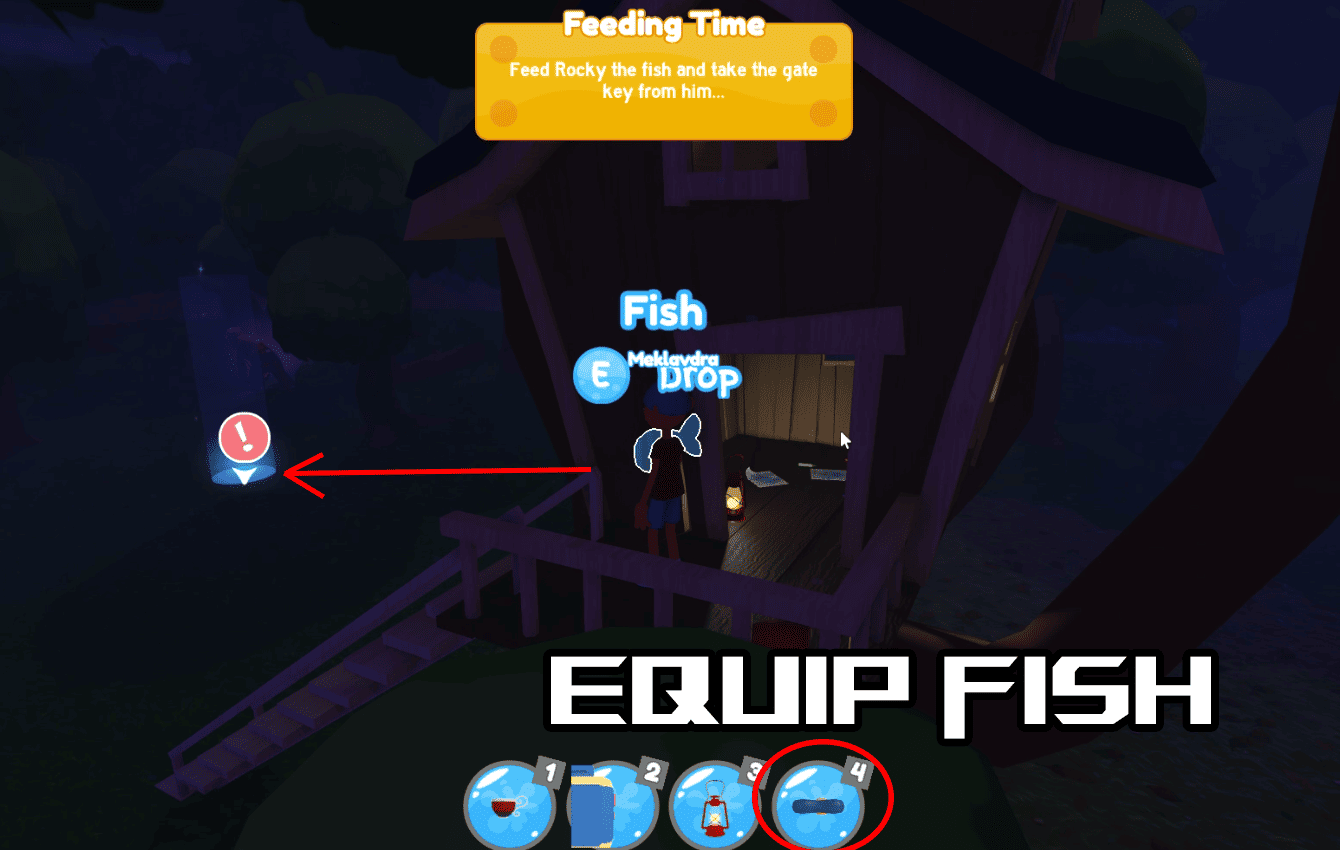
- Setting the Bait: Place the Fish in the indicated area, back off, and wait for Rocky to consume it. Sneak up behind him to retrieve the key. With the key equipped, make your way to the massive wooden gate in the town square.
Upon opening the gate, you’ll encounter a cutscene prompting you to rush to Oliver’s basement for safety, as Rocky will chase you. Speed is essential, so make your escape swiftly, utilizing sprint mechanics and leaping over fences.
Guide: Escaping from Rocky in Threadville


The final phase of Act 1 involves obtaining the key from Rocky, unlocking the town square gate, and racing to Oliver’s basement. Following a cutscene, you will enter a sprinting segment while fending off Rocky’s pursuit.
- Run for Your Life: Keep pressing Shift to sprint down the designated path, evading purple liquid traps and jumping over streams. At one point, you will find yourself trapped against a wall, but don’t worry—the wall will fall. Your HP will regenerate upon receiving damage, but do not stop running; otherwise, Rocky will catch you.
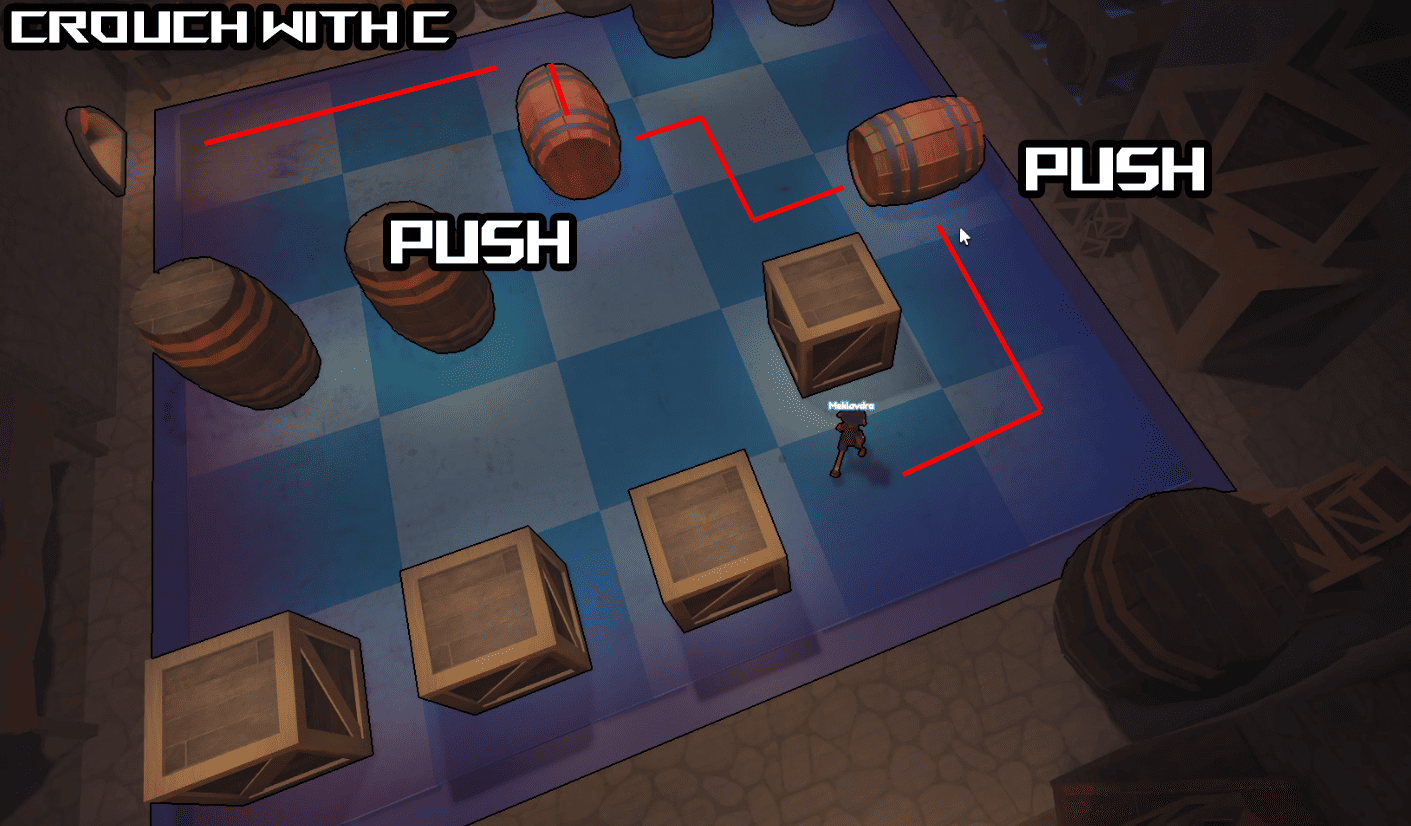
- Barrel and Box Navigation: Once halfway through, you’ve reached the barrel and box puzzle. You’ll need to push barrels and weave through obstacles to access a small vent. Once you’re right there, hit C to crouch, and make your escape through the vent.
- Keep Fleeing: Continue sprinting, jumping over barrels, boxes, and purple traps until you reunite with Oliver. A cutscene will play as he confronts Rocky to protect your character.
Upon concluding this cutscene, Act 1 of Threadville comes to an end. Congratulations! You will receive all collected coins plus the Oliver’s Hat cosmetic head item.
Threadville Coins and Spools: All You Need to Know
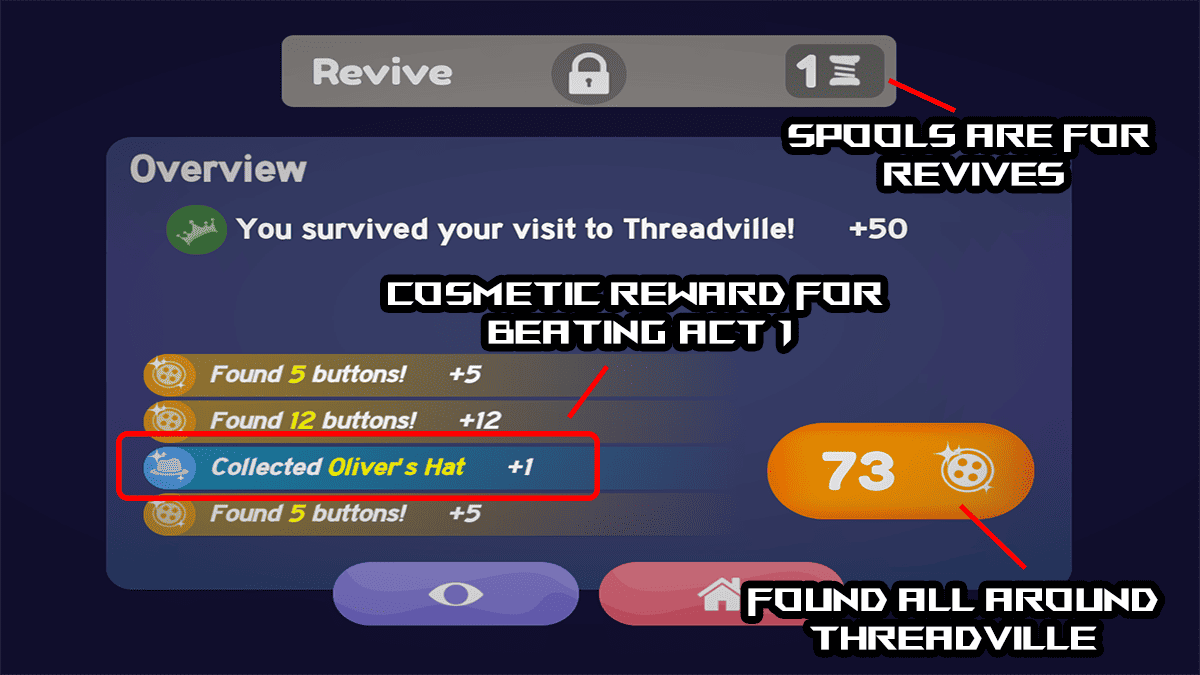
Here’s essential information regarding Coins and Spools in Threadville:
- Gaining Coins: Coins are collected by picking them up across Threadville. Their spawn locations are random, but feel free to gather them at any point. You’ll be rewarded upon dying or concluding Act 1.
- Using Your Coins: Use coins in the Outfits menu on the lower left to purchase cosmetic items such as shirts, hats, and other accessories. They’re also redeemable in the Shop for the latest outfits.
- How to Acquire Spools: You can purchase Spools using Robux in the lobby Shop or obtain them through redeemable Codes.
- Reviving with Spools: Spools are utilized for instant revives when you die, with one Spool equaling one revival opportunity.
That concludes my comprehensive Threadville Act 1 walkthrough guide. Be sure to visit our Roblox guides page for additional insights on Threadville.