
The screen flickered, a cascade of errors painting it red. My carefully constructed Hytale world, weeks in the making, threatened to crumble before my eyes. It turned out a single, rogue mod was the culprit. Hytale, despite a somewhat turbulent development journey, now sings a siren song to modders. The community’s creativity feels limitless.
Much like its spiritual predecessor, Minecraft, Hytale embraces modding. Players are actively encouraged to tweak and transform their gaming experience. Thousands of mods are already available for this early-access title, and that number is only set to swell as development continues.
Adding these mods is relatively simple, so let’s walk through what you need to know.
The Quickstart Guide to Hytale Mods
Every weekend, the local bookstore hosts a small gathering of writers. Last Saturday, I overheard two arguing about the best way to organize their digital files. It struck me that installing Hytale mods can feel the same: a bit chaotic until you have a system.

The go-to destination for Hytale mods is overwhelmingly CurseForge. Boasting over two thousand mods since early access began and racking up over four million downloads, it dwarfs alternatives such as Nexus Mods.
CurseForge provides its own mod manager, simplifying the installation. Just visit the CurseForge website, select “Get CurseForge app,” download, and install. To install a mod, launch the app and click “Install via App.”
If the app prompts you for the game’s location, find it within the Hytale launcher. Click the gear icon, followed by “Open Directory.”
Mods can be installed manually, too. On the CurseForge website, find your mod and select the arrow beside the “Install via App” button. You’ll be prompted to download the mod files, which you’ll then place in the correct folder.
Where do I find the right Hytale mod folder?
Think of your Hytale game directory as your digital workshop. Inside are all the tools and resources you need, including the “Mods” folder, which is where the magic happens.
Remember that some mods require special installation steps outside the standard methods. These instructions are usually in the mod descriptions, so be sure to read them carefully.
If your mod can be installed the standard way, head to your game directory, then UserData, and finally, the Mods folder. Drop the file(s) (typically with the .jar extension) into that folder.
Activating Your Hytale Mods
I remember the first time I tried to bake a cake. I had all the ingredients, but forgot to turn on the oven! Likewise, installing a mod is only half the battle.
Now it’s time to activate your installed mods.
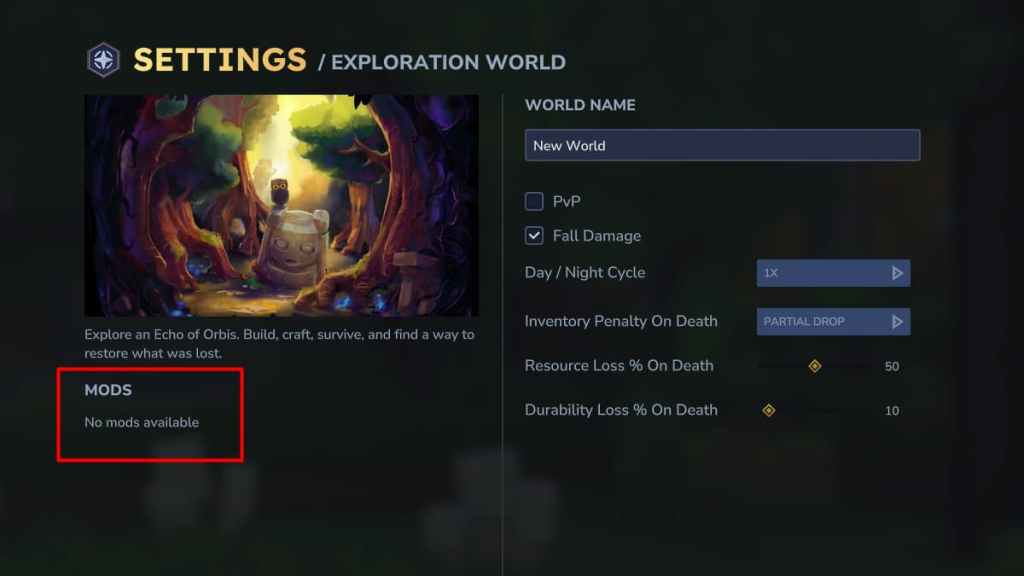
First, create a world. Once you’ve done that, exit and return to the “Worlds” tab. Right-click the world you want to change. You’ll notice a new “Mods” tab under the image to the left. This tab lists all your installed mods. Enable the ones you want and select “Save world settings.”
The selected mods should now be active in that world. You can change this whenever you wish, toggling mods on and off. Removing mods mid-game can sometimes cause issues, so proceed with care.
Can mods break my Hytale worlds?
Yes, but it’s relatively rare. Like tinkering with a car engine, sometimes adding or removing the wrong part can lead to unexpected outcomes.
And there you have it! Have you already started dreaming up your own Hytale mod?