I remember the dial cold beneath my fingers as the generator coughed. You hear a distant groan, the hallway light blinks once, and the safe icon on the map feels suddenly loud. Miss the right combination and that shotgun shell disappears forever.
I’ve spent more nights with Resident Evil Requiem than I care to admit, and I write like I play: quick, practical, and a little ruthless. You want what’s inside those metal boxes—ammo, crafting parts, freedom from a stun-locking puzzle—and I want you to get it without wasting a single backtrack.
Hospitals lock records behind metal drawers; games hide the good stuff behind dials. All safe codes in Resident Evil Requiem

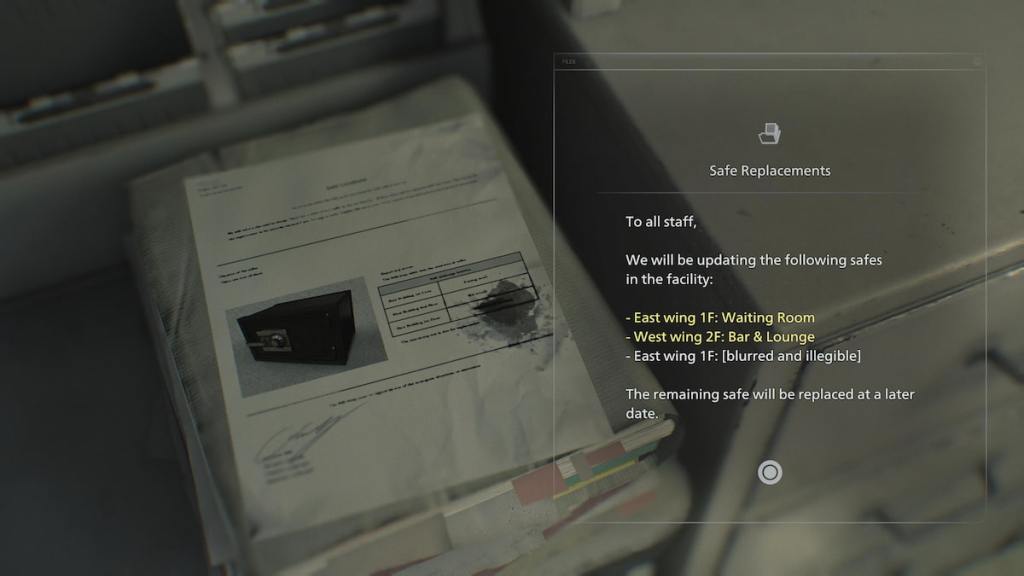
There are five safes total. Three sit inside Rhodes Hill Chronic Care Center; two appear near the game’s final area. A working safe code is like finding a heartbeat in a frozen room. Memorize the sets below and you’ll save time, ammo, and a lot of frustration.
What are all the safe codes in Resident Evil Requiem?
- Bar & Lounge safe combination
- Left 10
- Right 80
- Left 30
- Examination Room safe combination
- Right 30
- Left 10
- Right 50
- Basement safe combination
- Right 60
- Left 40
- Right 80
- Sterilization Chamber safe combination
- Right 10
- Left 90
- Right 20
- Monitor Control Room safe combination
- Left 50
- Right 60
- Left 80
Where are the safes located in Resident Evil Requiem?
Three safes are clustered in Rhodes Hill Chronic Care Center—easy to miss when you rush past beds and paperwork. The final two live in the game’s last area, positioned to reward thorough exploration. Think of each combination as a pocketknife for the apocalypse: small, cheap, and utterly necessary.
What is inside the safes in Resident Evil Requiem?
Most safes cough up ammo, crafting materials, and items that patch inventory holes—exact contents vary by difficulty and chapter. If you’re playing on PlayStation, Xbox, or Steam versions published by Capcom, these rewards are consistent with the game’s resource economy; Moyens I/O’s screenshots match what I found in my runs.
Play smart: keep the map open for safe icons, clear nearby rooms before fiddling with the dial, and stash anything you won’t immediately use in your box. You’ll spend less time backtracking and more time moving forward with full pockets.
If one code feels suspiciously obvious, check nearby notes or files—Resident Evil puzzles like to hide context in plain sight. Which safe are you cracking first: the bar’s quiet promise or the basement’s hidden weight?