
The Leaper folded space and landed on my squadmate’s back; the HUD flashed red; the match timer felt like a countdown to failure. I sighed, reloaded, and started a checklist in my head—where to go next, what not to do, which spawn to hunt. You’re about to get the same checklist, minus the panic.
I’ve played more Arc Raiders sessions than I’d like to admit, and I’ll tell you what actually works fast: where to go, what to shoot, and when to extract so your progress doesn’t evaporate. Below I break every Week 18 trial into clear, rinse-repeat moves so you finish them without a single wasted run. If you follow a few simple patterns used across Discord groups and popular YouTube creators, you’ll close these out this week.
All Arc Raiders Week 18 Trials (March 2–9, 2026)
Observation: Every match I joined between March 2 and March 9 showed one constant—teams scatter for probes or hot POIs before the first storm hits.
Week 18 brings five repeatable trials tied to Expedition 2 content. You must successfully extract for progress to count; dying resets that trial’s progress to zero. The five objectives you’ll see in your list:
- Damage Leapers
- Loot Bird’s Nests (Buried City)
- Damage Spotters
- Open Arc Probes
- Search Containers in Medical Research Wing (Stella Montis)
Play on PC (Steam), console (Xbox, PlayStation) or streamers’ picks like GeForce Now—community guides on Reddit and Discord show that timing and map choice matter more than flashy gear.
Damage Leapers
Observation: In maps with vertical cover, I saw Leapers repeatedly use their pounce to turn open ground into death traps.
Where are Leapers in Arc Raiders?
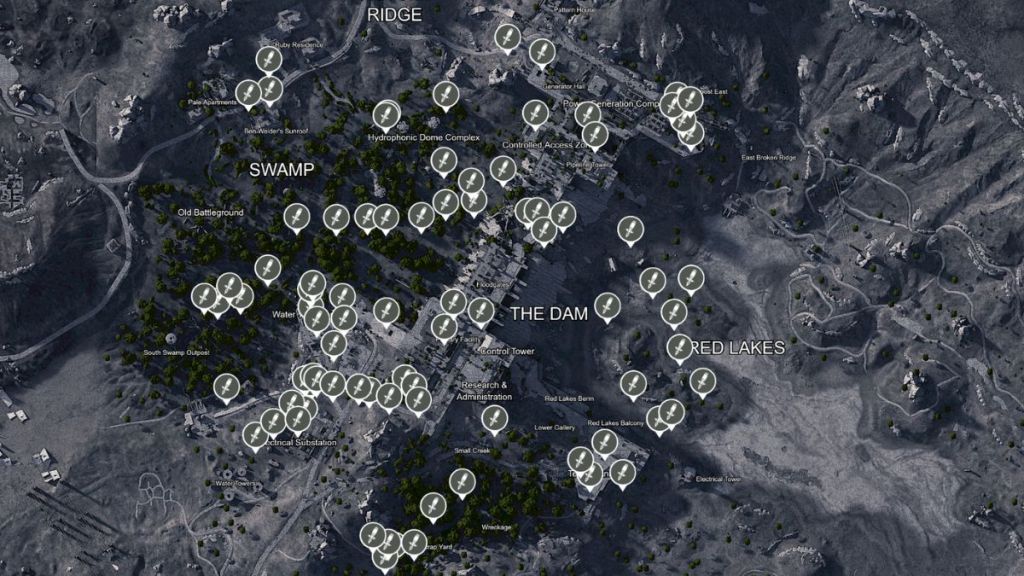
Leapers are fast, close-range ARC units that hit like a freight train and use a shockwave pulse on landing. They spawn across maps, but reliable patrol lanes are:
- South of the Launch Towers POI (Spaceport)
- Near the Hydroponic Dome or Water Treatment (Dam Battlegrounds)
- Red Lakes Balcony / Lower Red Lakes (Dam Battlegrounds)
- Marano Park (Buried City)
- Barren Clearing (Blue Gate)
- Ruined Homestead (Blue Gate)
How I handle them: don’t fight in the open—pull them into buildings and gun them down from cover. Aim for the legs to slow them; focus on the legs more than the central eye. Heavy ammo like the Anvil or Hullcracker tears through Leapers faster, and grenades such as Wolfpack, Trigger, Showstopper, or Blaze help control their movement. The Showstopper will stun a Leaper mid-lunge so you can empty a mag safely.
Score math: each Leaper gives ~1,760 points (around 3,500 during a 2x map condition such as Electromagnetic Storm). That means plan for 3–4 Leapers normally, or 2 if you catch a 2x map modifier.
Loot Bird’s Nests (Buried City)
Observation: When Buried City goes Bird City, rooftops turn into treasure streets and players who bring mobility win the race.
How do I find Bird’s Nests?
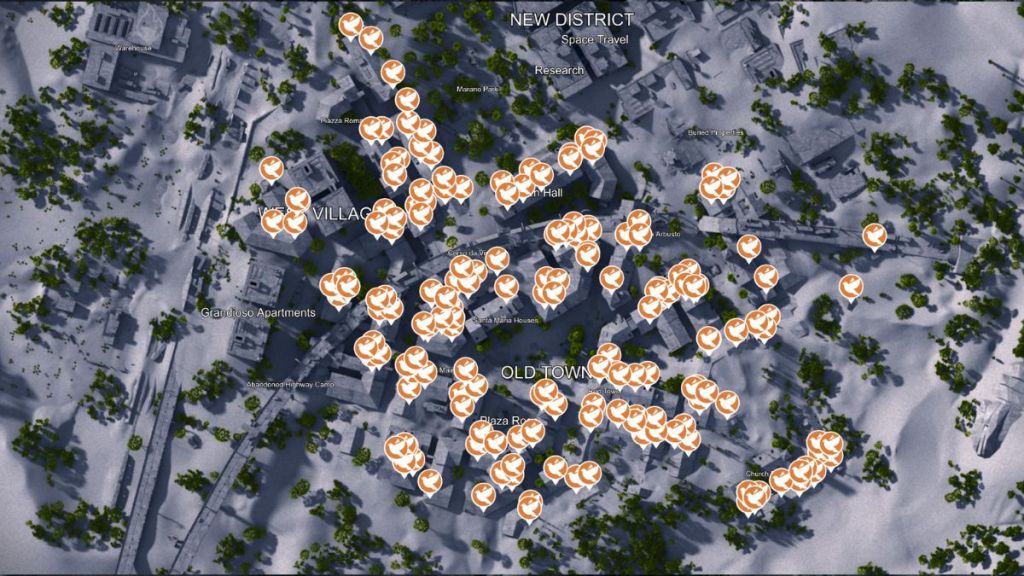
Bird’s Nests appear high on roofs—Old Town, Plaza Rosa, West Village are hotspots. Many nests sit inside chimneys; you need a Snap Hook or Ziplines to reach them reliably. These containers sometimes drop rare Rubber Ducks that sell for a tidy amount in Speranza, so you get loot plus progress.
Score math: you need to open 23 nests for the full 4,000 points (three stars). If Night Raid is active, the requirement drops to 12 nests thanks to doubled points.
Tip: treat rooftops like a scavenger map. If you run with a teammate who scouts from above (YouTube creators call this the “roof-run”) you’ll clear nests fast and avoid PvP theft.
Damage Spotters
Observation: Spotters almost always show up with a Bombardier; if you find one, expect the other shortly after.
How many Spotters do I need for the trial?
Spotters are small, flying ARC drones that act as eyes for Bombardiers. Locations I see them often:
- Roof of the Parking Garage (Buried City)
- East of Vehicle Maintenance (Spaceport)
- Raider’s Refuge (Blue Gate)
- Primary Facility (Dam Battlegrounds — night raids only)
Do not kill the Bombardier before you hit your target: it stops Spotter respawns. When a Bombardier detects you, it spits out two Spotters; kill them and it will send two more. Each Spotter gives ~800 points, so you need about 5–6 Spotters for max score, or only 3 during a 2x map condition.
Quick tactic: use short bursts and headshots—Spotters have no armor and are fragile. If you’ve watched competitive clips on Twitch, you’ll notice teams kite the Bombardier to generate fresh Spotters without engaging it directly.
Open ARC Probes
Observation: During Electromagnetic Storms the map looks like a metal rain of probes—every match spawns more than usual.
How many Arc Probes do I need to open?
Arc Probes are small cylindrical pods that land and ping before leaving. They have no fixed spawn but show up frequently on all maps—Dam Battlegrounds is the easiest map for this trial. Hotspots I scan first: the area between Red Lakes and the Dam, north of the Electrical Substation, and the swamp west of the Floodgates (watch for cover obscuring them).
One probe = ~667 points. You’ll need 6 probes to reach 4,000 points, or 3 during a 2x condition. Note: breaching a probe makes a loud ping that alarms nearby ARCs, and you don’t need to be the player who started the breach to get credit—just search the remains.
Search Containers in Medical Research Wing (Stella Montis)
Observation: Stella Montis funnels squads into the Medical Research wing; it’s one of the busiest POIs during peak hours.
This trial is strictly on the Stella Montis map. I recommend dropping in with a free loadout if you want to avoid losing gear to PvP—many squads camp that wing. Your job is simple: loot every searchable container in Medical Research and extract. Avoid big ARC fights; quick, methodical looting beats firefights here.
Score math: search 12 containers for the full 4,000 points, or 6 during Electromagnetic Storm (2x). If you want a stress-free run, bring mobility tools and clear with a teammate acting as a lookout; community Discord threads will show you route maps that shave minutes off this clear.
Final note: run smart routes, use cover, and extract — killing yourself with a full objective counter means nothing. I’ve mapped the hotspots, counted the points, and tested them across PC and console runs; now it’s your turn to test the routes and tell the community what works. Which strategy will you take into the next extract?