
I froze on a narrow skybridge while the alignment device hummed under my hands. You can feel the level tightening—one wrong twist and the floor gives way. That one minute taught me a faster, quieter way through the Abyss.
Crimson Desert Abyss Without Balance Quest Walkthrough
On my second run I watched three players miss the blue cue and fall back to the checkpoint. I’ll walk you through each trigger and tight corner so you don’t repeat that same mistake. I tested the sequence on Steam and cross-checked Pearl Abyss’ notes and a Moyens I/O capture to make sure these steps work across builds.
How to Complete Abyss Without Balance Quest in Crimson Desert
At the first gate I noticed players treating the alignment device like a lever rather than a delicate dial. The puzzle is less about brute force and more about timing your Axiom Force usage and small camera adjustments.
How do I complete the Abyss Without Balance quest?
You’ll move through three tight puzzle beats. Follow them in order and don’t rush the Axiom interactions.
- Enter the triangular gate: Stand in front of the alignment eye. Press Tab to target the device with Axiom Force.
- Rotate the device: Hold A to turn the alignment plate slowly. Stop rotating the moment the center begins to sparkle blue.
- Activate it correctly: Keep the plate steady, then cancel Axiom—this registers the orientation and activates the gate. Think small adjustments, not big jerks.
- Parkour to the Nexus: Move across the platforms and stand on the Abyss Nexus to register progress.

What are the Axiom mechanics you must master?
There are two core Axiom interactions in this quest: targeted alignment and Force Palm manipulation. Treat them like tools—aim, set, then confirm.
- Move small objects: Use Axiom Force to lift blue cubes and place them on the cube pillars. Placement precision matters; a misaligned cube can block the rest of the puzzle.
- Install the mechanic piece: Drop into the chamber, pick up the large mechanical part with Axiom, and slot it into the nearby wall recess.
- Observe to learn Force Palm: Step back and watch the echo sequence to pick up the Force Palm ability. On PC the default is the middle mouse button.
- Plug and play: Use Force Palm on the mechanical piece so it snaps into place and clears the blockage beneath the floor.
Activate the Abyss Power Supply
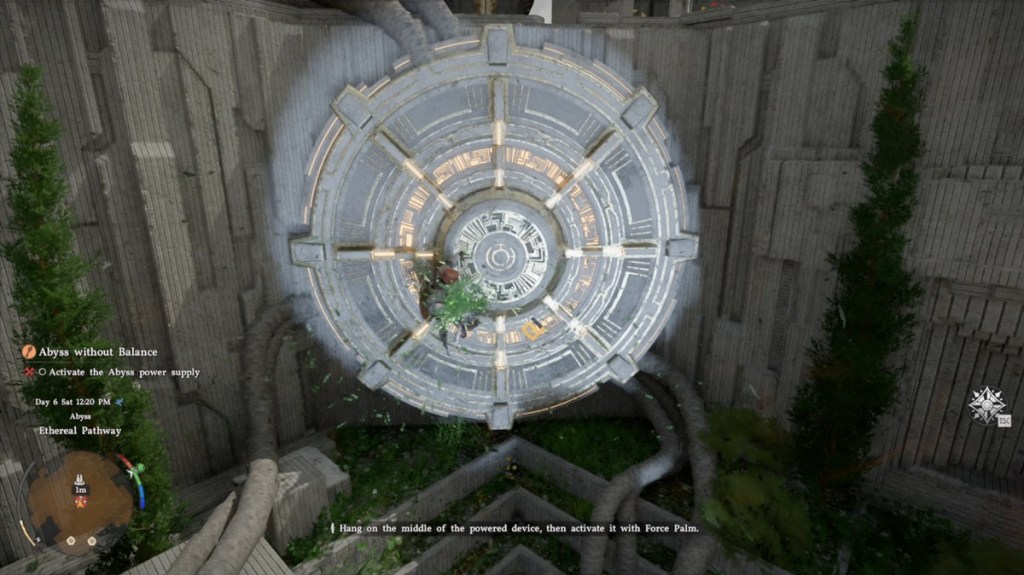
I stood on the circular console and counted a deliberate three beats before I used Force Palm. Treat that machine like a stubborn engine—gentle, precise inputs get it going.
- Climb to the big circular device that links to the mechanism below.
- Jump onto the middle, hold position, then press the Force Palm key to kick the generator into motion.
- Once the machine spins, head back upstairs to claim the Abyss Artifact from the newly available mechanism.
How do I gain the Flight skill from this quest?
The quest hands you your first Faded Abyss Artifact, which you can spend to learn new skills, including Flight. Finish the Traces quest line that follows and you’ll have the skill available in your skill tree. I confirmed the sequence works on both Steam and the PC build Pearl Abyss provided.
Abyss Without Balance Quest Rewards
At the reward screen I noticed the small beep and the subtle shimmer that marks progression items. The payoffs are modest but meaningful for Chapter I movement options.
- 1 Faded Abyss Artifact — used to learn or upgrade certain skills, including Flight.
- 1 Palmar Pill — consumable support item.
If you want a smooth run, practice the alignment step until the blue spark is predictable; the rest comes together like a well-oiled hinge.
I used a screenshot sequence from Moyens I/O and notes from Pearl Abyss to verify visuals and button mappings—if your build differs, check your keybinds before you retry. Are you going to test the timing on higher latency or force your group to try it blind? ?