
I dropped into Blue Gate with my heart in my throat — a single ping from the scanner was all it took to flip the run from routine to urgent. The stash was a needle in a haystack; enemies circled like wolves and a rival team was closing fast. You can lose the whole thing if you rush; I learned that the hard way.
The tunnel smells of oil — ARC Raiders Outstanding Balance quest walkthrough
I’ll walk you through the three parts so you finish the mission in one clean run. You start this quest from Tian Wen in Speranza and it sends you across the Blue Gate map to two POIs before the final handoff. Keep your timing tight: all three objectives must be completed in the same sortie.
- Search for Dodger’s Stash inside the Traffic Tunnel
- Search Dodger’s deal spot by the Pilgrim’s Peak antenna
- Deliver Dodger’s Note to Tian Wen in Speranza
Where is Dodger’s Stash located?
The stash sits in a shadowed corner of the Traffic Tunnel, reachable from the Headhouse. Take the stairs to the zipline and ride it all the way down; hug the far wall and check the marked corner shown below. I recommend scanning from cover—patrols and spawn points can make the approach messy.

Once you reach that corner, scan the small cache to advance the objective. If enemies see you while scanning, backpedal to cover and clear the area—there’s no benefit to a sloppy pickup.

Stairs groan under heavy boots — Search for Dodger’s Stash inside the Traffic Tunnel
Approach from the Headhouse. Take the stairwell to the zipline, drop to the lower level, and sweep the far corner. The stash is tucked in a blackened recess—scan it to trigger the next objective. If you’re solo, clear noise-makers before scanning; if you’re in a squad, cover the exits.
How do I scan Dodger’s stash and what happens if I die?
Scanning is instant once you’re close; the UI confirms the pickup. If you die or lose the note after the second stage, the quest forces a restart from the first stash. That reset is a mileage killer, so play patient—take a breath, clear threats, then scan.
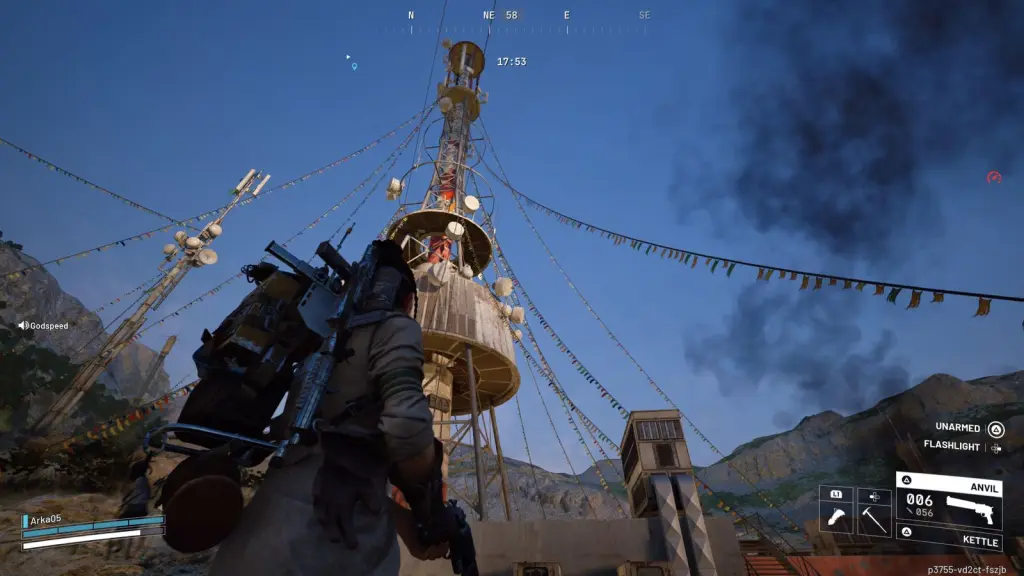
Antennas hum with electricity — How to search Dodger’s deal spot by the Pilgrim’s Peak antenna
Pilgrim’s Peak is vertical and exposed; the main antenna is a multi-zipline climb. Ride the zips to the top platform, then jump down onto the floor one level below where the antenna cap sits. The deal spot hides near a maintenance hatch—scan there to collect Dodger’s note.
Scan the deal spot and you’ll receive Dodger’s note. Treat that piece of paper like a candle in a storm: it’s fragile, and a single wipe or death sends you back to square one. That’s why I always bring a Safe Pocket loadout for this mission.
Do I need Safe Pocket to bring Dodger’s Note back?
Yes. Safe Pocket prevents the note from being lost on death, making the return to Speranza predictable. If you run without it you risk repeating two locations and wasting time. I use a light DPS build with a compact heal and Safe Pocket—fast entry, secure exit.

Return to Speranza and hand the note to Tian Wen to complete the quest. If you lose the note you must revisit the Traffic Tunnel stash, then Pilgrim’s Peak, so protect that inventory slot.
Cold metal and bright paint — Rewards for finishing Outstanding Balance
Complete the handoff and you’ll receive a small but useful reward package from the quest giver. These are practical items for mid-run upgrades and visual flair.
- Gothic Graffiti Aviator Color
- Extended Medium Mag III
- Silencer II
I learned to treat every scan as a commitment: clear the approach, use Safe Pocket, and move like you mean it. Will you rush for a fast completion and risk the reset, or will you lock in a patient, guaranteed run?