
The alarm bell split the map and every player scattered; I froze for a second and counted breaths. You know the feeling—the scoreboard blinks and a single mistake costs the round. I’ve tested every character so you don’t have to guess which moves actually matter.
I play on Roblox, study FNAF lore, and keep a tab open for Dead by Daylight guides—so when Bite By Night borrows a mechanic, I can tell if it’s clever or sloppy. Below I break the roster down, show the prices in Robux with a rough euro equivalent, and point out what makes each killer and survivor dangerous or forgiving. This is practical, not preachy: I’ll tell you what matters in match-play and why.
Bite By Night Roster: All Killers Explained
I once watched a single scripted trap flip a flawless run into a series of chaotic rescues; small tools decide big outcomes. The killers control space, force choices, and punish hesitation. The map is a chessboard.
Killers (animatronics) win by preventing survivors from finishing objectives. Each comes with distinct stats and abilities; I list exact numbers so you can compare playstyles. Costs are shown in Robux with a rounded euro equivalent for context.
| Killer | Cost | Stats |
|---|---|---|
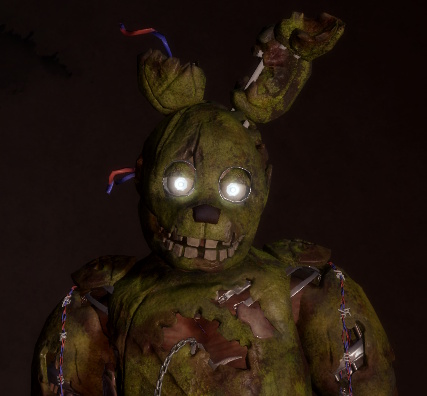 The Rotten (Springtrap) |
Free | Health: 1750 Speed: 14 RunSpeed: 22 Stamina: 70 |
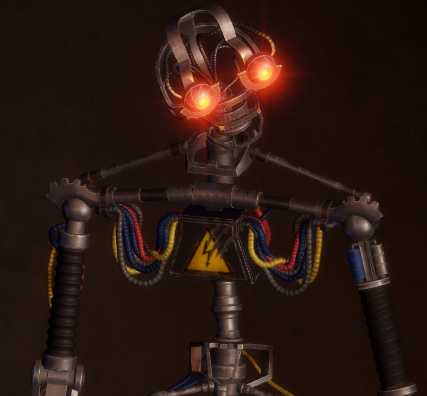 The Project (Mimic) |
4500 Robux (~€50) | Health: 3000 Speed: 12 (Strength)/ 15 (Speed)/ 13.2 (Stealth) RunSpeed: 65 (Strength, Stealth)/ 55 (Speed) Stamina: 65 |
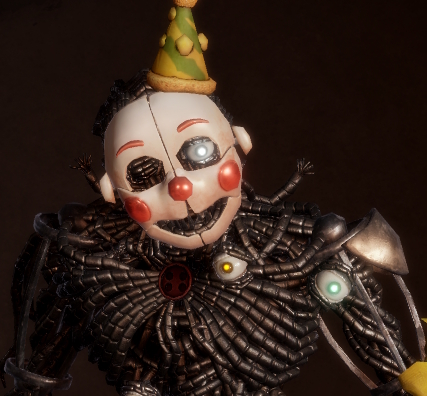 Doppelganger (Ennard) |
6000 Robux (~€67) | Health: 2500 Speed: 12 RunSpeed: 23 Stamina: 70 |
Below I summarize each killer’s toolkit and the match situations where they shine. I tested these in solo scrims and public matches on Roblox and cross-checked notes from the Bite By Night Discord and Moyens I/O coverage.
The Rotten
The Rotten is a control-heavy pick that punishes greedy survivors and rewards map awareness.
- Swing (M1 – 2.4s): Axe 34 damage, fists 28. Axe is wider; fists grant a short speed boost. Use fists to close gaps, axe when you need reach.
- Remnant Cleaver (axe throw; recoverable after 8s): 20 on hit + bleeding/slowness for 15 DOT. Without axe you gain mobility but lose damage and swap certain abilities—play aggressive when you have the axe.
- Beartrap (2.5s setup): Stuns ~8s, 15 damage. Teammates can free trapped players with hold-F, so position traps where solo rescues are risky.
- Scream (4s): Emits a blinding, revealing shockwave and restores 25 stamina. After use it changes into a short-range Charge to finish chases.
- Charge: Lunge that triggers a jumpscare and ragdolls on hit; follow-ups are weak (5 damage) and can be countered by Fighter Parry.
The Project (Mimic)
The Project is a mode-based killer built around choice: mobility, raw force, or stealthy control.
- Mode Switch: Flip between Strength, Speed, Stealth. Quick switch takes 0.1s; full switch cooldowns apply to heavier abilities.
- Strength (passive): Highest damage—Swing deals 40 (3s). Use when you want to win straight fights.
- Speed (passive): Movement-focused; Swing does 6 damage but you gain Leap (area ragdoll for 25). Ideal for hunting solo targets or closing distance.
- Stealth (passive): Grants invisibility and access to Grab/Drill. Swing 25 damage; Grab drills for 25 then throws the victim. Drill lets you tunnel briefly and pop up for up to 32 damage.
Doppelganger
Doppelganger excels at sowing doubt and forcing bad rescues; it is the roster’s deception specialist.
- Trust No One (passive): Survivor status markers are hidden—expect chaos on comms and delayed information.
- Swing (2.5s): 32 damage lunge; your bread-and-butter.
- Wire Eyes (15s): Sends out trackers that blind and reveal targets; removing them causes a small explosion (10–15 damage).
- Grab (12s): Pulls a survivor into melee range for guaranteed follow-ups.
- Skin Stealer: Disguises as fallen survivors—copies movement and gear—then either explodes for 25 AOE or initiates a multi-hit stab sequence for 45 total. Use the disguise to bait risky rescues and collapse groups.
Bite By Night Roster: Survivors
I’ve watched medics sacrifice position to secure a heal and seen customers win matches with smart resource use. Survivors focus on objectives and utility; your toolkit becomes a Swiss Army knife.
Survivors have class abilities that accelerate objectives, heal, or control the killer. Costs below are shown in Robux with a rounded euro equivalent.
| Survivor | Cost | Stats |
|---|---|---|
 Customer |
Free | Health: 100 Speed: 12 RunSpeed: 24 Stamina: 100 |
 Medic |
800 Robux (~€9) | Health: 90 Speed: 12 RunSpeed: 24 Stamina: |
 Security Guard |
1100 Robux (~€12) | Health: 100 Speed: 12 RunSpeed: 24 Stamina: 100 |
 Fighter |
1350 Robux (~€15) | Health: 110 Speed: 12 RunSpeed: 24 Stamina: 100 |
Pick survivors based on your team composition. Here’s what each class brings and how to make the most of short cooldowns and windows of safety.
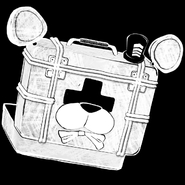
Customer
Customer is forgiving and mobile—ideal if you’re learning maps or want to buy time for teammates.
- Pizza (30s): Restores roughly 30% of missing health. Stronger when you’re low; use mid-chase when safe.
- Drink (65s): Short speed and recovery buffs followed by a small slow. Best used to cross open areas or escape a committed killer.
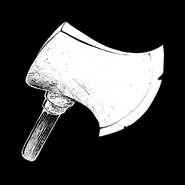
Fighter
Fighter is aggressive and punishes timing errors from killers; it rewards practice with parry windows.
- Swing (30s): Axe lunge that stuns for 3s and consumes parry charges for extra effects. High risk, high reward.
- Parry (30s): Negates a close hit and grants a charge. Mistiming gives a short weakness, so don’t spam it.
Medic
Medic shines in coordinated squads—little heals add up to extended objective presence.
- Heal (45s): Channel on a teammate, heals over time (5 HP per 2s). Cancels if you move.
- Self Heal (60s): Heals you for up to 40 HP while immobile; won’t cancel unless you take damage.
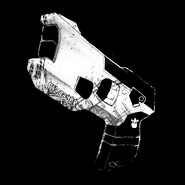
Security Guard
Security Guard gives information and crowd control; use cams to spot disguised threats or objective clusters.
- Taser: Chargeable stun tool—fully charged shots slow and debuff more. Timing matters.
- Cams (1s): Scans the map, highlighting survivors, objectives, and the killer through walls for short windows.
Which survivor class is best for beginners in Bite By Night?
Customer is the easiest entry: simple self-heals and a mobility item let you stay alive while you learn maps and killer habits. If you’re new to Roblox PvP, start here and move to Medic or Fighter once you’re comfortable.
Which survivor is best for team support?
Medic is the clear support pick. The ability to heal and occasionally overheal can flip a 2v1 fight into an objective rescue; pair Medics with Customers who bait chases.
What is the best killer in Bite By Night?
Doppelganger sits at the top for raw disruption because of its disguise mechanics and group control. It forces misplays and capitalizes on human hesitation—expect it to dominate in ranked lobbies and Discord-organized scrims.
Bite By Night Roster: Upcoming Characters List
I scan the Bite By Night Discord and developer posts for leaks, and some names keep appearing in test builds. Leaks are not guarantees, but they shape what players prepare for.
- Engineer (Survivor)
- Marionette (Killer – Confirmed)
- Withered Foxy (Killer – Confirmed)
- Mangle (Killer – Confirmed)
- Nightmare Freddy (Killer – Confirmed)
- Withered Bonnie (Killer – Confirmed)
- Withered Freddy (Killer – Confirmed)
- Angry Munci (Killer – Exclusive)
- bear5 (Killer – Exclusive)
- Tung Tung Tung Sahur (Killer – Exclusive)
- Airdude (Killer – Unconfirmed)
- Dreadbear (Killer – Unconfirmed)
- Lolbit (Killer – Unconfirmed)
- Remnant Husk (Killer – Unconfirmed)
- Vanny (Killer – Unconfirmed)
- Bonnie The Bunny (Killer – Scrapped)
If you want to track balance changes, follow the Bite By Night Discord and patch notes on the Roblox page; I cross-reference those with community threads on Reddit and Moyens I/O’s updates when I test. Which character are you most likely to buy first, and will your team complain or celebrate when you bring them to the match?