I remembered the banner animation slowing, as if the game itself was holding its breath. I pulled, and Hiyuki stepped out — quiet, precise, already reshuffling my roster. If you play her wrong, she feels like wasted potential; if you play her right, she rewrites how the fight ends.
A coffee-on-the-desk observation: many players judge a character in their first ten pulls.
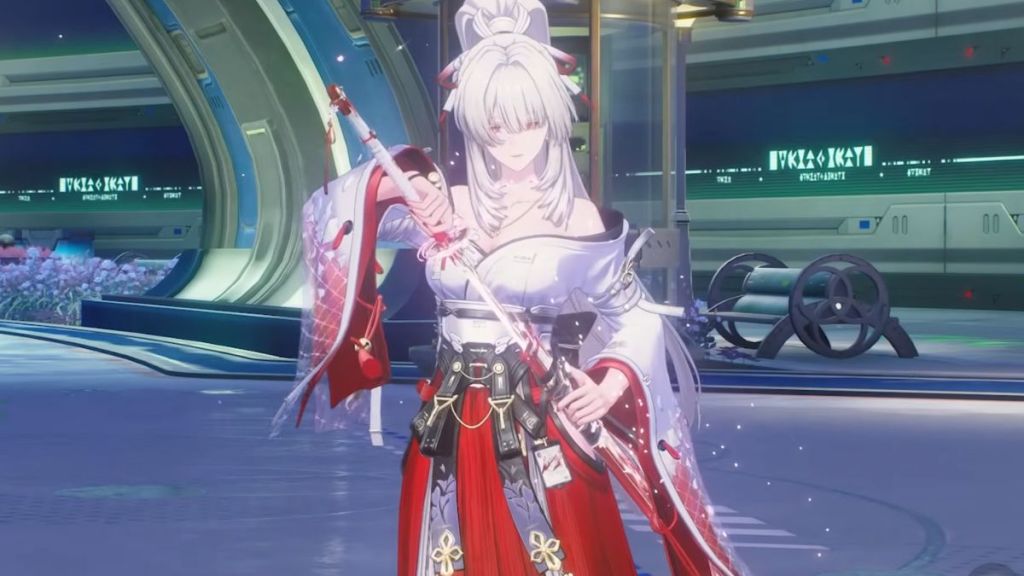
I’ve tested Hiyuki across rotations and parses, and you should treat her as a purpose-built Glacio main DPS. She scales primarily off ATK and Crit stats, excels at Resonance Liberation damage, and rewards rhythm — not just raw numbers.
- Rarity: 5-star
- Element: Glacio
- Weapon: Sword
- Team Role: Main DPS
- ATK: 462 (base shown in preview)
- DEF: 1112
- HP: 10300
A bench test observation: small stat swaps change her burst ceiling.
You want Hiyuki to close fights, not just chip at them. Her kit rewards precise resource management: Dedication, Frostheart, Snowforged Blade — you feed one to grow the next. Her rotation is clockwork — each resource feeds the next and the whole thing clicks into damage.
| Type | Information |
|---|---|
| Weapons | Frostburn |
| Main Echo | Reminiscence: Threnodian – Voidborne Construct |
| Sonata Sets | Wishes of Quite Snowfall |
| Main Stats | Cost 4: Crit Rate or Crit DMG Cost 3: Glacio DMG Bonus or ATK% Cost 3: Glacio DMG Bonus or ATK% Cost 1: ATK% Cost 1: ATK% |
| Sub Stats | Crit Rate > Crit DMG > Energy Regen > Resonance Liberation DMG Bonus > ATK% |
Practical priorities: high Crit, Glacio DMG bonus, and ATK% on your best sonatas and weapon. If you can farm the 5-piece Wishes of Quiet Snowfall, Hiyuki’s Resonance Liberation becomes a staggeringly efficient damage window thanks to the Snowfall Crit Rate buff. If not, Freezing Frost will do while you grind for set pieces.
What is Hiyuki’s best weapon?
Signature Frostburn sits at the top — it pairs perfectly with her kit and the new Reminiscence Echo. If you don’t have Frostburn, choose another sword with Crit Rate or Crit DMG: Blazing Brilliance, Emerald of Genesis, or Red Spring are strong 5-star picks. Feather Edge and Fable is Wisdom are sensible 4-star fallbacks.
- Frostburn (Signature, 5-star)
- Blazing Brilliance (5-star)
- Emerald of Genesis (5-star)
- Red Spring (5-star)
- Feather Edge (4-star)
- Fable is Wisdom (4-star)
How should I set Hiyuki’s Echo and sonata?
Reminiscence: Threnodian – Voidborne Construct is the best Echo: it adds Glacio and Resonance Liberation DMG and its damage snap pairs with the Wishes of Quiet Snowfall 5-piece. Lampylumen Myriad works as a backup; pair it with Freezing Frost until you can farm the signature combo.
An economy-floor observation: banners and weapons change value overnight.
If you chase Hiyuki’s weapon from the banner, calculate pulls like you would a stock buy — know when the odds favor you. Frostburn boosts her ceiling, but a high-rolled Blazing Brilliance or Emerald will still let you parse well in raids and abyssal runs.
A farming observation: set pieces take time, but one 5-piece shift changes every rotation.
Wishes of Quiet Snowfall (5-piece) is the set you want. It stacks Glacio DMG and grants a 25% Crit Rate while your Resonance Liberation lands — a direct multiplier to what Hiyuki cares about most. Freezing Frost is a short-term alternative if your resin calendar is already full.
A party-lobby observation: she peaks with the right partners.
I recommend building teams that give her uninterrupted windows to stack and spend Snowforged Blade. She benefits from a strong sub-DPS that raises her damage and a support that offers either healing or interruption resistance so her Iai chains don’t get cut short.
| Team | DPS | Sub DPS | Support |
|---|---|---|---|
| Hiyuki Premium Team I | Hiyuki | Lynae | Chisa |
| Hiyuki Premium Team II | Hiyuki | Lynae | Mornye |
| Hiyuki Glacio Team | Hiyuki | Zhezhi | Chisa |
| Hiyuki Resonance Liberation Team | Hiyuki | Changli | Shorekeeper |
| Hiyuki F2P Team I | Hiyuki | Jiyanxin | Verina |
| Hiyuki F2P Team II | Hiyuki | Sanhua | Verina |
Lynae and Chisa form the highest-damage pairing I’ve logged: Lynae’s broad DMG multipliers amplify every Glacio tick, while Chisa raises Hiyuki’s Glacio Chafe stacking ceiling and keeps her alive during heavy exchanges. If those aren’t available, Mornye, Shorekeeper, or other buffer sub-DPS characters that boost Crit or ATK will do the job.
A lab-bench observation: her kit rewards sequence more than button spam.
Hiyuki flips between Present Self and Foreclaimed Self. You build Dedication and Frostheart, cash out with Inward Vision to enter Foreclaimed, then spend Snowforged Blades on Blade Liberation. If you mistime resource gains, you lose damage windows — and lost windows mean lost runs.
How do you play Hiyuki effectively?
Your macro is simple: charge Dedication in Present Self, use Frost Splinter (or Inward Vision) to enter Foreclaimed Self, generate Frostheart with normal attacks and skills, dodge into Iai to stack Whiteout Bitterfrost, then spend Snowforged Blade with a charged Blade Liberation. Timing beats button-mashing; if you can practice one loop for ten minutes in practice mode, you’ll see immediate gains.
| Skill | Details |
|---|---|
| Basic Attack – Present Self | Press or hold Normal Attack to perform up to 3 consecutive strikes, dealing Glacio DMG. The 3rd hit applies 1 stack of Glacio Chafe. |
| Heavy Attack – Frost Splinter: Present Self | Becomes available when Dedication reaches 300. Hold Normal Attack to fire 3 arrows in sequence (costs STA), dealing Glacio DMG counted as Resonance Liberation DMG. Hiyuki is immune to interruption during this attack. After the final arrow, all Dedication is consumed and Foreclaiming: Inward Vision becomes available. Each arrow applies 1 stack of Glacio Chafe. |
| Mid-air Attack – Present Self | Consumes STA to perform a plunging attack from mid-air, dealing Glacio DMG. |
| Dodge Counter – Present Self | After a successful Dodge, press Normal Attack to counterattack and deal Glacio DMG. Press Normal Attack again within a short window to directly trigger Basic Attack Stage 3. |
| Basic Attack – Foreclaimed Self | Replaces Present Self attacks in Foreclaimed Self. Perform up to 5 consecutive strikes, dealing Glacio DMG counted as Resonance Liberation DMG. Hits 3, 4, and 5 each apply 1 stack of Glacio Chafe. |
| Heavy Attack – Foreclaimed Self | Hold Normal Attack to enter Hold Breath, continuously consuming STA. Release or run out of STA to perform a forward thrust that deals Glacio DMG (Resonance Liberation DMG). After casting, pressing Normal Attack chains into Stage 2. If Hiyuki is hit during the thrust, she negates the damage, Stagnates nearby enemies, becomes immune to interruption, and takes no damage for a short duration. In this case, the follow-up chains into Stage 4 instead. |
| Heavy Attack – Bitterfrost: Foreclaimed Self | Replaces the normal Heavy Attack when Whiteout Bitterfrost reaches max stacks. Hold Normal Attack to consume STA and all 3 Bitterfrost stacks, gaining 1 Snowforged Blade while dealing Glacio DMG (Resonance Liberation DMG). Applies 1 stack of Glacio Chafe. If used mid-air, Hiyuki lands before attacking. |
| Mid-air Attack – Foreclaimed Self | Replaces Present Self mid-air attack. Consume STA to perform up to 3 aerial strikes, dealing Glacio DMG (Resonance Liberation DMG). The 3rd hit is a plunging attack. Hits 2 and 3 apply 1 stack of Glacio Chafe. This combo is not interrupted by other skills (except Basic Attack – Iai) for a short duration. Holding Normal Attack mid-air performs a plunge attack. |
| Dodge Counter – Foreclaimed Self | Replaces Present Self dodge counter. After dodging, press Normal Attack to deal Glacio DMG (Resonance Liberation DMG). Press again within a short window to chain into Basic Attack Stage 3. |
| Resonance Skill – Present Self | Deals Glacio DMG and enhances the next Basic Attack Stage 3 to restore 100 Dedication. This buff ends if Hiyuki is switched out. After casting, press or hold Normal Attack to immediately perform Stage 3. |
| Frostblight: Jade Cleave | Available in Foreclaimed Self (ground). Pulls nearby enemies together and deals Glacio DMG, removing Frostbind. Shares cooldown with Petalfall. |
| Frostblight: Petalfall | Available in Foreclaimed Self (mid-air). Pulls nearby enemies together and deals Glacio DMG, removing Frostbind. Shares cooldown with Jade Cleave. |
| Foreclaiming: Inward Vision | Available after using Frost Splinter. In Present Self, activate Resonance Liberation to deal Glacio DMG, gain 3 Frostharden Iai, consume all Dedication and Frostheart, enter Foreclaimed Self, and restore 50 Frostheart. Applies 4 stacks of Glacio Chafe. Does not consume Resonance Energy. |
| Foreclaiming: Blade Liberation | Usable in Foreclaimed Self. Tap to cast immediately, or hold to charge. While charging, Snowforged Blade stacks are consumed over time. Releasing triggers the attack. If none are consumed, the attack auto-casts after a delay. Also auto-casts when all stacks are consumed. Each Snowforged Blade increases damage. Consumes all Dedication and Frostheart and ends Foreclaimed Self. |
| Intro Skill – Frostedge | Deals Glacio DMG (counts as Resonance Liberation DMG) and applies 1 stack of Glacio Chafe. In Present Self, restores 200 Dedication and allows chaining into Stage 3. In Foreclaimed Self, allows chaining into Stage 2. |
| Inherent Skill – Fine Snow | When teammates apply Glacio Chafe or Havoc Bane, Hiyuki gains Snow Rust (max 3 stacks, once per teammate). 1 stack: +30% Glacio Bite DMG and +40% Crit DMG. 2 stacks: applying Glacio Chafe also triggers an extra Glacio Bite hit (102%). 3 stacks: Glacio Bite DMG gains an additional +30%. Resets when team composition changes. |
| Inherent Skill – Ephemeral Realm | After leaving combat or reviving, if Hiyuki remains out of combat for 4s and has no Snowforged Blade, she gains 1 stack. |
| Forte Circuit – Glacio Bite | Converts Glacio Chafe applied by teammates into Glacio Bite. Each new stack triggers Glacio Bite DMG based on current stack limits. Can affect frozen targets. Counts as both Glacio Chafe and its damage type. If Inward Vision or Iai hits a target with ≥10 stacks, consumes 10 stacks to trigger Frostbind. Entering battle clears Chafe; leaving removes all Glacio Bite if no converter remains. |
| Iai Stance | If Frostheart ≥100, certain actions (dodging after attacks or holding skill after Frostblight) cause Hiyuki to reposition and enter Iai Stance (costs STA). Can reposition behind enemies. Works mid-air and resets aerial dodges. Ends when switching out. |
| Basic Attack – Iai | While in Iai Stance, press Normal Attack to consume 100 Frostheart and deal Glacio DMG (Resonance Liberation DMG). Can chain if enough Frostheart remains. If hit during the attack, the damage is negated and Hiyuki gains full damage reduction and interruption immunity briefly. Consumes 1 Frostharden Iai to apply 3 stacks of Glacio Chafe and grant 1 Whiteout Bitterfrost. |
| Dedication | Resource (max 300). Gained from Basic Attack Stage 3 and enhanced by Resonance Skill. Required for Frost Splinter. |
| Frostheart | Resource (max 300). Gained from Foreclaimed Self attacks and Frostblight skills. Used for Iai and Liberation. |
| Frostharden Iai | Resource (max 3). Gained from Inward Vision. Consumed by Iai attacks. |
| Whiteout Bitterfrost | Resource (max 3). Gained from Iai attacks. Enables enhanced Heavy Attack. |
| Snowforged Blade | Resource (max 3). Gained from Bitterfrost Heavy Attack. Used to increase Blade Liberation damage. |
| Bonus Crit Rate | 8% |
| Bonus ATK% | 12% |
Is Hiyuki worth pulling on the banner?
If you value a high-scaling Glacio main DPS and you already run teams that can apply Chafe reliably (Lynae, Changli, Zhezhi), yes — she changes damage ceilings. If you’re chasing a sword instead, weigh whether a signature Frostburn will appear on the weapon banner or if a practical 5-star alternative will cover your needs.
| Sequence | Details |
|---|---|
| S1 – Springless | Increases damage of all Foreclaimed Self attacks by 120%. Stage 3 gains pull effect, Stage 4–5 become interruption immune. After using Inward Vision, next Stage 1–2 attacks apply Glacio Chafe. |
| S2 – To Burn Cold in Silence | Iai damage increased by 140%. After being out of combat for 4s: gain 3 Frostharden Iai, reset 2 Jade Cleave charges, and next 2 skill uses restore extra Frostheart. |
| S3 – No Self, No Bound | Gains 1 Snow Rust stack every 2s after entering battle. Frost Splinter and Bitterfrost damage +120%. At 2 stacks, Glacio Bite bonus damage massively increases (+488%). |
| S4 – Like Reeds on Tides | Using any skill boosts team damage by 20% for 30s. Also heals Hiyuki for 18% Max HP when using Jade Cleave or Petalfall. |
| S5 – Vessel of Thousand Wishes | Increases damage of all Resonance Skills (Present Self, Jade Cleave, Petalfall) by 80%. |
| S6 – Into a Night Without End | Increases Liberation damage (Inward Vision & Blade Liberation) by 150%. At 2 Snow Rust: Glacio Bite now triggers from any teammate’s Chafe, deals more damage (+25%), and Hiyuki gains +40% Crit DMG. Out-of-combat effect now restores 3 Snowforged Blade instead. |
A planning observation: material lists look boring until you need one upgrade mid-raid.
If you’re raising Hiyuki, plan your farming windows. The ascension and Forte grids require a predictable set of Exoswarm Cores, Polarizers, and the special item We Who Question. Use tools like Honey Impact or the Wuthering Waves Wiki to track daily drops and reduce wasted runs.
| Material | Total |
|---|---|
| LF Exoswarm Core | 4 |
| MF Exoswarm Core | 12 |
| HF Exoswarm Core | 12 |
| FF Exoswarm Core | 4 |
| Our Choice | 46 |
| Redbell | 60 |
| Shell Credit | 170,000 |
| Skill | Materials |
|---|---|
| Forte (Total) | LF Exoswarm Core ×25 MF Exoswarm Core ×28 HF Exoswarm Core ×40 FF Exoswarm Core ×57 We Who Question ×26 Broken Wing Polarizer ×25 Monowing Polarizer ×28 Polywing Polarizer ×55 Layered Wing Polarizer ×67 Shell Credit ×2,030,000 |
| Stat Bonus 1 | Polywing Polarizer ×3 HF Exoswarm Core ×2 Shell Credit ×16,000 |
| Stat Bonus 2 | Layered Wing Polarizer ×3 FF Exoswarm Core ×3 We Who Question ×1 Shell Credit ×100,000 |
| Inherent Skill 1 | Monowing Polarizer ×3 MF Exoswarm Core ×3 We Who Question ×1 Shell Credit ×10,000 |
| Inherent Skill 2 | Polywing Polarizer ×3 HF Exoswarm Core ×3 We Who Question ×1 Shell Credit ×20,000 |
I track rotations and bench results with Honey Impact and community parses on the Wuthering Waves subreddit; copy their test timings for your team and calibrate stamina usage until your Iai windows are consistent. Blade Liberation cuts through defenses like a cold knife through silk, so every extra Snowforged Blade you preserve is damage that actually lands.
If you’re pulling, farming, or theorycrafting Hiyuki, which part of her kit do you think demands the most practice: the resource loop, the Iai timing, or the set/weapon grind?