
I crouched behind a fractured slab as Moldlings closed in and a Perfect Dodge turned the tide. You know that electric click—when a single Talent changes a crowded fight into a clean run. I’ll show you which ones matter and how to get them into your loadout.
A chess player thinks three moves ahead — All Talents in Control Resonant
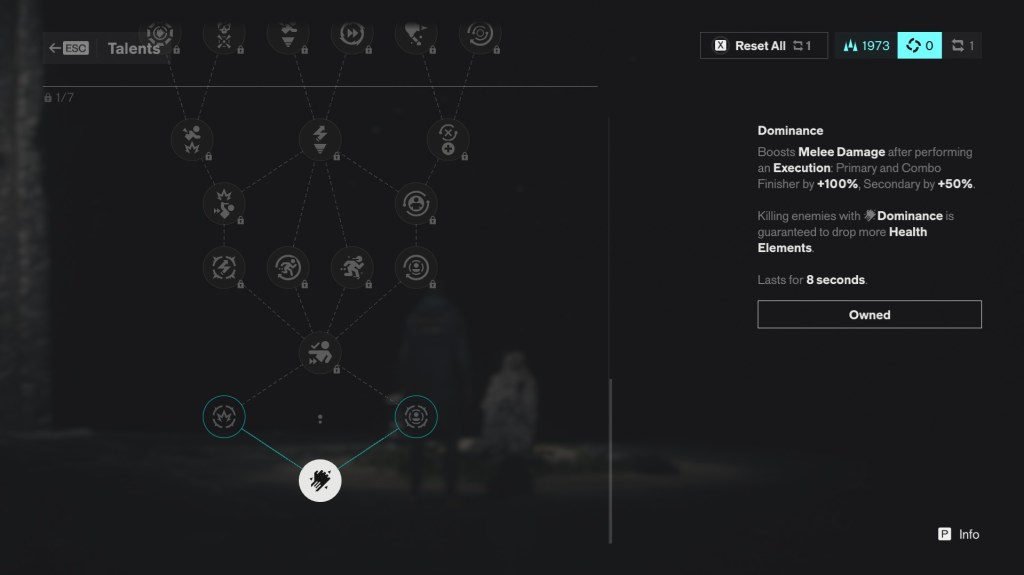
I mapped every Talent so you don’t waste points on dead ends. Talents come in 16 tiers and stack into predictable synergies—some are row-based, meaning you must take earlier skills on the same path before moving forward. Think of a Talent tree like a pocketknife: compact choices that suddenly solve a dozen problems.
- Tier 1:
- Dominance: Melee Damage jumps after an Execution — Primary and Combo Finishers +100%, Secondary +50%. Kills during Dominance drop extra Health Elements. Duration: 8s.
- Tier 2:
- All-Rounder: +5% Damage and Falter from all attacks.
- Extra Impact: +10% Falter from Combat Abilities.
- Tier 3:
- Perfect Dodge: Time a dodge just before impact to gain Retaliation. Your next attack deals +50% damage and Falter.
- Tier 4:
- Extended Falter: Enemies remain Faltered longer.
- Cleansing Rush: Rush clears status ailments twice as fast.
- Extended Rush: Rush lasts three times longer.
- Retribution: Retaliation adds +25% Falter.
- Tier 5:
- Guarded Formation: Take 20% less damage when near summons.
- Agile Response: Dodge attacks deal +25% Damage and Falter.
- Tier 6:
- Restorative Summons: Enemies killed by Summons drop extra Health Elements.
- Sanctioned Retaliation: Retaliation recovers +50% Power.
- Skilled Backstab: Melee from behind deals +50% Damage and Falter.
- Tier 7:
- Enduring Ally: Summon lifetime +50%.
- Mold Colony: +1 active Mold ally.
- Reactive Detonation: Perfect Dodge during Ignite applies Burn to nearby enemies.
- Back Stab Recovery: Back hits restore +50% Power.
- Decisive Step-up: Execution activates Keen — +20% Crit Chance to Melee briefly.
- Resurgence: Enemies attacking while Ignite or Shield are active get Vengeance, taking +50% Damage and Falter from Melee and Shield Bash.
- Tier 8:
- Better Together: Summons deal +25% Damage and Falter during Dominance.
- Heightened State: +20% Power during Dominance.
- Sustained Assault: Successive Melee hits on the same enemy can drop Health Elements.
- Tier 9:
- Extended Retaliation: Retaliation gets an extra charge — boosts the next two attacks within 5s after a Perfect Dodge.
- Restorative Dodge: Perfect Dodge restores a small amount of Health.
- Tier 10:
- Battle Alignment: Summons apply Tracked. Tracked enemies take +30% Damage and Falter from Combat Abilities.
- Optimized Projectiles: Projectiles deal +25% Damage and Falter.
- Impressive Comeback: +20% Power recovery when Health is below 25%.
- Tier 11:
- Parting Blast: Summons explode on death, dealing Damage and Falter in a small area.
- Anti Air: Summons deal +20% to Airborne enemies.
- Avid Execution: Increased Execution range.
- Restorative Dominance: Hitting enemies during Dominance drops a Health Element.
- Shield Blast: Tap light attack with Shield active to trigger an explosion.
- Tier 12:
- Friendly Fairwell: Summons drop a Health Element on death.
- Combat Recharge: +10% Power from all Melee attacks.
- Peak Condition: +20% Falter when Health is full.
- Status Spread: Push and Ground Slam spread any target’s active status ailments to nearby enemies hit.
- Rising Heat: Using Inferno rapidly increases its Damage and Falter.
- Executive Finisher: Executing Heavy enemies restores a large amount of Power.
- Tier 13:
- Summoned Reserves: Heavy enemies killed by Summons have a 20% chance to drop a Command Charge.
- Morale Boost: +20% Power recovery when you have a Commanded enemy on the battlefield.
- Tier 14:
- Thought Leader: Commanding low-health enemies costs 1 fewer Command Charge (minimum 1).
- Crowd Conversion: Drone enemies killed by Commanded enemies revive as allies.
- Command Provision: Enemies killed by Combat Abilities have a 20% chance to drop a Command Charge.
- Lethal Authorization: Commanded enemies explode on death.
- High Morale: Commanded enemies deal +25% Damage and Falter.
- Tier 15:
- Exploit Ailments: Enemies with Burn, Infected, or Astralized take more Damage and Falter from Summons.
- Stored Command: +5% Combat Ability Damage and Falter per unused Command Charge.
- Strong Presence: Commanded enemies last +30% longer.
- Energized Melee: +5% Melee Damage and Falter per unused Command Charge.
- Command Advantage: Applies Keen to Dylan and Commanded allies while a Commanded enemy is present — +20% Crit Chance to Melee briefly.
- Tier 16:
- Team Morale: Take 5% less damage per Summon on the field.
- Field Master: Non-summon Combat Abilities deal +20% Damage and Falter if a Commanded enemy is present.
- Command II: +1 Command Charge.
- Resilient: Dylan takes 25% less Damage when Dominance is active.
- Extended Dominance: Dominance duration increases to 15 seconds.
A quiet ritual at the shrine before every boss — How to Access Talents In Control Resonant
Small actions in the game world flip larger systems. In Control Resonant, Talents are not available from the start: beating the first Resonant, The Artist, will reveal the Gap and let you spend Talent Points. Once you have access, the Talent shrine becomes a routine stop between runs.
- Press and hold G to enter the Gap. You cannot do this inside Story areas or during dialogue.
- In the Gap, interact with the little shrine to open the Talents menu.
- Select a Talent and spend your Talent Points to add it to Dylan’s kit.
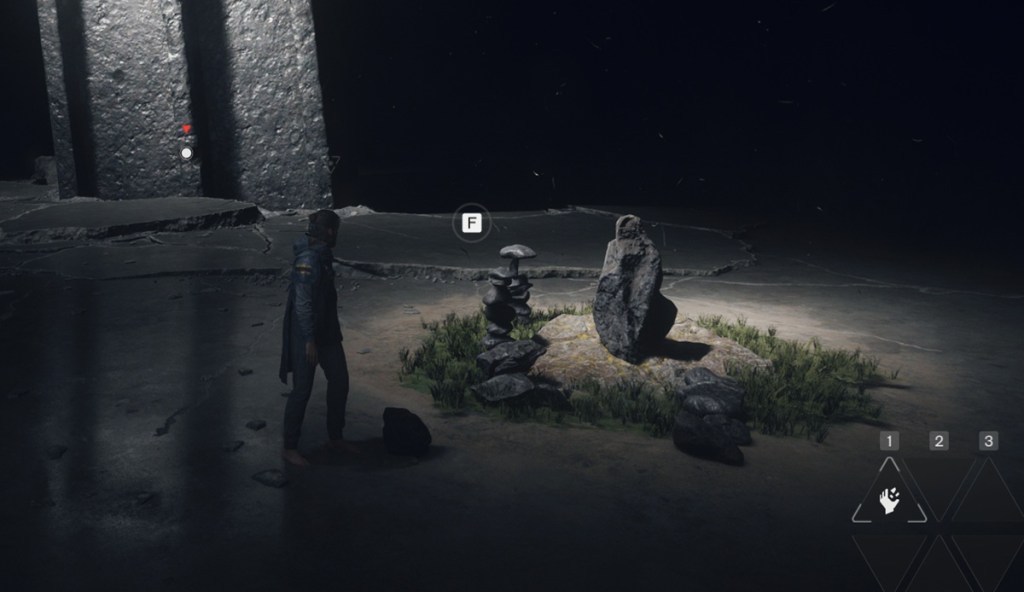
You earn Talent Points by upgrading zones: finish story missions, clear activities around the map, and raise a zone’s level. The tree lets you freely reset all Talent Points, so you can experiment without penalty. On Steam and Xbox (and platforms like Epic Games Store where Remedy releases appear), several trophies/achievements tie directly to specific Talent choices—so pay attention if you chase completion.
How do you access Talents in Control Resonant?
Beat the first Resonant, The Artist, to reveal the Gap. From there press G, interact with the shrine, and spend Talent Points. It’s a single loop: fight, upgrade zones, return to the shrine.
Which Talents are best for melee-focused builds?
Prioritize Dominance (Tier 1) and layer in Skilled Backstab, Agile Response, and Decisive Step-up when you want high burst and execution rewards. Combine Dominance with summons talents like Better Together or Restorative Dominance for sustain. Pairing these feels surgical; when it clicks the synergy hits like a heat-seeking missile.
How do Talent Points work?
Talent Points come from zone level-ups and mission completion. Each Talent costs a point; some are gated behind earlier nodes on the same path. If you change your mind, reset the tree and reassign points freely.
My last piece of advice: experiment early and often. Try a Dominance+Summon route on a minor zone and watch how your playstyle shifts—what will you test first?