
I logged into my old survival world planning a small igloo and froze mid-build when I realized the walls looked flat and cheap. Mojang had slipped in a new block that quietly rewrote cold builds: Snow Bricks. I ripped out a few blocks, tested a few recipes, and found a handful of tricks that save you time and make builds sing.
I’m going to walk you through everything I used, in plain terms: where to find the materials, how to craft every variant, which tools matter, and a couple of build ideas you’ll actually use. Follow these steps and you’ll stop settling for plain snow.
Items Required to Make Snow Bricks in Minecraft
On most maps, you’ll bump into shallow snow before you ever see a full biome of ice.
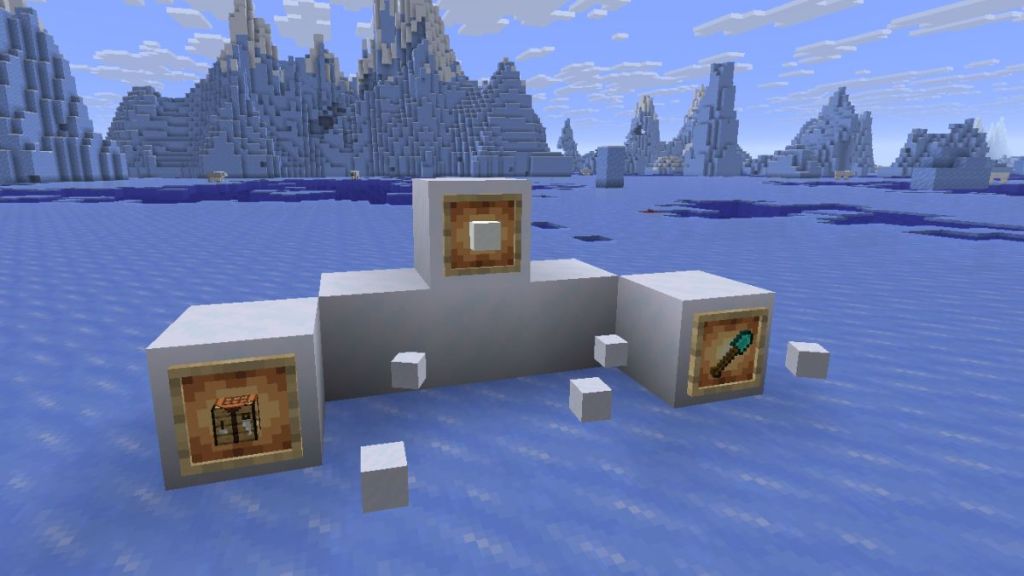
You only need a few common items. Snow Blocks are the main ingredient, and either gathering snowballs or using a Silk Touch shovel will get you there. I recommend carrying a shovel with Silk Touch if you play long-term; it saves inventory space and time.
| Item | Quantity | How to Get |
|---|---|---|
| Snow Blocks | 4x | Craft using 4 snowballs or use a Shovel with Silk Touch enchantment in Minecraft |
| Crafting Table | 1x | Craft using 4 wooden planks |
| Shovel | 1x | Craft using two sticks and a wooden plank, cobblestone, copper, iron, gold, diamond, or netherite ingot |
Snow Blocks spawn across cold biomes: snowy plains, ice spikes, frozen peaks, jagged peaks, and inside igloos. If you don’t have Silk Touch, break snow to collect snowballs and craft four into one Snow Block on a Crafting Table. That’s the practical route for most survival runs.
Where do Snow Blocks spawn?
Snow Blocks and surface snow appear in all cold biomes and certain high-altitude chunks. If you want concentrated resources, seed worlds for an ice spikes biome or frozen peaks; those give the most Snow Blocks per hour of gathering.
How to Craft Snow Bricks in Minecraft: Step-by-Step Method
In creative and survival play, a few simple moves separate a good build from a great one.
Crafting Snow Bricks is straightforward. If you’ve used recipes in Minecraft before, this will take seconds:
- Place a Crafting Table and open it.
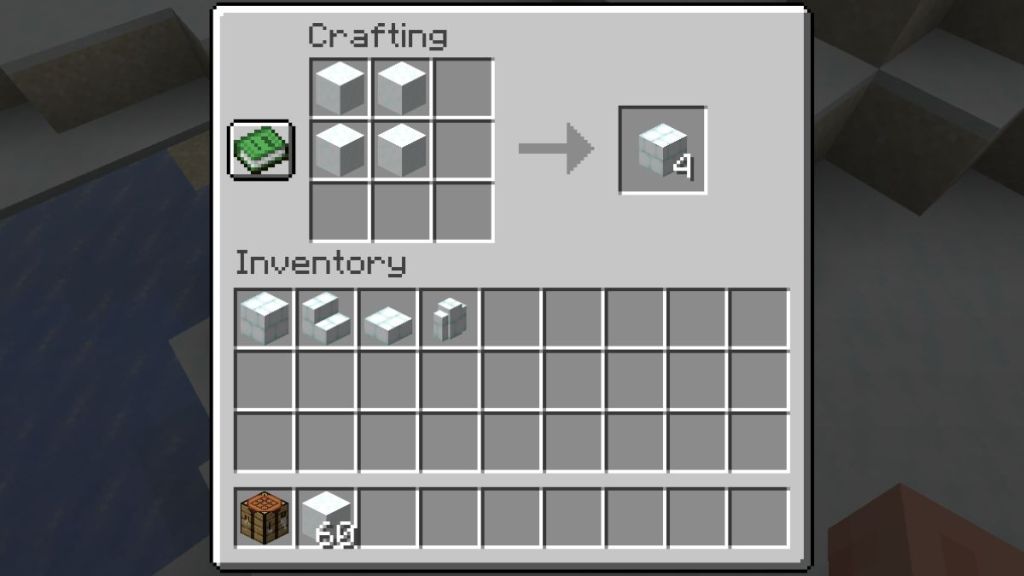
- Drop 4 Snow Blocks into a 2×2 square anywhere in the grid.
- Grab the 4 Snow Bricks from the result and move them to your inventory.
How do you make Snow Bricks in Minecraft?
Use 4 Snow Blocks on a Crafting Table in a 2×2 pattern. That yields 4 Snow Bricks. No furnace, no extra materials—just Snow Blocks and a crafting grid.
How to Make Snow Brick Block Variants in Minecraft
Builders immediately ask for stairs, slabs, and walls when a new decorative block drops into the game.
Snow Bricks are more than plain cubes. They come in three functional variants that expand design options:
- Snow Brick Stairs: Place Snow Bricks in the crafting grid in a stair pattern (three in the first column, two in the bottom row’s remaining cells, and one centered) to produce stairs for roofs and steps.
- Snow Brick Slabs: Put 3 Snow Bricks across any horizontal row to make slabs—perfect for low walls or detailed flooring.
- Snow Brick Walls: Stack 6 Snow Bricks across two adjacent rows in the crafting grid to make walls for battlements and fences.
All of these are made at a Crafting Table. Note: the Stonecutter does not produce Snow Bricks or their variants in either Java or Bedrock—this is a crafting-table-only family.
Can you use a Stonecutter for Snow Bricks?
No. The Stonecutter cannot craft Snow Bricks, slabs, stairs, or walls. Use a Crafting Table for all Snow Brick variants.
Other Uses of Snow Bricks in Minecraft
Players treat decorative blocks as pure cosmetics, but a few mechanical uses can surprise you.
Snow Bricks are primarily decorative, but they interact with new archetypes and gameplay elements in small, useful ways:
- Sulfur Cube interaction: If you make a Sulfur Cube absorb Snow Bricks, the cube gains a Fast Sliding behavior. The Sulfur Cube will slide like a hockey puck on a frozen pond, which opens up snappier mini-game mechanics.
- Heat resistance: Snow Bricks do not melt under high-heat blocks in Minecraft, unlike snow layers. That makes them ideal for cold-themed builds placed in warm biomes (Plains, Cherry Grove), giving you contrast without structural loss.
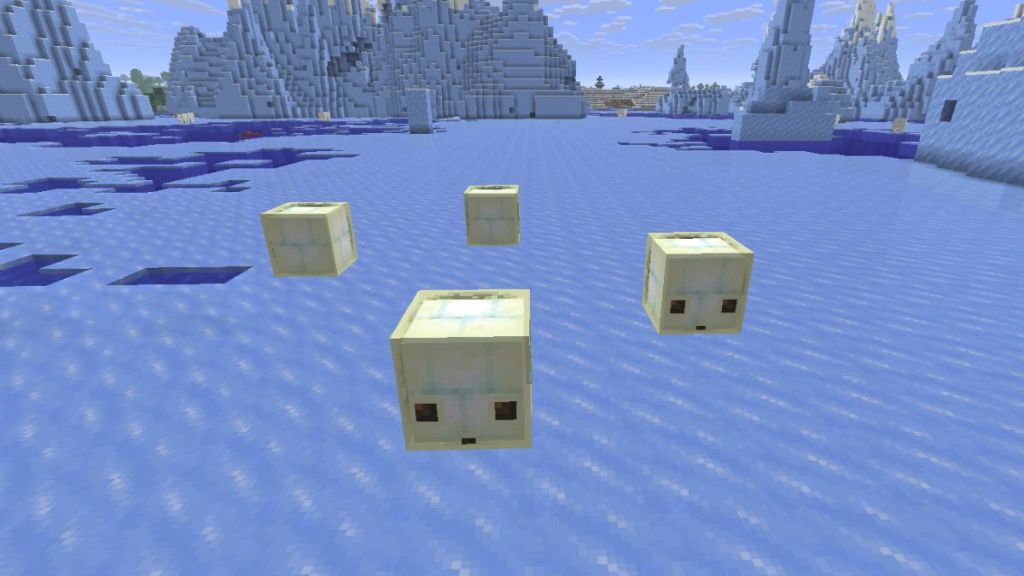

One practical tip from my tests: always carry a proper shovel when you interact with placed Snow Bricks. If you break them with bare hands or the wrong tool, they disappear instead of dropping as blocks—so a Silk Touch shovel is the safe option.
Snow Bricks sit like a frost-covered chessboard in a build: clean, patterned, and ready to read when placed next to darker materials. Use them to add readable geometry—arches, banding, trimmed roofs—and you’ll get far more visual return than a pile of snow ever gives.
That’s the full walk-through on how to get Snow Bricks in Minecraft, the variants you can craft, and a few uses I’d bet you hadn’t tried yet; do you plan to build a snow fortress, a minimalist temple, or something stranger?