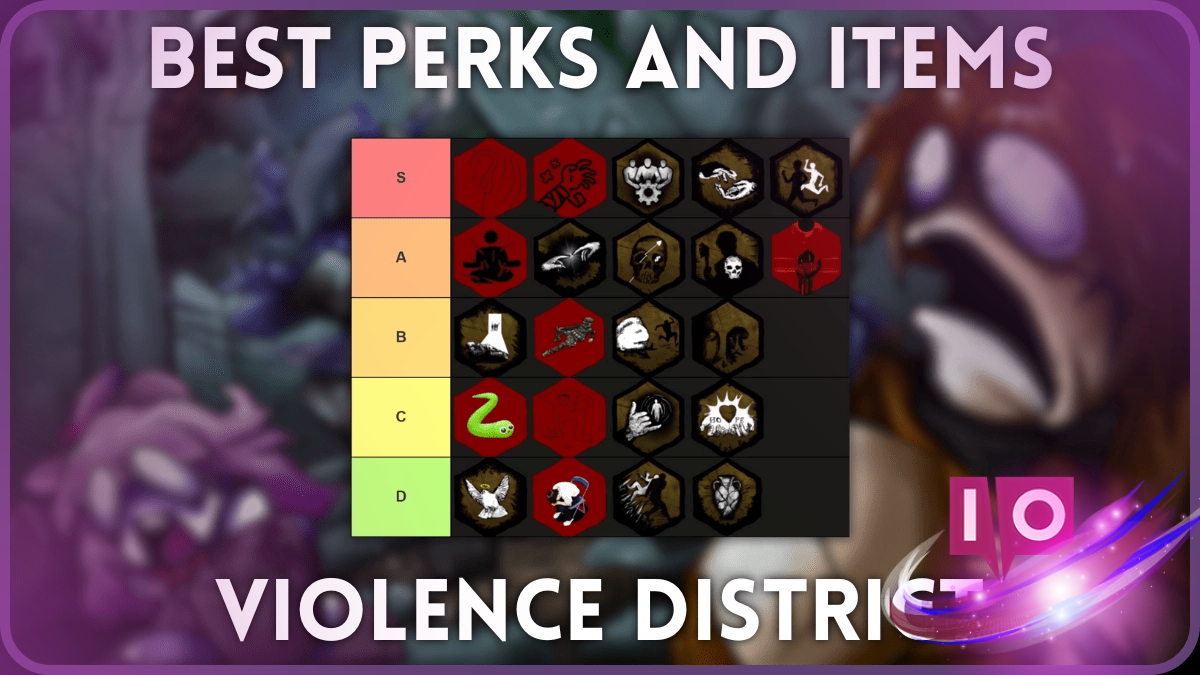
Surviving in Violence District can be a tough challenge, especially when you’re up against a skilled killer. To maximize your chances of survival and enhance your gameplay experience, utilizing the right perks and items is crucial. Given that you can only equip one item and three perks at a time, we’ve compiled this tier list of the best perks and items in Violence District to help you select the most effective loadout.
Top Perks in Violence District
In the tier list you’ll find perks ranked based on their overall effectiveness for survivors. We gave preference to altruistic perks that not only benefit you but also your allies because teamwork is key to survival. While perks like Time to Grow Up and On My Own focus on individual players, they may not be as effective when teammates don’t cooperate.
Detailed Perk List
Below is an overview of each perk available in Violence District, highlighting their effects. Each perk is upgradable twice using Screws, with distinct color coding to indicate buff scaling across upgrades.
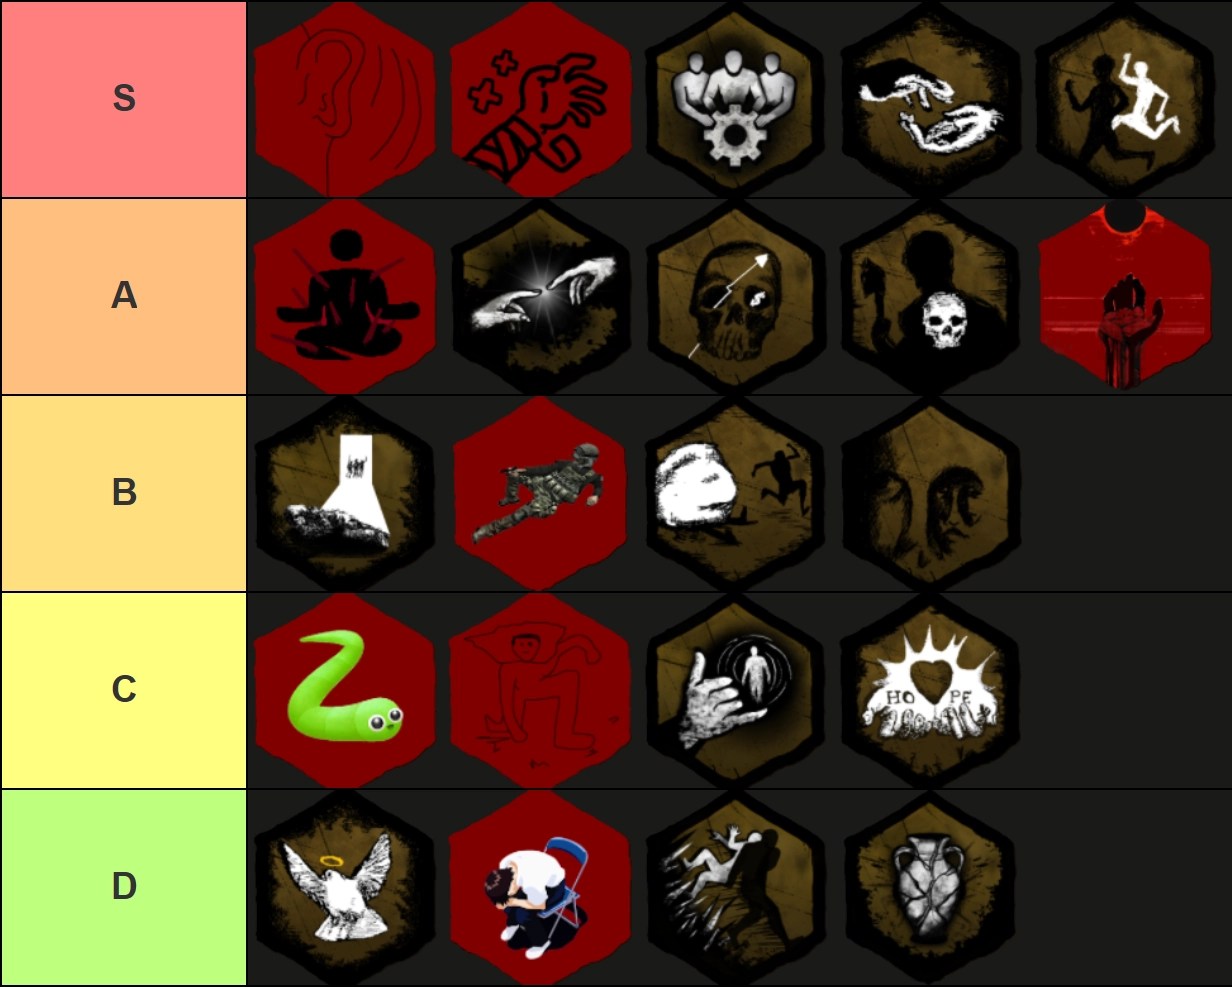
S-Tier Perks
| Perk | Effects | Cost |
|---|---|---|
| Heads Up | Auditory warning when the killer is within 40 studs plus a speed boost of 10/15/20% for 3 seconds. Afterward, gain Winded debuff for 60 seconds. | 250 |
| Second Wind | Gain invincibility for 15/20/25 seconds upon being rescued from spikes. | 250 |
| Group Project | Increases repair speed by 3/4/5% per additional survivor repairing with you, maxing at 9/12/15%. | 250 |
| Grab My Hand | Unhooking a survivor fills their healing bar by 30/40/50%. | 250 |
| We’re Stronger Together | Gives a speed boost of 2/4/6% when near a teammate. | 250 |
A-Tier Perks
| Perk | Effects | Cost |
|---|---|---|
| Iron Tranquility | Your aura is hidden from the killer while spiked, and blood pools despawn 3/4/5s faster. | 250 |
| Enhanced Touch | Healed players receive a boost in heal, repair, and speed for 10/15/20s. | 250 |
| High Karma | Allows you to free yourself on the first spike stage after saving a teammate, but applies anti-heal for 90/75/60 seconds. | 250 |
| Time To Grow Up | Extend your speed boost after getting hit by the killer for 1/2/3 seconds. | 250 |
| Born in Blood | When healing another survivor, gain a 30/40/50% speed boost for 6 seconds. | 250 |
B-Tier Perks
| Perk | Effects | Cost |
|---|---|---|
| Left Behind | Gain a permanent speed boost of 5/6/7% when a teammate escapes. | 250 |
| Last Stand | While you are the last survivor, heal by a soul state and see the killer’s aura for 10/15/20s. | 250 |
| Great Collapse | Stunning the killer with a pallet drop gives a 20/30/30% speed boost for 2/2/3 seconds. | 250 |
| On My Own | When alone, you open gates 40/50/60% faster and see the killer’s aura for 5 seconds. | 250 |
Best Items in Violence District
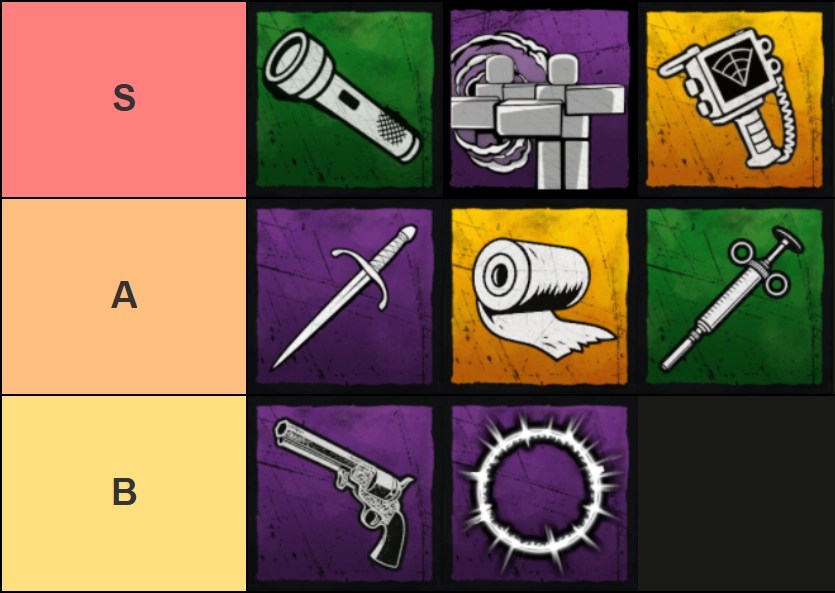
As you can only bring one item into a match in Violence District, we’ve evaluated items based on their overall versatility. Items like Flashlight, Shadow Clone, and Motion Tracker are outstanding choices in most scenarios, as they perform well regardless of your opponent’s playstyle. A-tier items, while excellent, might be situational or tricky to use.
Item Overview
Here’s a look at the various items you can use, along with their effects and costs to unlock.
| Item | Effects | Cost |
|---|---|---|
| Flashlight | Temporarily blinds the killer and forces them to drop any survivor they’re carrying. | 5,000 |
| Shadow Clone | Summons a clone that runs in the direction you were facing. 60s cooldown (5s if interrupted). | 7,500 |
| Motion Tracker | Detect a nearby killer by sound, ignoring stealth modifiers. | 3,000 |
| Parrying Dagger | Equip to knock down the attacker when they strike, stunning them temporarily. 40s cooldown. | 7,000 |
| Bandage | Recovers one and a half health states, taking 20 seconds for a full heal. | 3,500 |
| Adrenaline Shot | If used while healthy, gives a 10% speed boost for 10 seconds. If knocked down, recovers in 7 seconds. 90s cooldown. | 5,000 |
| Twist of Fate | Attempts to fire a shot that stuns the killer; 60% chance of success, else damages you. | 7,500 |
| Gate | Channels a spell gate for 3 seconds to teleport randomly on the map. | 7,500 |
Unlocking and Equipping Perks and Items
-
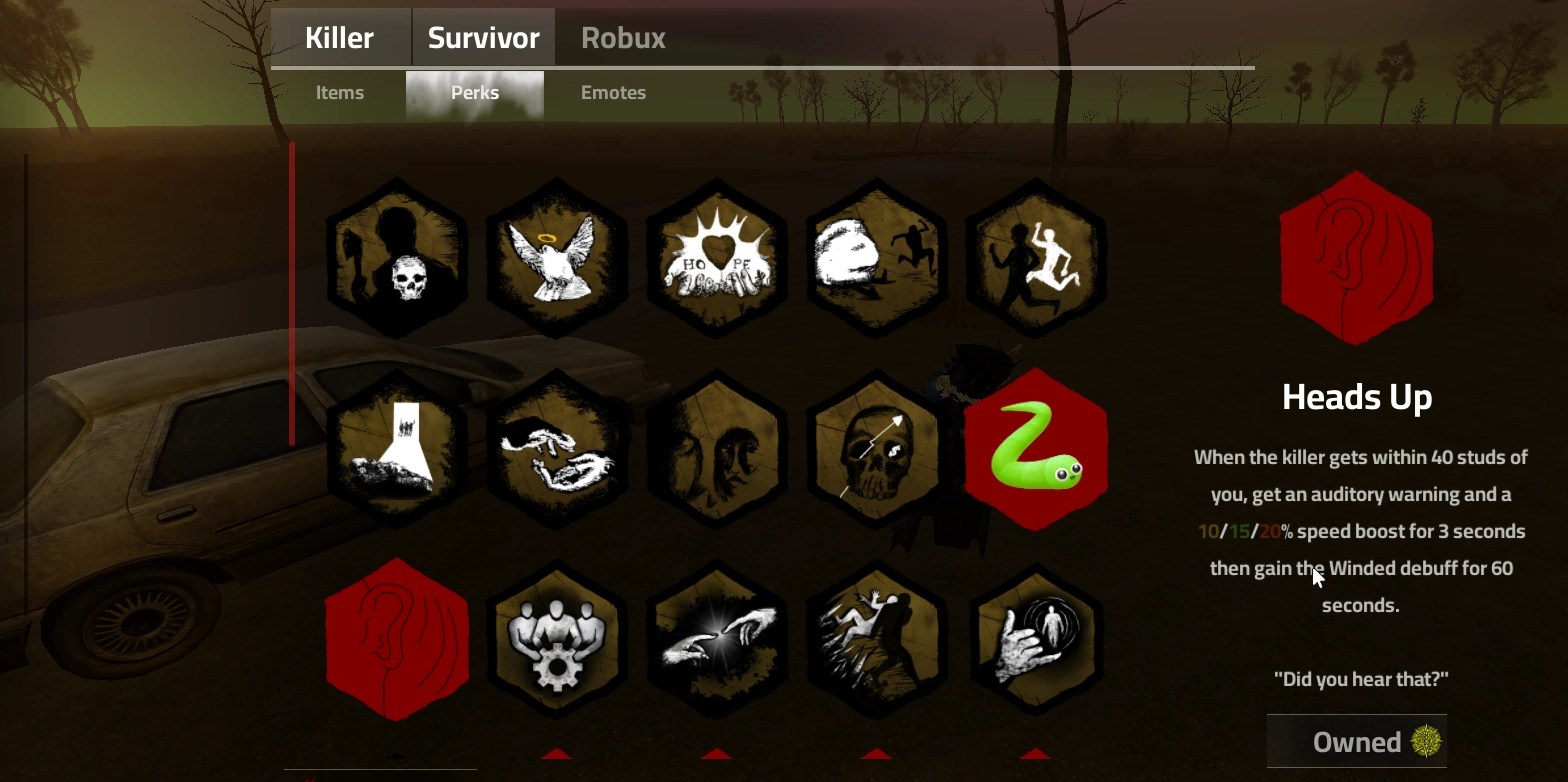
All perks cost 250 Emblems to unlock. -

Items range from 3,000 to 7,500 Screws to unlock. -
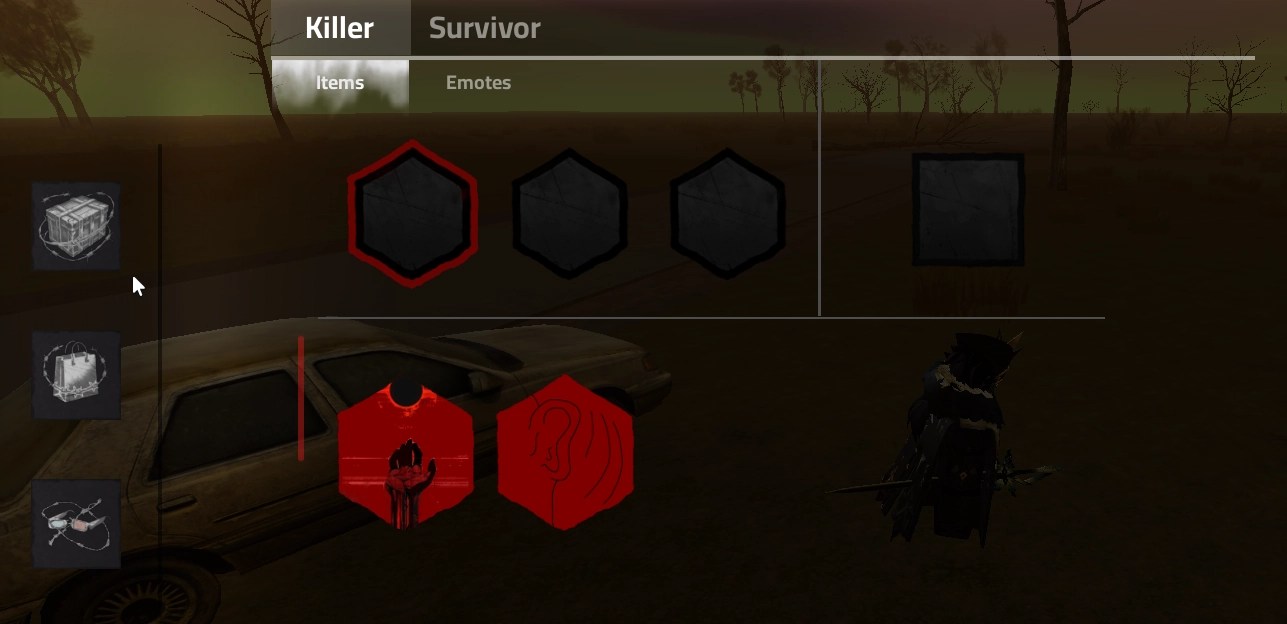
You can only equip perks and items before a match or after you die.
To unlock new perks and items in Violence District, access the shop menu in the lobby. Once you purchase a perk or item, it is permanently unlocked, allowing you to switch at will but only while in the lobby.
What are the top perks in Violence District? The standout perks include Heads Up, Second Wind, and Group Project. These perks greatly enhance your survivability against killers.
What items provide the most utility? The items that consistently prove their worth are Flashlight and Shadow Clone, offering unmatched versatility in varied scenarios.
How many perks and items can you equip at any given time? You can equip a maximum of three perks and one item at once, striking the right balance between utility and specialization.
In conclusion, equipping the right combination of perks and items can significantly boost your gameplay in Violence District. Explore different combinations, experiment, and find what works best for you. For more insightful tips, be sure to check out Moyens I/O.