
Key Takeaways
- Confirm that your laptop supports USB-C charging and connect the charger to a port that supports Power Delivery.
- Use the appropriate power adapter and cable, ensuring a firm connection and checking for any damage.
- If the laptop still won’t charge, try removing the battery and cleaning the contacts before reinserting it. If necessary, consider replacing the battery.
The USB-C port has become the standard for data transfer, video output, and charging on modern Windows laptops. Although this is convenient, it can be frustrating when you plug your laptop into a power adapter via USB-C, and it won’t charge.
Since there can be several reasons for such charging issues, there’s no one-size-fits-all solution. Rest assured, following these tips should get your Windows laptop charging via USB-C quickly.
1. Ensure Your Laptop Supports USB-C Charging
A USB-C port on your laptop does not necessarily mean it can be charged via USB-C. Hence, your first step is to ensure your Windows laptop supports USB-C charging. If unsure, refer to your PC’s user manual or visit the manufacturer’s website to verify whether your laptop supports USB-C charging.
If your laptop supports charging via USB-C, connect your charger to a port that supports Power Delivery (PD). If you connect to a USB-C port that only supports data transfer, your laptop won’t charge. Look for a small icon (a battery symbol) on the side of the USB-C port to determine which port is for charging.
2. Use a Compatible Power Adapter and Cable
Using the appropriate charging adapter and cable is also important. Sticking to the charger and cable that came with your laptop is best. If you are using a different power adapter or cable, you will need to make sure that it is powerful enough to charge your laptop.

Dust and dirt particles in the charging port can also cause a loose connection and prevent charging. So, make sure the charging cable is connected firmly. While you are at it, check the cable for any cuts. If it appears damaged, there are plenty of ways to fix a broken charger cable.
3. Remove the Battery and Try Again
It’s possible that the charging issue is not related to the USB-C port or your charger but rather the battery itself. To rule out this possibility, you will need to plug in your laptop without the battery.
For laptops with a removable battery, remove it by pulling on the tabs on the underside. After that, hold down the power button for 10 to 15 seconds to drain any residual power from the system. Then, plug the laptop into an outlet and try to turn it on without the battery.

If the laptop powers on, there’s nothing wrong with the USB-C port or your charging accessories. Use a soft, dry cloth to clean the battery compartment and remove any foreign material. Then, reinsert the battery into its compartment and check all the contacts are aligned.
If your Windows laptop still won’t charge, you may have a dead laptop battery that needs replacing.
4. Remove Battery Charge Threshold
Is your Windows laptop not charging to 100%? This could be because you have set a battery charge threshold, a feature on most modern laptops that allows you to extend the battery life by preventing it from charging past a certain level, such as 80%.
This setting can make it seem like your laptop is not charging. The maximum power of your battery’s RSOC (or Relative State of Charge) can be set in the BIOS or the proprietary system companion app, depending on the laptop manufacturer.

Start by setting a battery charge threshold on your Windows laptop and follow the steps to remove the battery charging limit. Once you’ve done that, you can charge your laptop fully.
5. Reset Your Power Plan to Default Configuration
If removing the battery charge threshold does not resolve the issue, another power setting may be causing the problem. You can try resetting your power plan to its default configuration and see if that solves the problem.
To reset your power plan to default on Windows, use these steps:
- Press Win + S to open the search menu.
- Type Command Prompt in the search box and select Run as administrator from the right pane.
- Select Yes when the User Account Control (UAC) prompt appears.
- Type the following command in the console and hit Enter.
powercfg -restoredefaultschemes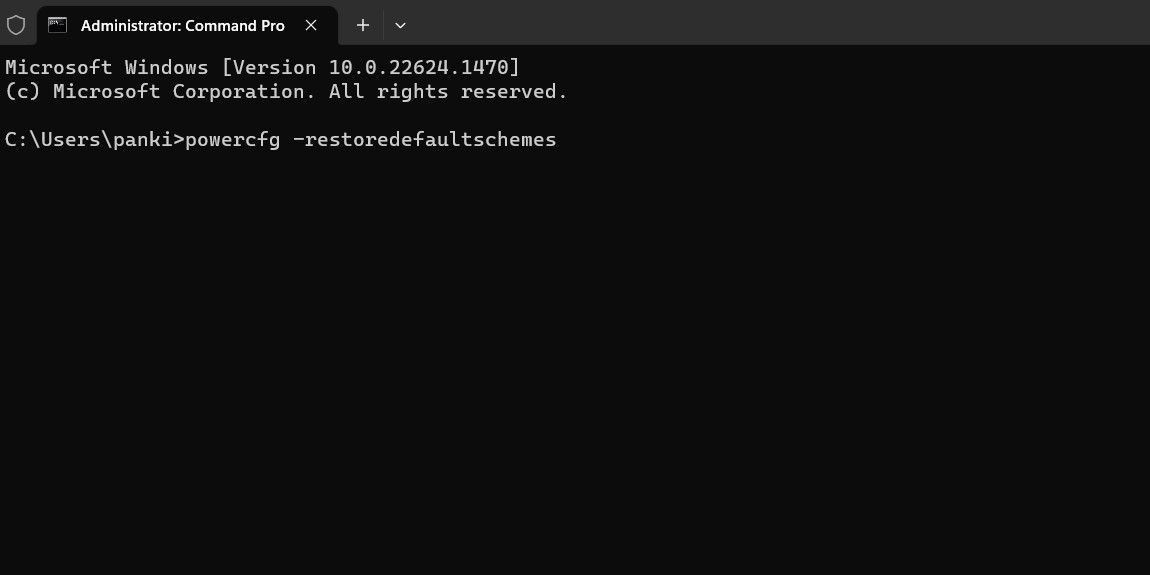
Once you run the above command, Windows will reset all the power plans to their default settings. After that, check if you can charge your laptop.
6. Update or Reinstall Battery Drivers
Battery drivers on your laptop facilitate communication between Windows and your laptop’s battery. If these drivers are outdated or corrupted, you may see a yellow triangle sign on the battery icon, and your laptop will not charge through USB-C. In most cases, such issues can be resolved by simply updating the driver. To do so, use these steps:
- Press Win + X to open the Power User menu.
- Select Device Manager from the list.
- Expand Batteries, right-click on the first entry, and select Update driver.
- Select Search automatically for drivers.
- Click the Search for updated drivers on Windows Update option, and then follow the on-screen prompts to finish the process.
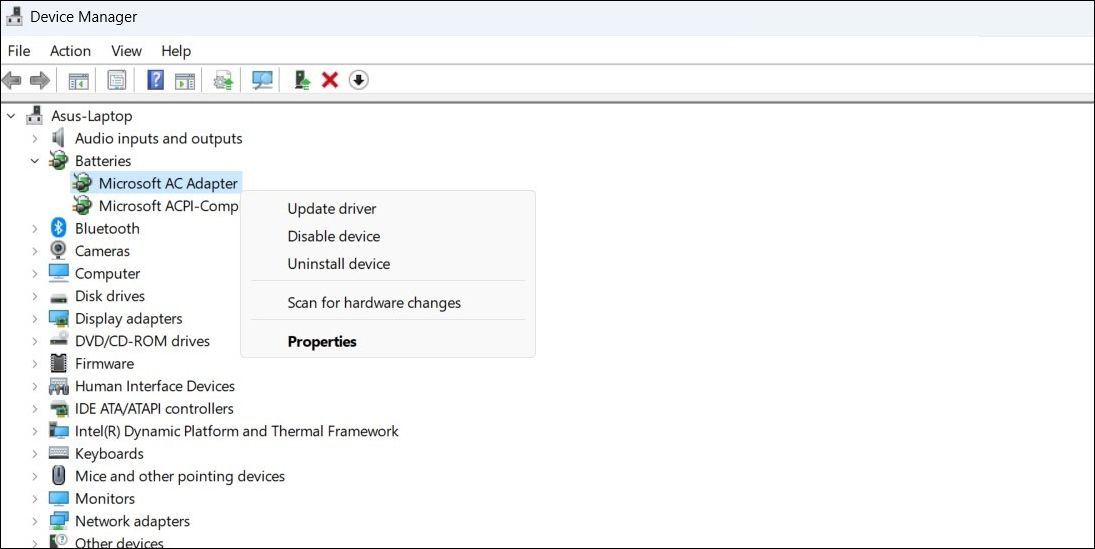
Similarly, update the Microsoft ACPI-Compliant Control Method Battery drivers as well.
If you cannot charge your laptop even after updating the battery drivers, they may be corrupted. In this case, you can try to fix the corrupted drivers on Windows by reinstalling them.
7. Update BIOS/UEFI
Another reason your Windows laptop may not charge via USB-C is incorrect or outdated BIOS settings. The BIOS is a small program saved on your computer’s motherboard that is accountable for initializing your computer’s hardware and loading the operating system. If the BIOS settings are incorrect, it can cause problems with your computer’s USB-C port.
So, if nothing else works, you can try updating the BIOS settings on your Windows laptop.
Energize Your Windows Laptop With USB-C
Not being able to charge your Windows laptop through USB-C can be a significant inconvenience. Before running to the nearest service center to check your computer or buy a new charger, give the tips mentioned above to fix the underlying issue.