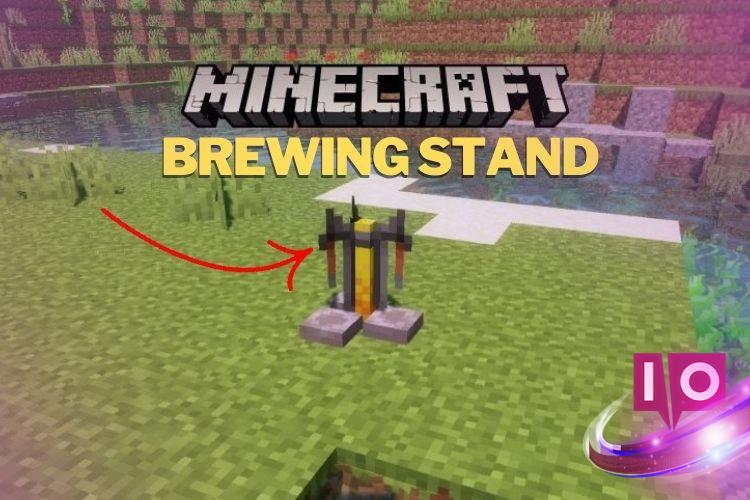
If you’re diving into the vast world of Minecraft, you might find yourself dreaming of finding the ultimate survival seed. For many, that dream remains just that—dreamy. But fret not! One of the key resources at your disposal is the power of potions, which can transform your gameplay experience. The first step on your potion-brewing journey? Learning how to craft a Brewing Stand in Minecraft. This guide will walk you through everything you need to know to get this essential tool and make your potion-making dreams a reality.
Let’s get started by gathering the necessary ingredients.
1. Items Required to Make a Brewing Stand
Most players craft a Brewing Stand later in their Minecraft adventure. While using seed map tools can sometimes lead you to a village with one already in place, it’s not the most reliable method. To craft your own Brewing Stand, gather the following items:
- 3 Cobblestone blocks
- 1 Blaze rod
The cobblestone is easy to come by—it’s one of the most abundant resources in the game. However, the Blaze rod is a bit trickier to acquire. To secure one, you’ll need to journey to the Nether and defeat Blazes, which spawn in Nether Fortresses. Make sure to build a Nether portal first to make your way into that fiery realm.
Remember, you’ll need more than just one Blaze rod to keep your Brewing Stand operational; Blaze powder, crafted from Blaze rods, is essential for fueling the stand. Cobblestone and the crafting table are one-time requirements.
2. How to Make a Brewing Stand in Minecraft
Once you’ve gathered your ingredients, making the Brewing Stand is a straightforward process. Choose a safe location—preferably inside a house or in a biome free from hostile mobs. Here’s how to craft it:
- Set down a crafting table and access it with a right-click.
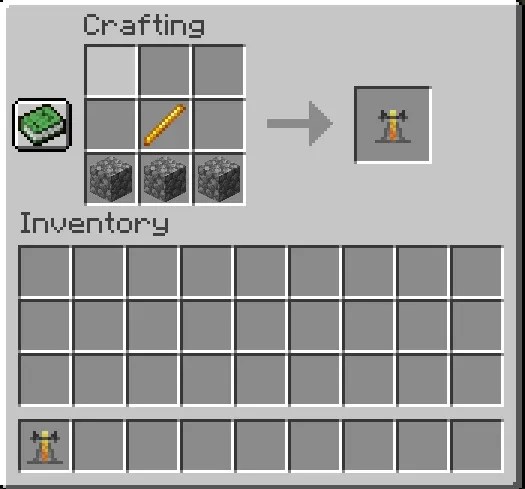
- Place 3 cobblestone blocks in the bottom row of the crafting grid.
- Then, place the blaze rod in the middle cell of the center row.
- Congratulations! You now have a Brewing Stand, ready to be moved into your inventory.

As you’re crafting, make sure to create some fuel for your Brewing Stand. If you have any extra Blaze rods, turn them into Blaze powder in the crafting area; this will be necessary for potion brewing.
3. How to Use a Brewing Stand in Minecraft
The Brewing Stand has a unique design, and mastering its functions is crucial to brewing potions effectively. Here’s a breakdown of its user interface:
- The top left spot is for placing your fuel, which is Blaze powder.
- Next to the fuel, you’ll notice a tube-like space where bubbles will appear during the brewing process.
- To the right are slots for your key potion ingredients.
- Lastly, at the bottom, you’ll find a spot to place glass bottles to store your freshly crafted potions.

With these simple steps, you’re now equipped to make and utilize a Brewing Stand in Minecraft. Have you tried your hand at crafting your first potion yet? Which potion do you think will be the most useful for your adventures? Share your thoughts in the comments!
Where can you find a brewing stand in Minecraft? You can spot brewing stands in village churches. However, they typically lack potions. Also, check out igloos with basements or end ships for additional brewing opportunities.
What does Glowstone do in a Brewing stand? Glowstone powder is used to enhance the potency of your potions when brewing.
How does Redstone enhance your brewing experience? Redstone powder is beneficial for extending the duration of your potions.
Now that you know how to create and use a Brewing Stand, continue exploring all that Minecraft has to offer. For more tips and guides, visit Moyens I/O.
