Bosses in Arcane Lineage vary from being so easy that a new player can defeat them alone to being so hard that you need multiple teams to defeat them. They each offer a unique challenge and have many different mechanics, requiring strategy and patience to beat effectively. Defeating them brings the player some of the best loot and items in the game, so follow along with our Arance Lineage Boss guide to prepare yourself for the thick of it.
Arcane Lineage Boss List
| Boss | Location | Difficulty |
|---|---|---|
| King Slime | Around the City | Easy |
| Yar’thul, the Blazing Dragon | Inside Mount Thul | Normal |
| Thorian, the Rotten | Deep in the Cess Grounds | Hard |
| Mettrom’s Vessel | Deeproot Canopy | Very Hard |
| Seraphon | Unlocked by ranking up in the Church of Raphion | Hard |
| Arkhaia | Unlocked by ranking up in the Cult of Thanasius | Very Hard |
King Slime
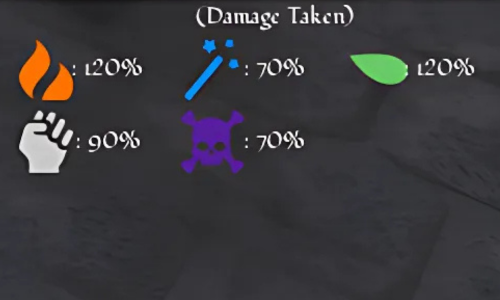
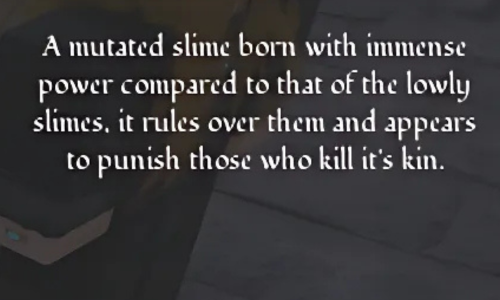
We consider this to be more of a mini-boss since it does not pose a big threat like the other Bosses in Arcane Lineage. But be careful, as low-level players are still no match for it. Note that you cannot get soul points from this boss.
King Slime Location
The King Slime spaws after 100 Slimes die on the Server. It will spawn around the city closest to the location of the last slain slime, and there will be a notice on the Quest Board letting the players know that the King Slime quest is active. The quest has 2 steps:
- Find the King Slime
- Kill the King Slime
This quest has a 30-minute global cooldown on the server.
King Slime Fighting Strategy
This Boss spawns with 400 HP (600 HP if Corrupted), having the lowest HP total of any Boss in Arcane Lineage. King Slime’s main attack is summoning more Slimes that can overwhelm your party over time. On top of that, he also has a lot of AOE poison attacks, so we recommend coming prepared with potions and cleansing abilities. His relatively low Health allows for a simple battle. After you take care of his Slimes, you will be able to kill him in a few turns of attacks. His AOE attacks only inflict your party with Poisoned, but they do not do any direct damage, meaning that you have room for attacks.
| Attacks | Energy Cost | Effect |
|---|---|---|
| Slime Creation | 1 | Summons a Slime to fight for King Slime. |
| Crush | 0 | King Slime lunges forward, attacking a party member. |
| Poison Eruption | 2 | King Slime throws out a burst of Acid, poisoning your party. This attack cannot be dodged or blocked. |
| Scalding Spray | 3 | King Slime erupts with boiling hot liquid, poisoning your party. This attack cannot be dodged. |
King Slime Drops and Rewards
After defeating the King Slime, these are the possible drops:
- Random Tier 1 Equipment
- Slime Buckler
- Gelat Ring
These are the possible rewards for completing the King Slime event from the Quest Board:
- Ferrus Skin Potion
- Small Health Potion
- Essence
- Gold
Yar’thul, the Blazing Dragon

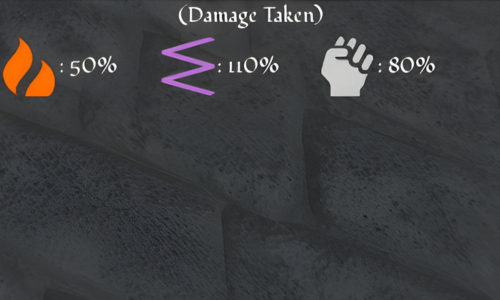
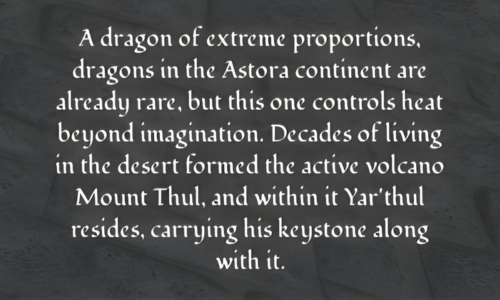
This is a fire-type boss, using Fire and Inferno-based attacks to damage the party. Almost all of his attacks inflict the Inferno and Burning stacks on the party, making the fight very difficult if the party is not adequately prepared. He is resistant to fire and physical damage and weak to Hex damage.
Yar’thul Location
To find Yar’thul in Arcane Lineage, you will have to travel deep into the Desert. There, in the heart of the Desert, you will find Mount Thul, an active volcano created by Yar’thul’s immense heat. Enter Mount Thul and navigate through the dark corridors, and you will find the Blazing Dragon waiting for you at the end.
Yar’thul Fighting Strategy
This massive dragon has 1200 HP (1800 HP if Corrupted), but it makes up for its lack of tankiness with its massive damage. He has many attacks, most of them inflicting the players party with Inferno and Burning effects. At its core, this is a battle against time, trying to slay the Blazing Dragon before you burn to a crisp. Upon falling below 50% health, he will enter his second phase. He will summon giant meteors to destroy the part, stunning them and applying healing reduction. In this phase, the player needs to focus on ending the battle as soon as possible, as prolonged hits from the meteors will wipe the party. Luckily, having the Dragon Ring and Accessories that are at least Pristine level makes this battle easier. The Corrupted version gains lifesteal.
| Attacks | Energy Cost | Effect |
|---|---|---|
| Inferno | 0 | This attack is activated automatically when the battle starts, inflicting the player’s party with the Inferno status effect. This attack cannot be dodged or blocked. |
| Fire Claw | 0 | Yar’thul slashes at you with its claws, imbued with fire, dealing light damage. |
| Magma Pillar | 2 | Yar’thul slams the ground, creating a pillar of magma. Anything that tries to attack him through this pillar takes damage and is inflicted with 2 stacks of Inferno and 5 stacks of Burn. This attack lasts 3 turns. |
| Blaze Core | 3 | Yar’thul consumes the parties’ Inferno stacks, healing based on the amount consumed. |
| Blaze Eruption | 2 | Yar’thul slams his arms into the ground, further damaging burning targets and applying scaling Inferno and Burning stacks. |
| Magma Beam | 4 | Yar’thul charges a devastating beam of fire for 1 turn. On the following turn, he fires the beam for massive damage, also damaging adjacent units. This attack cannot be dodged or blocked. |
| Hellfire | 1 | Yar’thul sends out an unstoppable wave of fire, damaging the whole party lightly and applying 9 stacks of Burning. This attack cannot be dodged or blocked. |
| Armageddon | 6 | When Yar’thul falls below 50% Health, he has a chance to use his ultimate move. He will summon a large meteor to devastate the whole party, dealing massive damage. This attack applies healing reduction, has a chance to stun the party, and can be used multiple times. This attack cannot be dodged or blocked. |
Yar’thul Drops and Rewards
After defeating Yar’thul, these are the guaranteed rewards:
- Absolute radiance
- Permafrost Curse
- Wild Impulse
- Heavenly Prayer
- Breath of Fungyir
- Narhana’s Sigil
- Reality Watch
- Shifting Hourglass
- Ring of the Dragon
- The Void Key (Corrupted Yar’thul)
And here are the possible drops:
- Dragontooth Blade
- Dragonbone Gauntlets
- Dragonbone Spear
- Dragonflame Shield
- Memory Fragment
- Soul Dust
- Phoenix Tear
- Resplendant Essence
- Lineage Shard
- Skyward Totem
Thorian, the Rotten
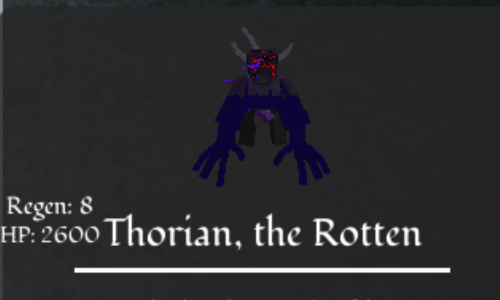
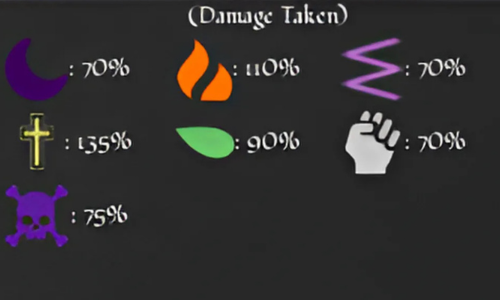

Thorian used to be an animal, residing in the Deeproot Canopy, but he got corrupted over time. Now, he is a towering abomination with many red eyes and tentacles, terrorizing the area. He curses anyone and anything that comes into contact with him. He is resistant to almost all elements but is heavily weak to Holy damage.
Thorian Location
You can find Thorian in the furthest reaches of the Cess Grounds, in the Deeproot Canopy. When entering the Cess Grounds, head to the right side and stick to that direction. He is a huge, abominable enemy, so it is hard to miss him once you enter his area.
Thorian Fighting Strategy
Thorian has 2.600 HP (3.900 HP if Corrupted). This bossfight is tricky and has a few different mechanics. The first mechanic is related to his passive negations. If you attack him twice in a row with the same attack type, he will heal 150% of the damage dealt. This means that every attack you do on him has to be of a different type, which can be incredibly difficult when managing energy and cooldowns of a full party. He also has resistance to almost all damage types in the game except holy, which does 135% damage to him. He is also slightly weak to fire, but there is a measly 10% damage increase, so I would not rely on it as a finisher.
When he goes below 50% Health, he will ravage the party with a devastating attack, inflicting the party with Plague, Curse, and Hexed. This move has a 15-turn cooldown, so in 99% of fights, you do not have to worry about it hitting you again. After that, the fight resumes as normal.
| Attacks | Energy Cost | Effect |
|---|---|---|
| Cursed Wave | 2 | Thorian attacks 3 party members, dealing damage. This attack has a chance to inflict Curse. |
| Overflowing Curse | 0 | This attack starts a minigame. If you fail, you will be inflicted with Plague. This attack cannot be dodged or blocked. |
| Cess Breath | 1 | Thorian sends a wave of rotten air, dealing AOE damage to the party and debuffing them. |
| Warped Crush | 1 | Thorian charges the party, dealing damage to 3 party members. |
| Blasphemous Obliteration | 5 | Upon falling below 50% Health, Thorian goes into a rage, devastating the party members and applying 1 stack of Plague, 3 stacks of Curse, and 1 stack of Hexed. This attack cannot be dodged or blocked. |
| Hexed Burst | 1 | Thorian sends out a small AOE wave, damaging the part. This attack has a chance to apply random debuffs (1 Hexed or 3 Curse). |
| Plague Rupture | 2 | Thorian gives a party member a random debuff. Once applied, he ruptures the party member, dealing massive damage scaling with the number of debuffs. |
Thorian Drops and Rewards
After defeating Thorian, these are the guaranteed rewards:
- Absolute Radiance
- Permafrost Curse
- Wild Impulse
- heavenly Prayer
- Breath of Fungyir
- Stellian Core
- Metrom’s Amulet
- Darksigil
- Ring of Blight
- The Void Key (Corrupted Thorian)
And here are the possible drops:
- Blightrock Dagger
- Blightwood Staff
- Memory Fragment
- Soul Dust
- Phoenix TearResplendant Essence
- Lineage Shard
- Skyward totem
Metrom’s Vessel
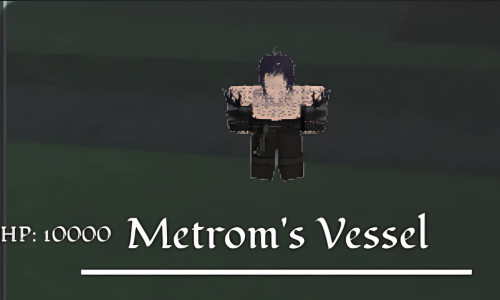
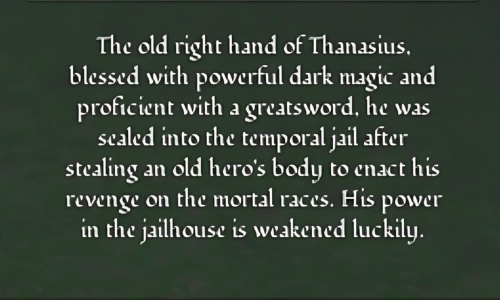
Once a proud hero, this empty shell now serves as a vessel for Metrom. They sealed him into a Temporal Jail after he possessed the hero’s body and tried to take revenge on all mortal races. Luckily, the Temportal Jail significantly weakens him.
Metrom’s Vessel Location
Unlike the other Bosses on this list, Metrom’s Vessel is a Raid Boss and spawns on a global timer. To enter this Boss Fight, you will need a Void Key, obtainable by defeating corrupted versions of the previous bosses on this list. Once you obtain a Void Key, you can wait for the server-wide notification of Metrom’s Vessel spawning, along with its location.
Metrom’s Vessel Fighting Strategy
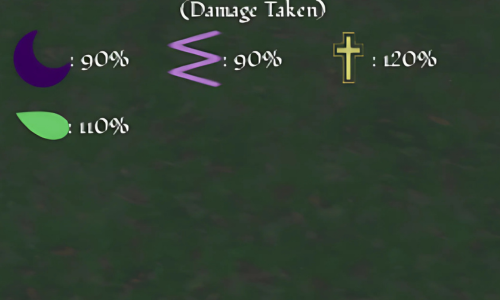
There is one simple word to describe this boss: statpile. With a 10.000 HP (15.000 HP if Corrupted) total and some crazy damage negation, you will need between 30 and 60 minutes to defeat this absolute tank. Now, that is not to say that the bossfight itself is easy. He has 2 phases with different moves, different offensive and defensive mechanics, and just a ton of damage output.
In his first phase, he has black wings that each grant him incredible amounts of damage negation. To destroy these wings, you need to apply status effects and debuffs onto Metrom’s Vessel. But be careful, as the fewer wings he has, the more damage he deals. Because of that, you want to time your wing-destroying abilities to right before or right after the second phase starts. If you destroy all his wings before the second phase, he will have access to the attacks from the second phase in the first one, making the fight much harder.
On top of all of that, he also summons Shadeblades, minions that are squishy but deal a lot of damage. They have 200 HP, so try to kill them as fast as possible. You want to finish the first phase as fast as possible because the longer you take, the higher the chance he will use Oblivion, a move that cannot be dodged and deals 50% max HP to everyone.
When entering his second phase, Metrom’s Vessel falls to the ground and screams out in pain, shattering the Temporal Jail. In this phase, his wings mechanic changes completely. They each gain an Offensive and Defensive mode. The Offensive mode gives him a passive damage increase each turn they are active and also increases the damage of the minions he summons. The Defensive mode gives him high damage resistance, but also Thorns Aura, reflecting damage he takes to the player’s party. To destroy his wings, apply status effects and debuffs, like in the first phase. The final mechanic he has during this phase is a Mini Shadebringer that he will send out for an additional attack every time a player fails to dodge an attack.
To beat him efficiently, you need to coordinate with your team and constantly apply debuffs and damage-reducing status effects on him. With his insane health total, this is a true battle of attrition and pure will. Once you get the hang of his timings and how his wing mechanics work, this fight becomes a bit easier.
Phase 1 Attacks
| Attacks | Energy Cost | Effect |
|---|---|---|
| Rendering Slash | 0 | Metrom’s Vessel lunges towards the player, damaging them and applying 3 Weakness stacks. |
| Deathbound | 1 | Metrom’s Vessel chooses 2 random players to apply 3 stacks of Sundered on. |
| Eclipse | 1 | Metrom’s Vessel applies a buff onto himself. |
| Invoke Shadeblades | 3 | Metron’s Vessel summons two Shadeblades that have 200 HP each. This attack cannot be dodged or blocked. |
| Hexed Rend | 3 | An undodgeable AOE slash that debuffs all players. This attack cannot be dodged or blocked. |
| Oblivion | 5 | Metron’s Vessel uses ancient magic, dealing 50% of everyone’s HP and inflicting them with Curse. This attack cannot be dodged or blocked. |
Phase 2 Attacks
| Attacks | Energy Cost | Effect |
|---|---|---|
| Oblivion + Eclipse | 1 | Metrom’s Vessel uses Rendering Slash (P1) followed by a Hexed Rend (P1). |
| Unyielding Fury | 2 | An AOE debuff that gives all players 3 stacks of Blind and 2 stacks of Hexed. This attack cannot be dodged or blocked. |
| Minishade Bringer | 3 | Metrom’s Vessel shoots 3 Shadebringers. This attack cannot be dodged or blocked. |
| Shadebringer | 1 | Metrom’s Vessel slashes 3 Shadebringers, which hit the whole party and apply 4 stacks of Cursed. This attack cannot be dodged or blocked. |
| Blackout | 2 | Metrom’s Vessel debuffs the whole party. This attack cannot be dodged or blocked. |
Metrom’s Vessel Drops and Rewards
After defeating Metrom’s Vessel, there are the guaranteed rewards:
- Metrom’s Grasp
- Chaos Orb
- Expedite Anklet
- Echo Shard
- Tempurus Gem
- Arcanium Crystal
And these are the possible drops:
- Darkblood Staff
- Darkblood Dagger
- Darkblood Spear
- Darkblood Hexer
- Darkblood Sword
- Darkblood Cestus
Arkhaia and Seraphon
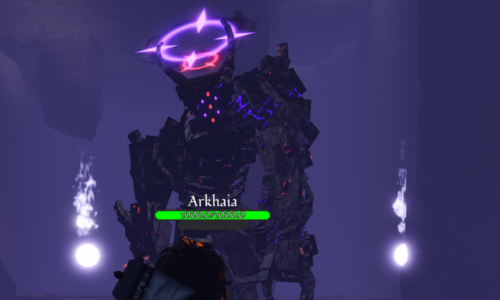
Unfortunately, we do not know much about these bosses at this time, as they are quite rare. They are hard bosses that have a lot of different mechanics, so they are not recommended for beginners and new players, even in a strong party. They are the final bosses at this time of development.
To unlock Arkhaia, you need to reach rank 20 in the Cult of Thanasius. Arkhaia has 7000 HP and has a damage-over-time gimmick that is a bit tricky to deal with. Defeating Arkhaia will give you a choice to start a new character and receive the Inferion race, a powerful and rare starting race in Arcane Lineage.
To unlock Seraphon, you need to reach rank 20 in the Church of Raphion. Seraphon has 4500 HP, and defeating him will give you a choice to start a new character and receive the Sheea race, a powerful and rare starting race in Arcane Lineage.
And that is all for this Arcane Lineage Boss guide. Interested in becoming more powerful? Check out our Complete Arcane Lineage Class tier list and guide.
