
In the thrilling world of Phasmophobia, having the right tools can make all the difference in your ghost-hunting adventures. One of the most unique pieces of equipment in your arsenal is the Sound Recorder. While it may seem tricky at first, mastering this tool is essential for every investigation.
Understanding how to use the Sound Recorder effectively can enhance your gameplay, helping you gather audio evidence crucial for identifying the ghost type. Let’s dive into everything you need to know about the Sound Recorder in Phasmophobia.
What Does the Sound Recorder Do in Phasmophobia?
The Sound Recorder is specifically designed to capture audio evidence unique to Phasmophobia. Since it’s the only tool that can obtain this kind of evidence, using it consistently is vital for maximizing your XP and earning cash during investigations.
Each audio clip you capture goes into your journal, allowing you to replay it and finalize your evidence selection for the contract. You can store up to three pieces of audio evidence per round, so managing your recordings wisely is important.
How to Record Evidence with the Sound Recorder in Phasmophobia
To effectively record evidence with the Sound Recorder, simply hold down the Primary Use button while the device is activated. There are three tiers of this equipment, but the recording method remains consistent across all versions—once you learn how to use one, you’re prepared to use the rest.
How to Use the Tier I Sound Recorder in Phasmophobia

The Tier I Sound Recorder is the simplest version, which makes it the easiest to operate. You can follow the colored lights to zero in on the source of the noise. The goal is to get as many lights to light up green as possible—this indicates clearer audio.
Similar to the Tier II EMF Reader, the light colors provide valuable information: Red shows slight noise, orange indicates medium noise, and green signals loud noise.
How to Use the Tier II Sound Recorder in Phasmophobia
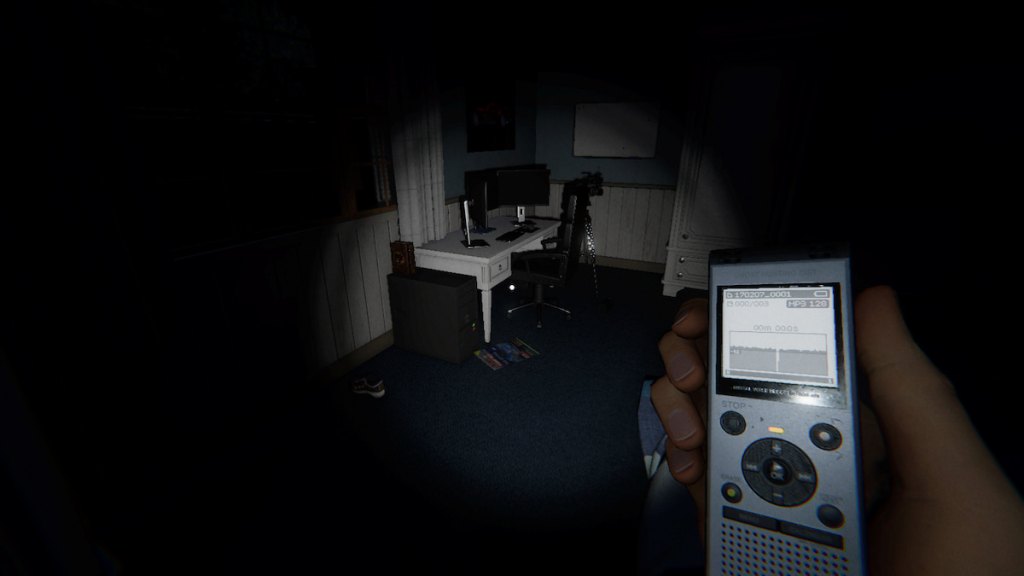
The Tier II version features a small screen with a graph-like structure. Your goal here is to identify spikes in the graph—the higher the peak, the better the captured evidence.
Sound waves appear as dark gray shading. A mostly blank screen indicates no sound, so look for areas with substantial dark gray shading and tall peaks, as these signal a higher volume of noise.
How to Use the Tier III Sound Recorder in Phasmophobia
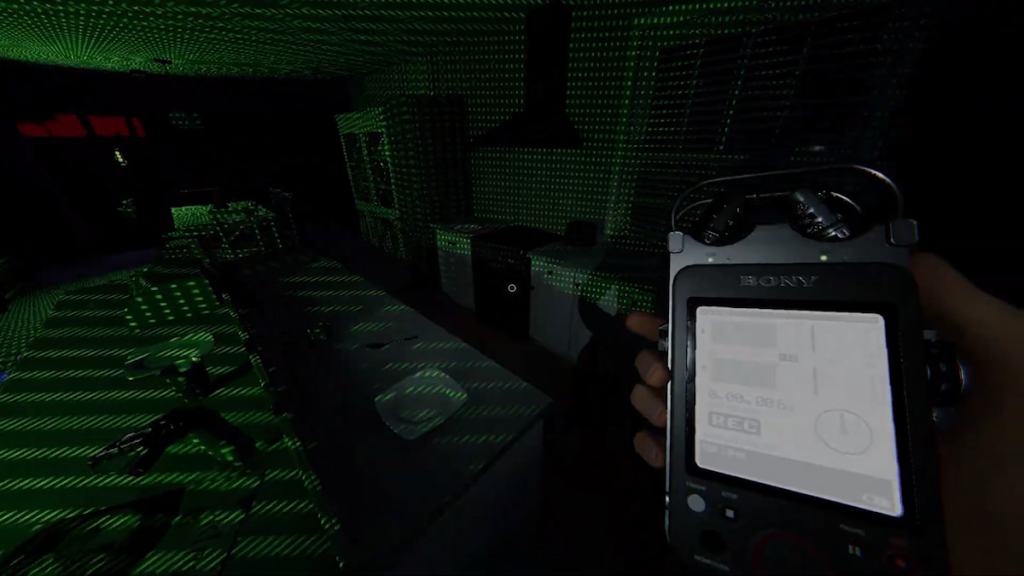
The most advanced option, the Tier III Sound Recorder, displays two bars that track sound direction; the top bar represents the left, while the bottom bar signifies the right. As you detect sounds, one or both bars will spike, guiding you to record clearer audio.
Additionally, there’s a circular, clock-like icon that may point you toward the noise source, acting as a compass. While it can feel complex at first, mastering this tool can significantly enhance your ghost-hunting capabilities.
Which Sound Recorder is Best in Phasmophobia?
Even though the Tier III Sound Recorder offers the most advanced features, many players find the Tier I and Tier II versions more manageable. Ultimately, your choice should align with your personal play style for the most effective use.
If you’re after a powerful yet straightforward option, the Tier III is your best bet. However, the Tier I version boasts an intuitive color system that is easier to monitor during fast-paced gameplay, making it my go-to in many situations.
The Tier II serves as an excellent middle ground, with a bit more functionality than Tier I without being overwhelming like Tier III. Just be aware that it takes a bit longer to power on.
As you get the hang of using the Sound Recorder, consider testing out the weekly challenge mode or exploring the Music Box to further enhance your ghost-hunting skills.
By mastering the Sound Recorder, you’ll significantly improve your investigations in Phasmophobia. Ready to dive deeper? Explore further insights into tools and strategies at Moyens I/O.