
Minecraft is introducing an exciting new way to store and showcase your items: shelves! This feature allows you to store multiple items at once, potentially making item frames less relevant. Plus, these shelves can be activated with Redstone signals, offering automation for your storage needs. Let’s dive into how to craft a shelf in Minecraft and how you can effectively use it.
Before we get started, it’s important to note that shelves are currently in the experimental phase, available in Minecraft Preview build 1.21.110.20 and later. This means you’re getting a sneak peek at a feature still in development, perfect for adventurous players like you!
Items Required to Make a Shelf
To craft a shelf in Minecraft, you will only need one type of material: six matching stripped logs (from any wood type). Not sure how to obtain stripped logs? It’s simple! Equip an axe and approach any tree. Right-click, and voilà, you’ll have stripped logs. Repeat this for each tree log until you have the required amount. Don’t forget to gather those blocks by pressing the left mouse button!
Additionally, you’ll need a crafting table to create your shelf. Once you have everything ready, let’s move on to crafting.
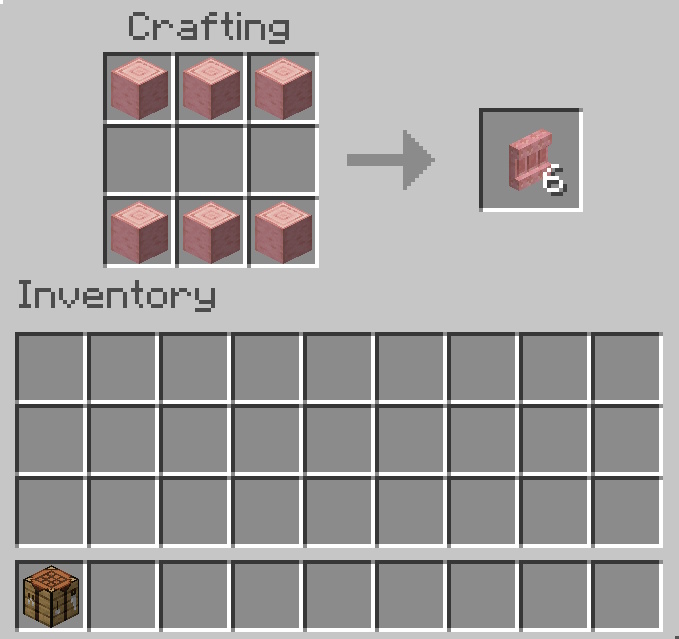
How to Craft a Shelf in Minecraft
Crafting a shelf in Minecraft is a straightforward process. Just follow these steps:
- Place the crafting table on the ground and right-click to access the crafting UI.
- Fill the first and third rows with three stripped logs of the same type.
- Once you do this, you’ll see six shelves pop up on the right side of the crafting table. Drag these into your inventory.
How to Use a Shelf in Minecraft
After you’ve crafted your shelves in Minecraft Preview 1.21.110.20, you have two ways to utilize them. Whether you prefer to place items manually or automate the process using Redstone, you’re covered.
1. Manually Swap Items
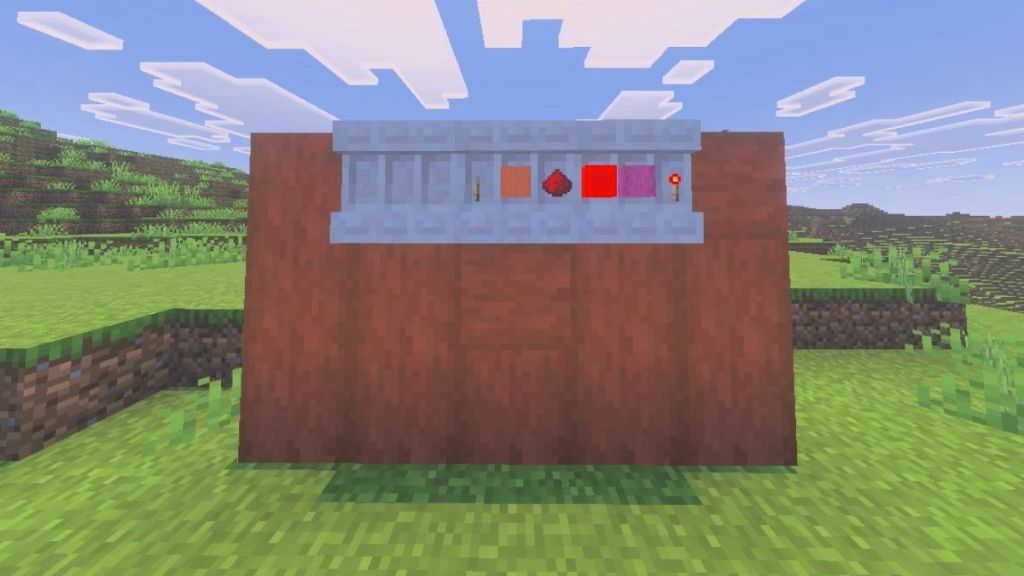
To start using your shelves, just place them on the walls of your base. Everything is done manually. If you hold an item and right-click on the shelf, it will swap the item with whatever is in the cell you’re pointing at. If the cell is empty, your item will be stored there.
You can fill all three cells by repeating this step. This feature allows you to manage your storage efficiently, ensuring that your shelves are always stocked just the way you want them.
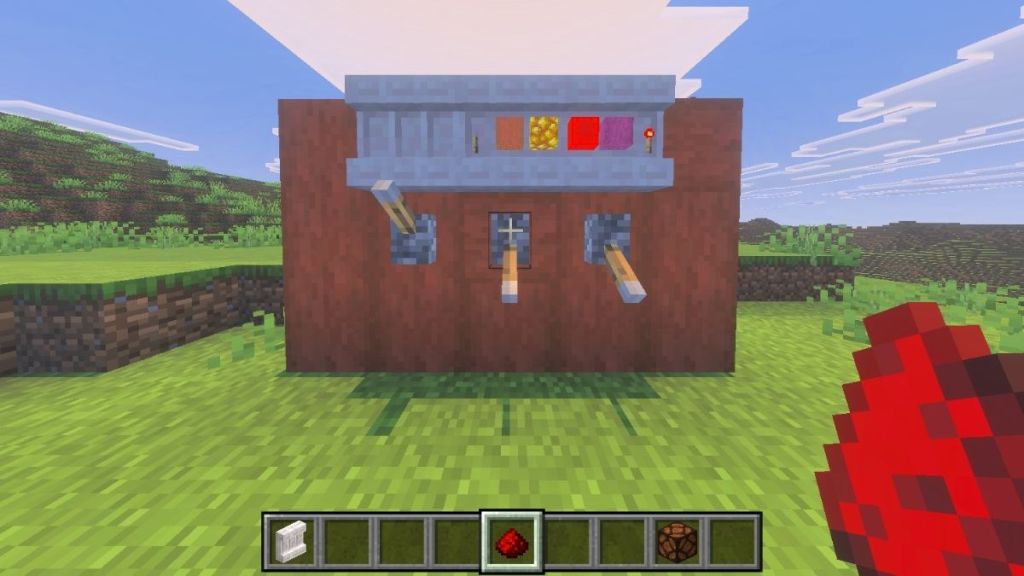
2. Activate Shelf with Redstone
The alternative method involves using a Redstone signal. Place a lever on an adjacent block or use Redstone powder along with a Redstone torch. When activated, the shelves will no longer show distinct cells.
Positioning two activated shelves next to one another will combine them, allowing the two to work together. You can even link up to three shelves with this method if all are powered by Redstone.
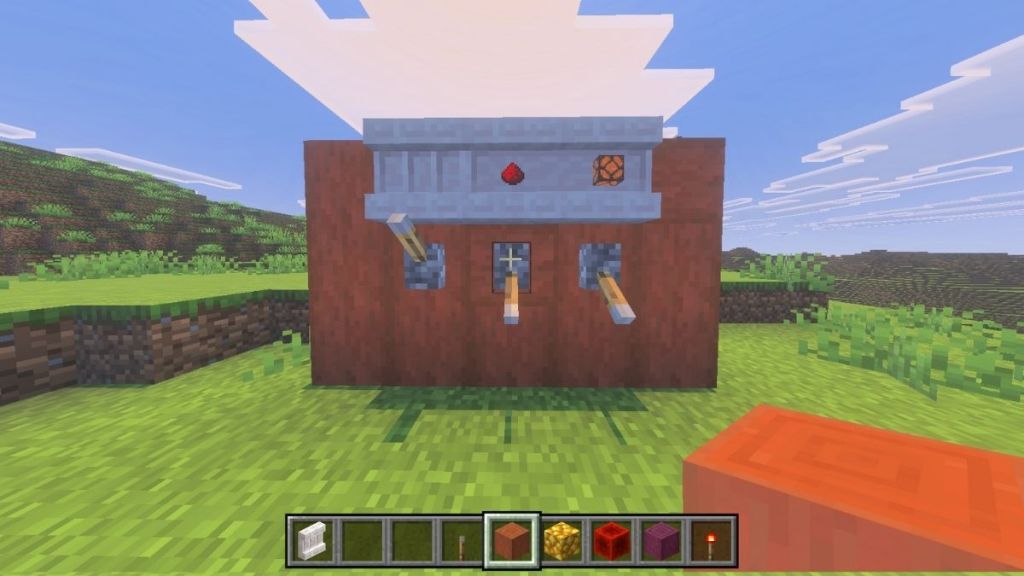
Once you’ve set this up, just right-click any of the activated shelves, and the items on the right side of your hotbar will swap with the items stored in the shelves. Here’s a quick rundown:
- 1 activated shelf: Swaps the 3 rightmost items from your hotbar.
- 2 activated shelves: Swaps the 6 rightmost items from your hotbar.
- 3 activated shelves: Swaps all 9 items from your hotbar.
Using shelves in Minecraft adds a new layer of organization and accessibility for your items. Have you had the chance to try out this new feature? Share your thoughts with us below!
What are the benefits of using shelves in Minecraft? Shelves allow for more organized storage of items and the ability to automate item swapping, enhancing your gameplay experience.
How can I craft a shelf in Minecraft? To craft a shelf, gather six stripped logs of the same type and use a crafting table to arrange them as specified.
Are shelves in Minecraft compatible with Redstone? Yes, shelves can be activated with Redstone signals, enabling automated item swapping.
In conclusion, shelves are a fantastic addition to your Minecraft arsenal, offering both functionality and style. If you’re curious to explore more features or tips, take a look at additional content at Moyens I/O.