
If you’re leveling up in Destiny 2‘s Guardian Ranks during The Edge of Fate, hitting rank four can seem daunting. To move forward, you’ll need to utilize both a faction drop modifier and a faction unit modifier. These modifiers can significantly impact your gaming experience, so let’s dive into how to implement them effectively.
As you navigate through the variety of modifiers available in the Portal, it’s easy to get overwhelmed, especially if you’re trying to juggle several effects at once. Both faction drop modifiers and faction unit modifiers increase the power of your enemies, enhancing the challenge. However, keep in mind that you can’t choose these modifiers if your activity has locked effects. Here’s an overview of how to use them.
1. How to Use a Faction Drop Modifier in Destiny 2’s Portal
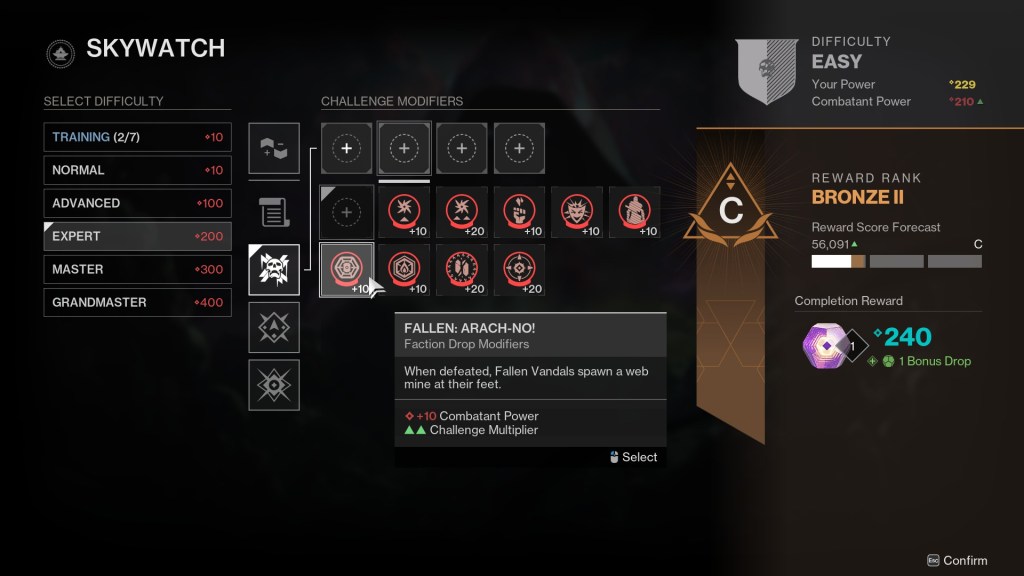
Faction drop modifiers and faction unit modifiers can be applied to multiple activities, but you can only use them in Expert-level runs and above, where your foes will be at least 200 power. You can add these modifiers after progressing through the Bane section, alongside other negative effects like threats, Chill Touch, and Counterfeit. Here’s how they function:
Faction drop modifiers introduce harmful effects that occur when you defeat specific enemy types. They align with the main faction you’re engaging with in a given activity.
- Fallen: Arach-No! (+10): Enemies drop Spider Mines upon defeat.
- Taken: Epitaph (+10): Defeated Taken enemies release Blight geysers.
- Vex: Shocker (+10): Goblins create Arc pools when killed.
- Hive: Fire Pit (+10): Acolytes generate fire pools upon death.
- Scorn: Festering Rupture (+10): Scorn Stalkers spawn mini-Screebs when defeated.
- Cabal: Pestilence (+10): Psions release Void grenades at their feet upon defeat.
2. How to Use a Faction Unit Modifier in Destiny 2’s Portal
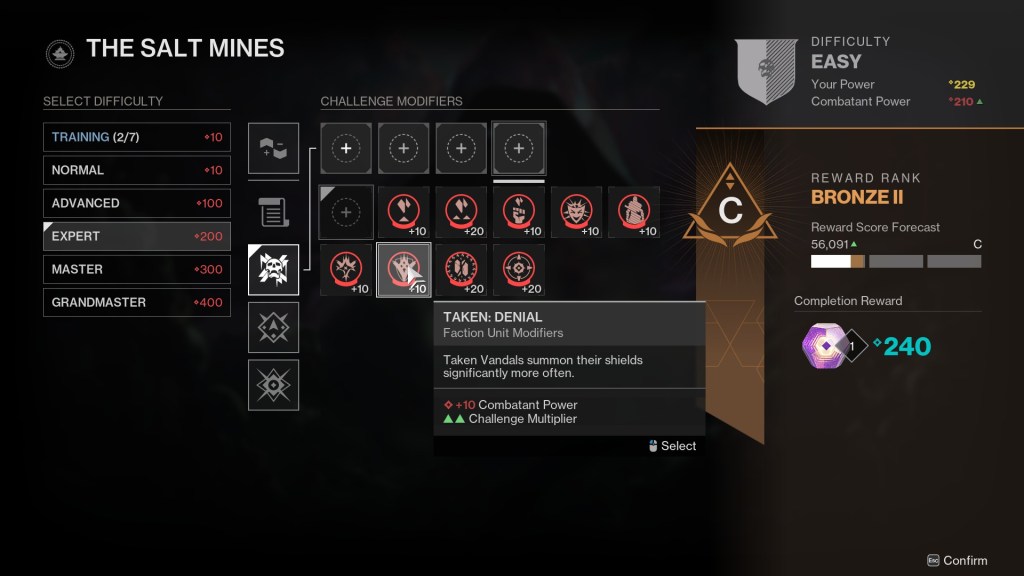
Faction unit modifiers influence how specific enemies behave, which can substantially alter your strategy during gameplay. Although they might seem similar in danger, their effects can stand out during a mission.
- Fallen: Hot Knife (+10): Shanks are equipped with Solar shields.
- Taken: Denial (+10): Taken Vandals are more frequent in using their shields.
- Vex: Air Superiority (+10): Affected flying units deal increased damage.
- Hive: Martyr (+10): Exploding Hive units boast greater health.
- Scorn: Raider Shield (+10): Scorn Raiders gain Void shields.
- Cabal: Scorched Earth (+10): Enemies will toss grenades more frequently.
Interestingly, there’s no specific score requirement for advancing from Guardian Rank four. You will complete the objective as long as you apply the required modifiers, regardless of your current reward tier.
What happens if I forget to apply a modifier? If you skip using the required modifiers, you won’t be able to progress. Always make sure to slot them in before you start your run.
How do I check what modifiers are currently active? You can view your active modifiers in the game’s Portal menu, which shows all the chosen effects that will influence your session.
Can I switch modifiers during an activity? No, policy in Destiny 2 requires you to select your modifiers before starting an activity, and changes can’t be made mid-run.
Ready to take your Guardian Rank to the next level? Understanding and effectively using modifiers can greatly enhance your gaming experience. Explore more strategies and tips on Moyens I/O as you continue your Destiny 2 journey.