
Updated on July 25, 2025: Added Artorias and new Survivor items and perks from the Abysswalker update. All Killer Perks ranked coming soon.
Violence District offers a gaming experience that aligns closely with the thrilling essence of Dead by Daylight, compared to Roblox’s Forsaken. Players need to consider mobility and potential capture when selecting their characters. The best Killers often exhibit superior mobility and capture abilities, while Survivors thrive on team utility. Let’s dive into the Violence District Killer and Survivor tier list and guide for optimal gameplay.
All Killers, Items, and Perks in Violence District Ranked
In the realm of Violence District, all categories of Killers and Survivor Perks and Items are ranked against each other within their respective tiers. S and A Tiers are your best choices. B-Tiers can be situational, while C and D Tiers usually present weak options. Notably, a strong Killer may appear in C or D due to the current meta. I’ll break down the top Killers and their perks for you.
All Killer Perks Ranked: This section is coming soon, but I’ll outline the best Killer Perks available from each character.
Survivor Tip: Remember to heal each other. This mechanic can be exploited for easy Survivor wins, especially with teams of 4 or 5 players. Plus, the more Survivors heal each other, the stronger The Killer becomes.
S-Tier
| S-Tier | Ranking Explained |
|---|---|
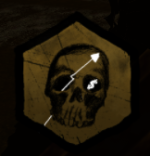
 The HiddenKiller |
• Considered the top killer in Violence District thanks to its incredible mobility. The Mark dash can hit multiple enemies and grants wallhack visibility on those hit. Leap enables quick navigation over obstacles. Both abilities have low cooldowns, making it immensely versatile for chasing and camping. Overall, this Killer lacks any glaring weaknesses. Best Perk: Next in Line – A Hidden Perk that provides useful information. |
 Parrying DaggerSurvivor Item |
• Potentially the best item if used correctly. Timing is key; you can’t spam it, as Killers are getting savvy to baiting. A cooldown of 40 seconds adds further complexity. |
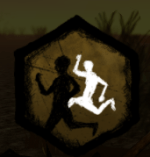
 Grab My HandSurvivor Perk |
• This Perk is unmatched for team utility, enhancing the win chances for Survivors significantly. |
 Great CollapseSurvivor Perk |
• Perfect for making a quick escape; whether dropping an obstacle or parrying with the Dagger, this Perk significantly boosts your speed. |
 Time to Grow UpSurvivor Perk |
• Effective at higher ranks. If you can reach an obstacle after being hit, this Perk shines, otherwise, it’s just A or B Tier. |
A-Tier
| A-Tier | Ranking Explained |
|---|---|
 The SlasherKiller |
• A surprisingly effective free killer with speed boosts and movement utility. Mist aids repositioning, while Pursuit grants a speed boost for aggressive chases. However, lower reach and high cooldowns hold it back from S-Tier. Best Perk: Brutal Strength – Fast-clearing obstacles makes it invaluable. |
 The AbysswalkerKiller |
• A powerful option with high-risk, high-reward gameplay. Master Dark Severance for multiple downing potential. Abyssal Burst provides excellent range and visibility, but timing is key. Best Perk: Abyssal Covenant – Essential for slowing down and revealing enemies. |
 The MaskedKiller |
• Versatility in masks determines effectiveness. Some masks boost movement speed while others affect your attack range significantly. Best Perks: Hard Swing or Combo Streak – The best options for pure aggression. |
 High KarmaSurvivor Perk |
• Provides rapid movement freedom post-rescue, enhancing overall team performance. |
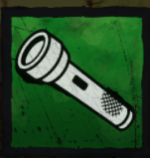 FlashlightSurvivor Item |
• Still a great utility item despite nerfs; effective when used strategically at opportune moments. |
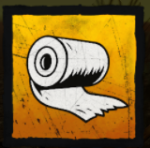 BandageSurvivor Item |
• An underrated option for self-sustain, beneficial for risky moves involving generators. |
B-Tier
| B-Tier | Ranking Explained |
|---|---|
 The StalkerKiller |
Getting reworked soon; updates will come later. • While it struggles at Tier 2, reaching Tier 3 grants exceptional speed and the second-highest Lunge. |
 GateSurvivor Item |
• While situational, it provides utility for escapes and mobility, excellent for planning defensive tactics. |
 On My OwnSurvivor Perk |
• Very useful when playing solo; less effective in coordinated teams, but shines in random encounters. |
C-Tier
| C-Tier | Ranking Explained |
|---|---|
 The KillerKiller |
• IMPORTANT: The Killer is actually strong but sits in C-Tier due to his lack of synergy with the current healing meta. His anti-heal abilities need a better player response to be effective. Best Perk: Sloppy Mess – Essential for tracking and healing prevention. |
 PacifistSurvivor Perk |
• Becomes valuable at higher ranks in teams that prioritize healing each other; otherwise, it may not shine much. |
 Twist of FateSurvivor Item |
• More situational; best utilized early when there are ample players. Current buffs have improved its reliability. |
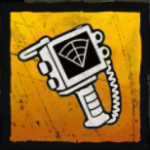 Motion TrackerSurvivor Item |
• Its potential is diminished if players are using headphones; awareness can render it pointless. |
 Heads UpSurvivor Perk |
• Decent for final generators, but not very powerful unless at Rank 3. |
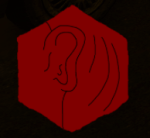
 Snake StepSurvivor Perk |
• Useful mostly at Rank 3 against attentive Killers who pay close attention to footsteps. |
D-Tier
| D-Tier | Ranking Explained |
|---|---|
 We’re Stronger TogetherSurvivor Perk |
• The speed boost offered is underwhelming, rendering it nearly useless in practice. |
 Left BehindSurvivor Perk |
• Limited utility; better options are available, so it’s often overlooked. |
 Nobody Left BehindSurvivor Perk |
• Engaging in healing activities once the doors open is integral; it’s better to run and juke instead. |
That covers the Violence District Killer and Survivor tier list and guide. For more insights and strategies, explore our dedicated Roblox section at Moyens I/O.