
When you delete an app on your Mac, you might expect it to be completely removed from your system. However, in some cases, you’ll still find traces of the app on your Mac.
For instance, you may notice the app’s icon on your Mac’s Launchpad or Dock. Fortunately, there are a few quick fixes to eliminate the app completely.
1. Restart Your Mac
Although this step might seem basic, restarting your Mac can eliminate most common macOS problems. Sometimes, the most straightforward solutions can be the most effective. Restarting your Mac can clear temporary caches and refresh the system, often resolving minor glitches. Here’s how to restart your Mac:
- Click the Apple logo in the top-left corner of the menu bar.
- Select Restart or Shut Down.
- A prompt will appear asking if you’d like to Reopen windows when logging back in. Uncheck this option.

If your Mac is glitching and isn’t responding to any menu bar options, you can force it to restart by pressing and holding the Power button and the Command and Control keys until it turns off.
However, if this doesn’t work, you can force your frozen Mac to shut down by holding down the Power button until your device’s screen goes black. Once you’ve restarted your device, check if the deleted app still appears.
2. Use the App’s Built-In Uninstaller
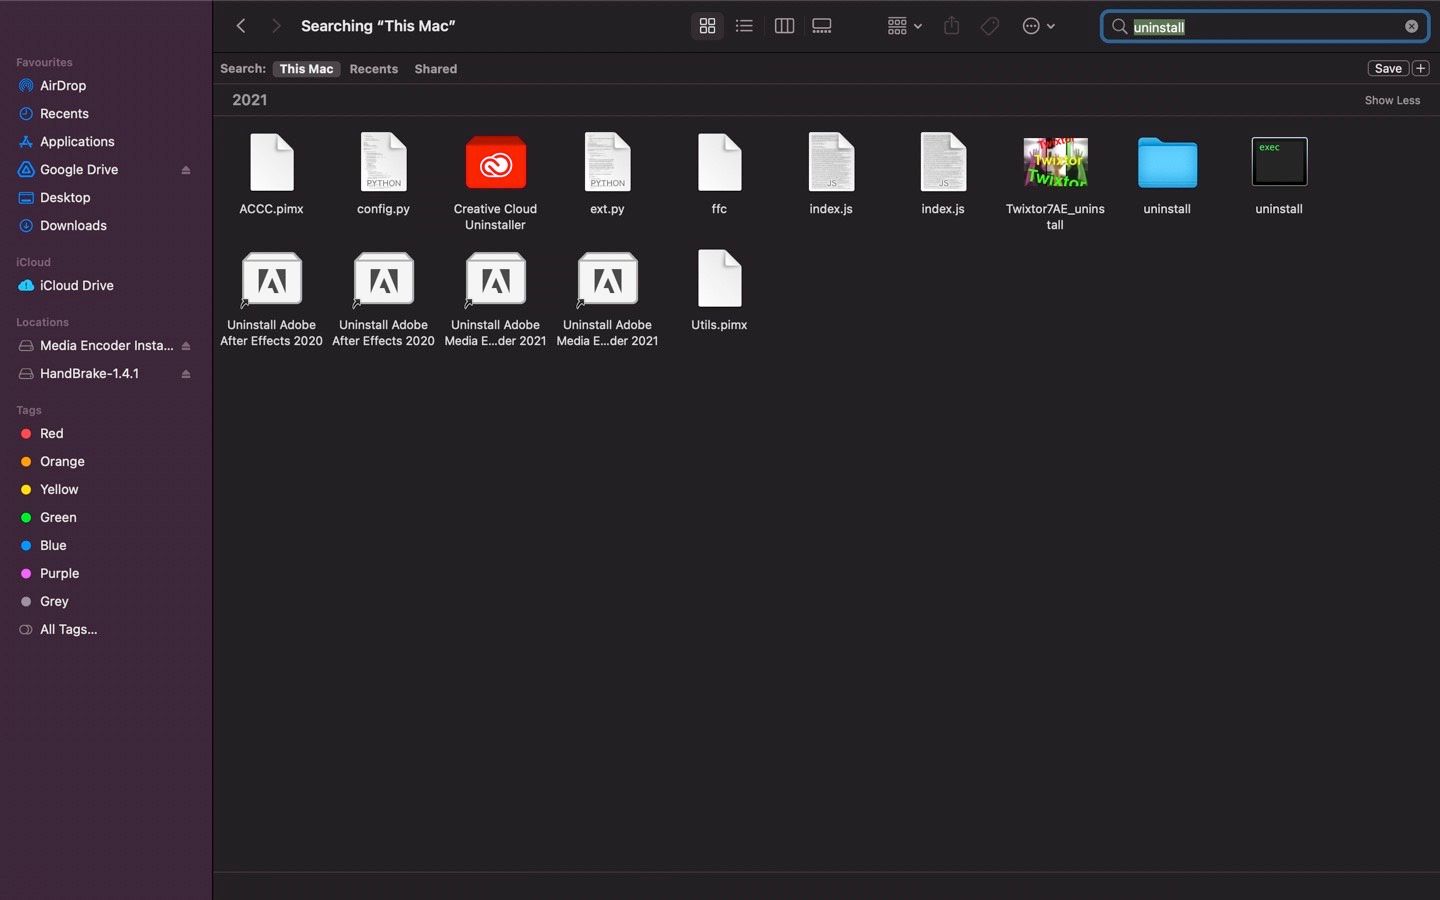
If you’ve downloaded a third-party app from somewhere other than the App Store, using its built-in uninstaller usually does the trick and deletes the app for good. To find an app’s uninstaller using Finder, follow these steps:
- Launch Finder.
- Type “Uninstall” in the search bar. To find the uninstaller quicker, type the app’s name as well. For example, if you want to uninstall Adobe Creative Cloud, you’ll need to use its dedicated uninstaller. In this case, type “Uninstall Adobe” in the search bar, and a folder will appear.
- Once you find the app’s built-in uninstaller, click it. A pop-up window may appear prompting you to enter your Mac’s password.
3. Clear Your Mac’s Cache
Caches are temporary storage locations where macOS stores frequently accessed data to speed up various processes and improve system performance. When you delete an app, the associated cache files are not always deleted. Therefore, a quick way to ensure a deleted app doesn’t leave traces behind is to clear your Mac’s cache by following these steps:
- Open Finder and click Go in the menu at the top of the screen.
- Select Go to Folder from the dropdown and type ~/Library/Caches in the textbox that appears. Then, press Return.
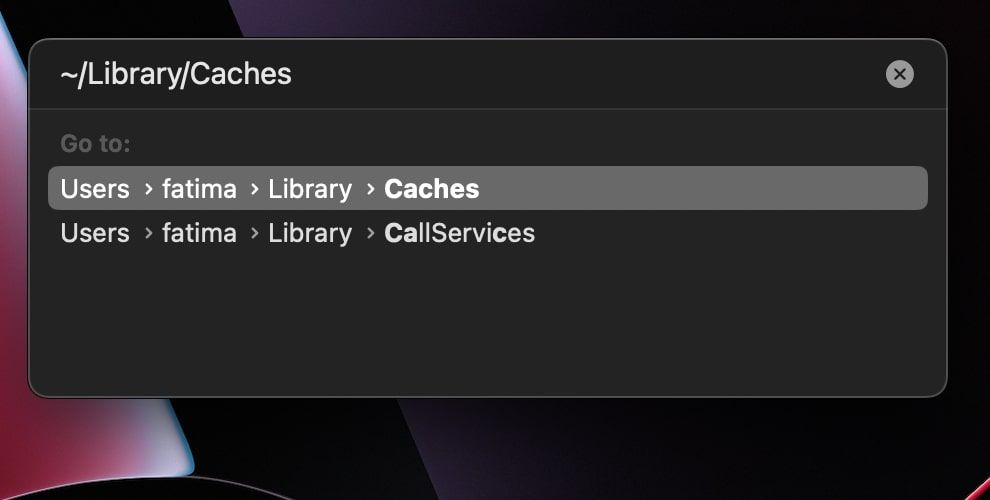
- Locate the files or the folder containing the deleted application’s name and delete them.
4. Delete the App Directly from Launchpad
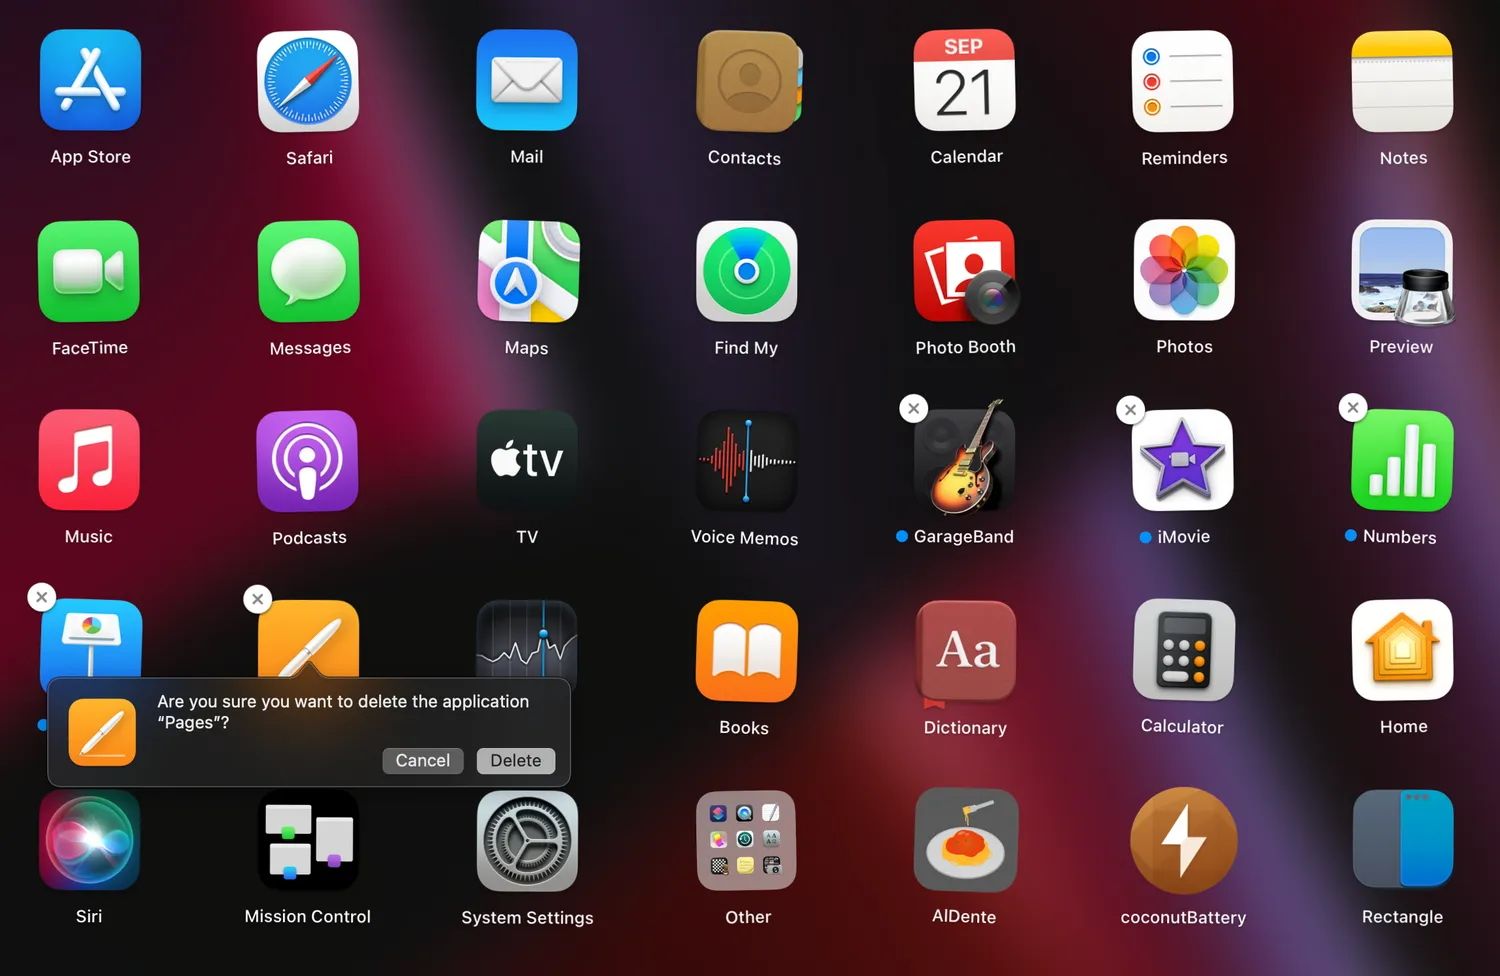
If you’ve downloaded an app from the App Store, we recommend deleting it directly from the Launchpad on your Mac. Here’s how:
- Click the Launchpad icon on your Mac’s Dock.
- Click and hold the stuck app’s icon until all icons start to wiggle.
- Click the X button that appears at the top-left corner of the app’s icon.
- When you get a confirmation prompt, select Delete.
5. Delete the App Using Terminal
If you’re encountering a stubborn, unresponsive app on your Mac that refuses to delete through traditional methods, you can get the job done via Terminal. While this method effectively deletes stuck apps and their related data from the root directory, you must use Terminal commands carefully. Begin by launching Terminal from Applications > Utilities.
Now, paste the following command into the Terminal window and press Return:
cd /Applications/Next, type the following command and add a space at the end of it.
sudo rm -rfNow, drag the stuck app to the Terminal window and press Return. Terminal will prompt you to enter your administrator password to confirm the deletion. Simply input your password, and the app will be deleted from your Applications folder.
6. Reset Launchpad
If deleting the app directly from the Launchpad didn’t work, try resetting the Launchpad. However, resetting Launchpad will restore its default layout and remove any custom app organization. Therefore, only proceed if you’re comfortable with that.
Launch Terminal and enter the following command:
defaults write com.apple.dock ResetLaunchPad -bool true; killall Dock.Press the Return key and enter your Mac’s administrator password. After entering the command, the Dock will restart, and Launchpad will reset to its default state. This process should only take a few seconds.
7. Remove the Residual Files
When you uninstall an app, macOS often leaves behind residual files such as preferences, caches, and other app-specific data. These files, although not part of the main application, can accumulate over time and clutter your system. Here’s how to remove every last trace of an app and ensure it no longer shows up on your Mac:
- Open Finder and click Go > Go to Folder from the menu bar. Alternatively, you can use the keyboard shortcut Shift + Command + G.
- Type the following file paths into the dialogue box one at a time and hit the Return key. Next, look for any files of the stuck application and delete them.
- ~/Library/Preferences/
- ~/Library/Caches
- ~/Library/Containers
- ~/Library/Logs
- ~/Library/Cookies
- ~/Library/ApplicationSupport/
- ~/Library/Application Support/CrashReporter
- ~/Library/LaunchAgents/
- ~/Library/LaunchDaemons/
- ~/Library/AddressBookPlug-Ins
- Now, type ~/Library/Receipts/ into the dialogue box and delete any files that have the .pkg extension
- Click the Apple logo in the top-left corner of the menu bar and choose System Settings from the dropdown.
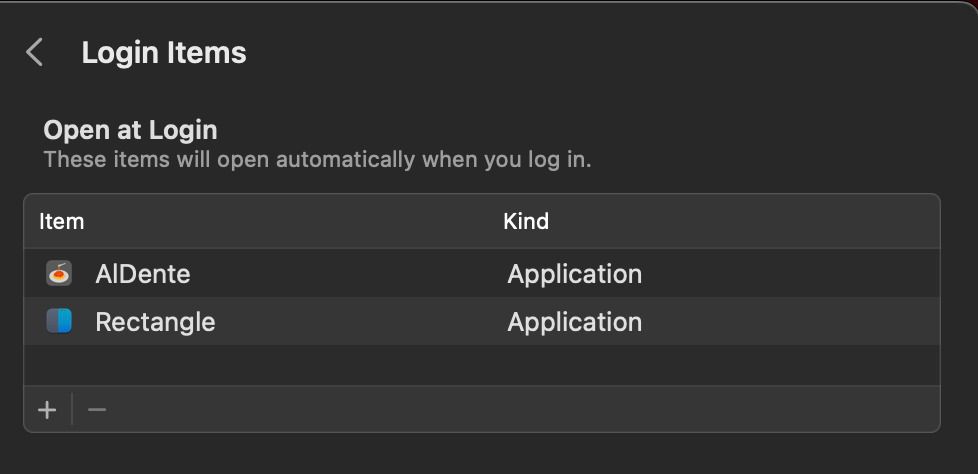
- Now, select General in the sidebar and click Login Items on the right. Look for any files of the app you’re trying to remove and click the minus (-) button to delete them.
- Lastly, conduct a final search by typing the app’s name in the Finder search and delete any files that appear.
8. Delete the Stuck App Using Finder
If you’ve tried to remove the app using its dedicated uninstaller and it’s still stuck, you can try to delete it using Finder.
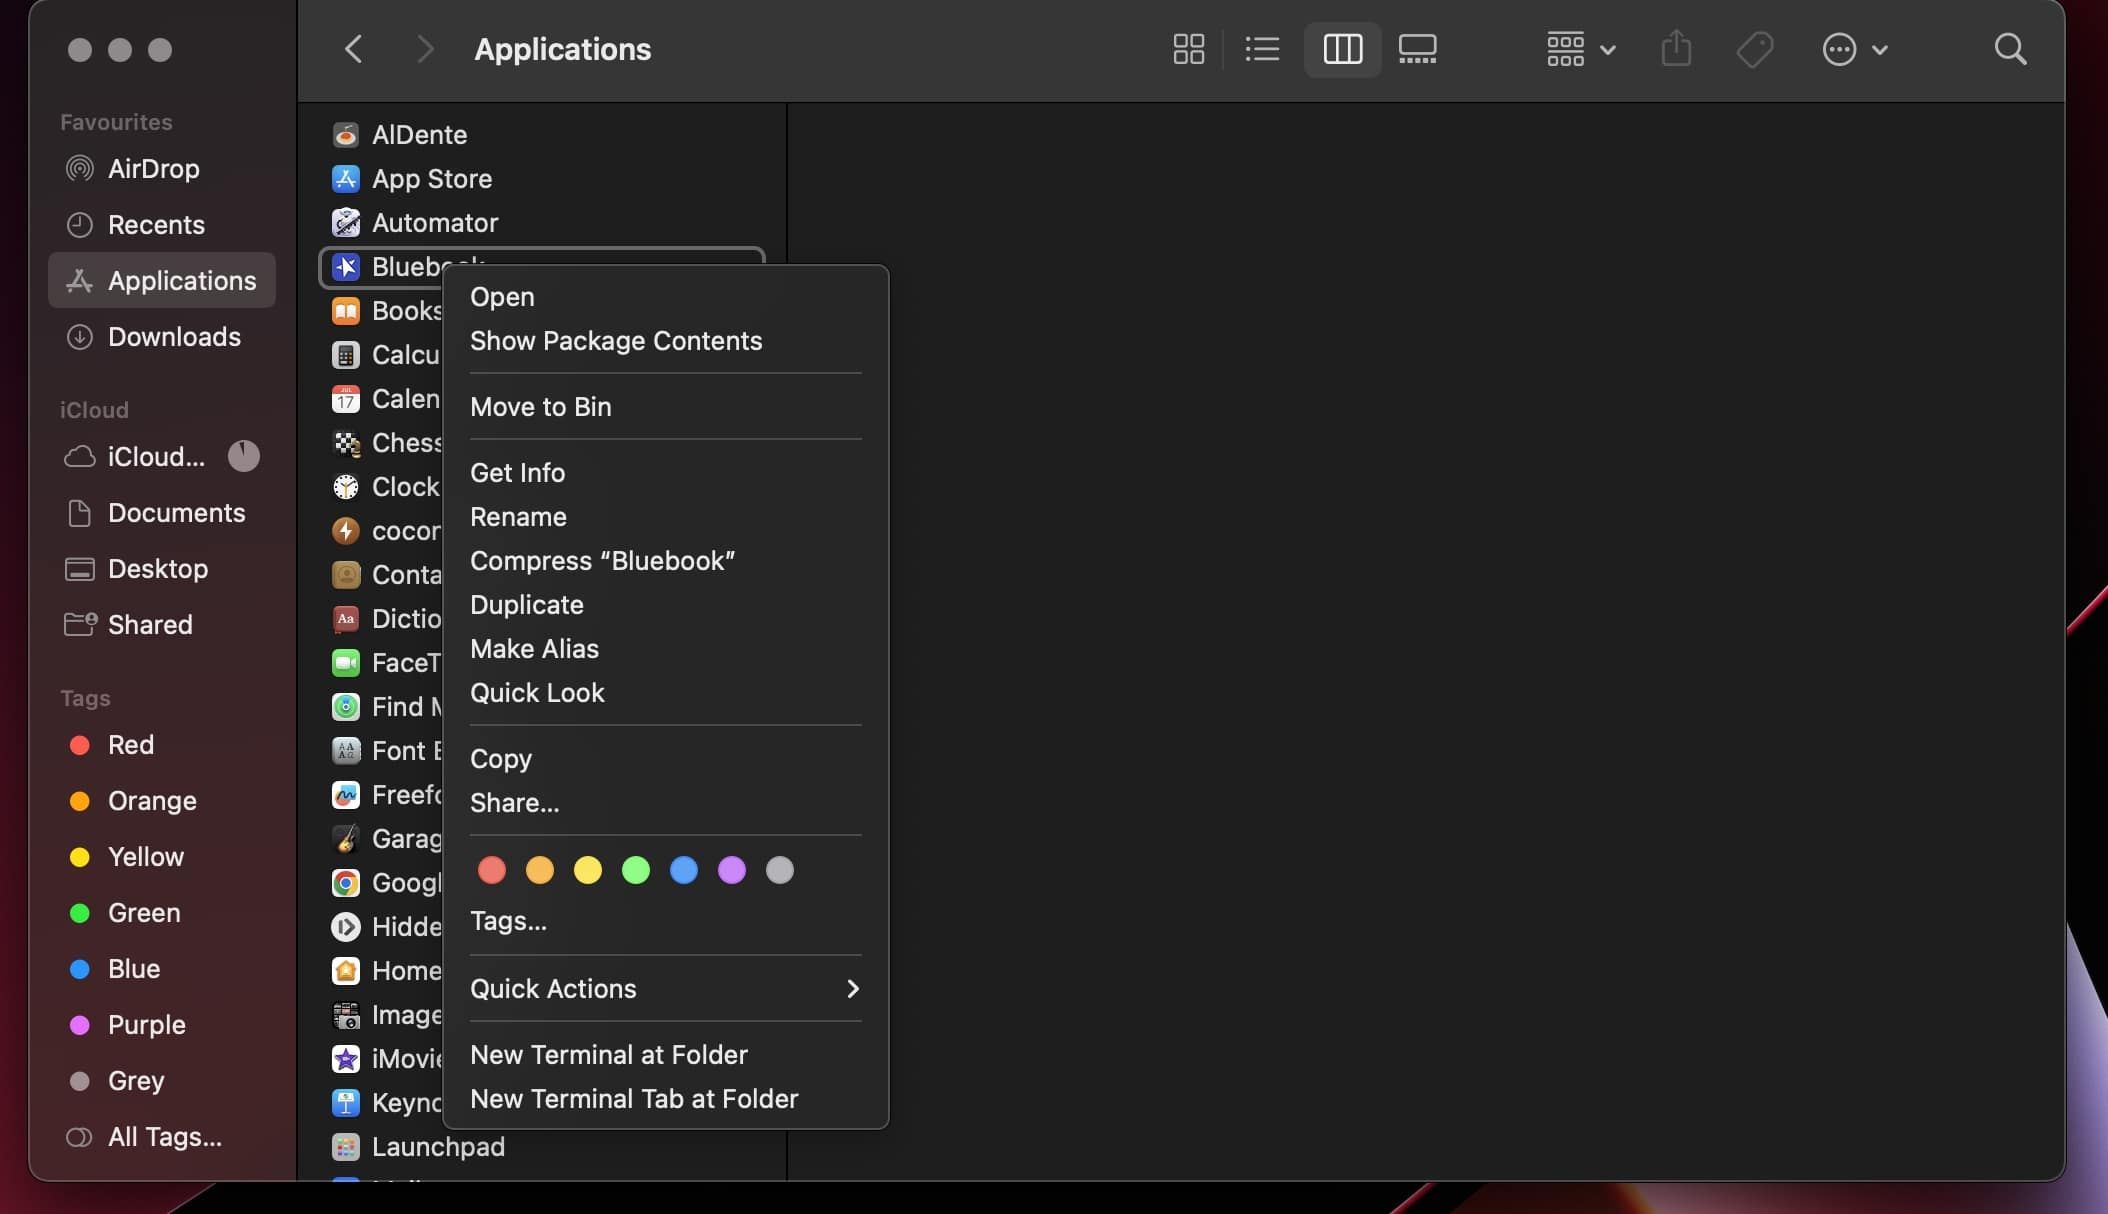
All you need to do is launch Finder and head to the Applications folder. Then, once you find the stuck app in the folder, Control-click it and select Move to Trash.
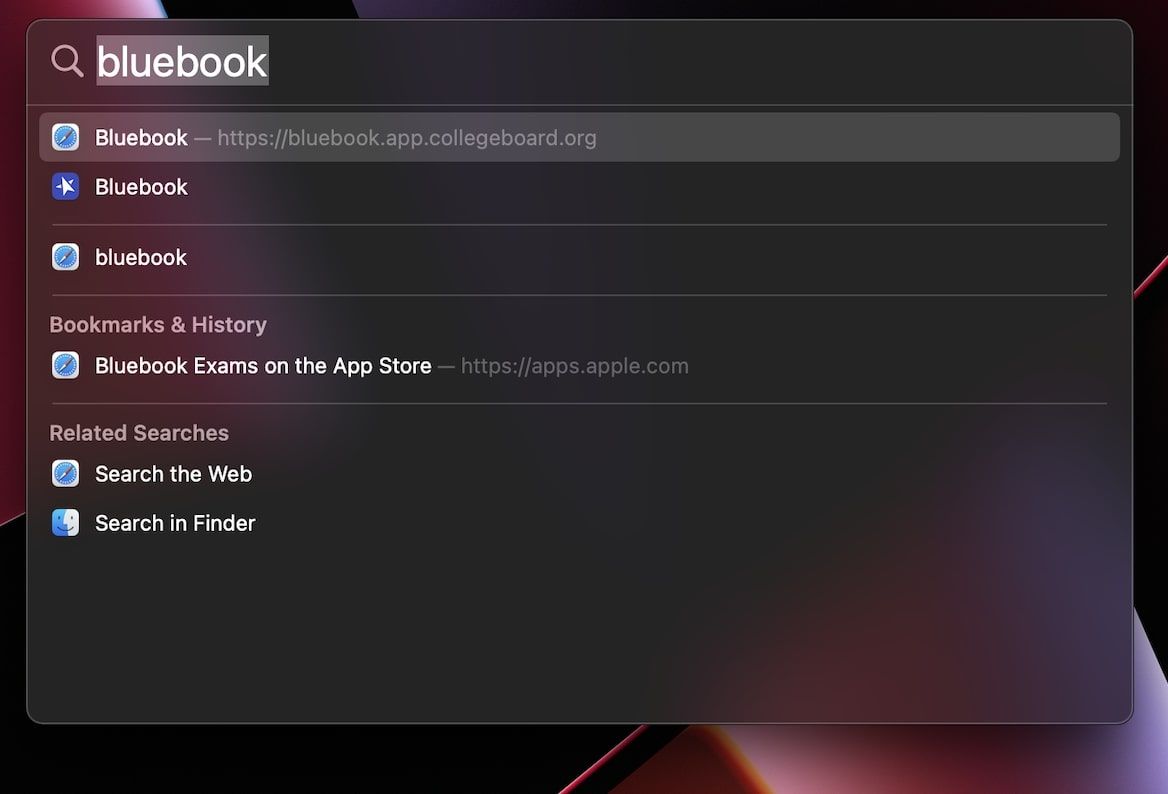
9. Delete the App’s Data From Spotlight Search
Dragging an app and dropping it into the Trash icon in the Dock does not guarantee that associated files and data are gone. To ensure that deleted app data doesn’t appear in Spotlight search, follow these steps:
- Press Command + Space to open Spotlight search on your Mac.
- In the Spotlight search bar, type the name of the deleted app. Long-press the Command key.
- Control-click on the deleted app’s file and select Move to Trash.
Successfully Get Rid of Deleted Mac Apps
As you can see, you have several ways to deal with this issue and to ensure the stuck app is gone for good. Although these troubleshooting steps will not harm your Mac, we recommend using Terminal to delete an app only if all other methods fail.
In some cases, you may need to remove all the residual files to get rid of an app completely from your Mac.