
UltiMaker Cura is one of the most popular 3D printing tools found online. This simple piece of slicer software enables you to turn a regular 3D model into a set of instructions that your 3D printer understands, but what happens if something goes wrong? Let’s learn about some of the most common Cura errors and how you can solve them.
How Do You Fix Model Errors in Cura?
Cura is very good at its job, and this means that there is usually something wrong with your 3D model if it throws an error at you. Fixing 3D model errors in Cura can be as simple as pressing the Repair button, but you may have to use 3D modeling software to fix the problems with your 3D model.
Cura is designed for FDM 3D printing, and this means that you need a different slicer tool to print with a resin printer. You can learn how to use Lychee for resin 3D printing along with loads of other slicers online.
1. Cura Won’t Slice 3D Models
Cura’s “Unable to slice” error is just as common as it is frustrating. It tells you little about the actual problem you’re facing, leaving you to figure it out for yourself. In a lot of cases, this error occurs because your 3D model is too large for your build surface, and you need to make it smaller to fit.
If changing the scale of your 3D model doesn’t work, there are several other things to check before you give up.
- Restart Cura: Cura is great at what it does, but it does have a few bugs. If you see an “Unable to slice” warning and can’t figure out the cause, close and restart Cura to give it a chance to reset. If this fails, try the process again but restart your computer as well as Cura.
- Update Cura: UltiMaker is working hard to remove the bugs from Cura, and this means that regular updates roll out to improve the software. Cura will display a message at the bottom of the screen when it is ready for an update. If you see this, click on Download and install the latest version before trying to slice again.
- Repair Your 3D Model: Unlike other slicer tools, Cura doesn’t have an auto-repair tool to fix model errors that stop it from printing. It will usually tell you what is wrong with your model, but you will have to find another piece of software to fix it. You can use your regular 3D modeling software or a dedicated 3D model repair tool for this.
2. How to Fix 3D Model Not Manifold in Cura

Learning that your model is not manifold is a common problem in Cura, but what does this actually mean? A non-manifold model is one which has intersecting geometry or geometry that shares the same space.
For example, you have a manifold cube with six faces that all point outwards and eight vertices (one for each corner). You extrude one of the vertices, but you don’t change its position, leaving it to occupy the same space as the original vertex. The cube is now non-manifold, and Cura may refuse to slice it. 3D models with holes or gaps are also non-manifold.
How to Fix 3D Model Not Manifold Using Blender
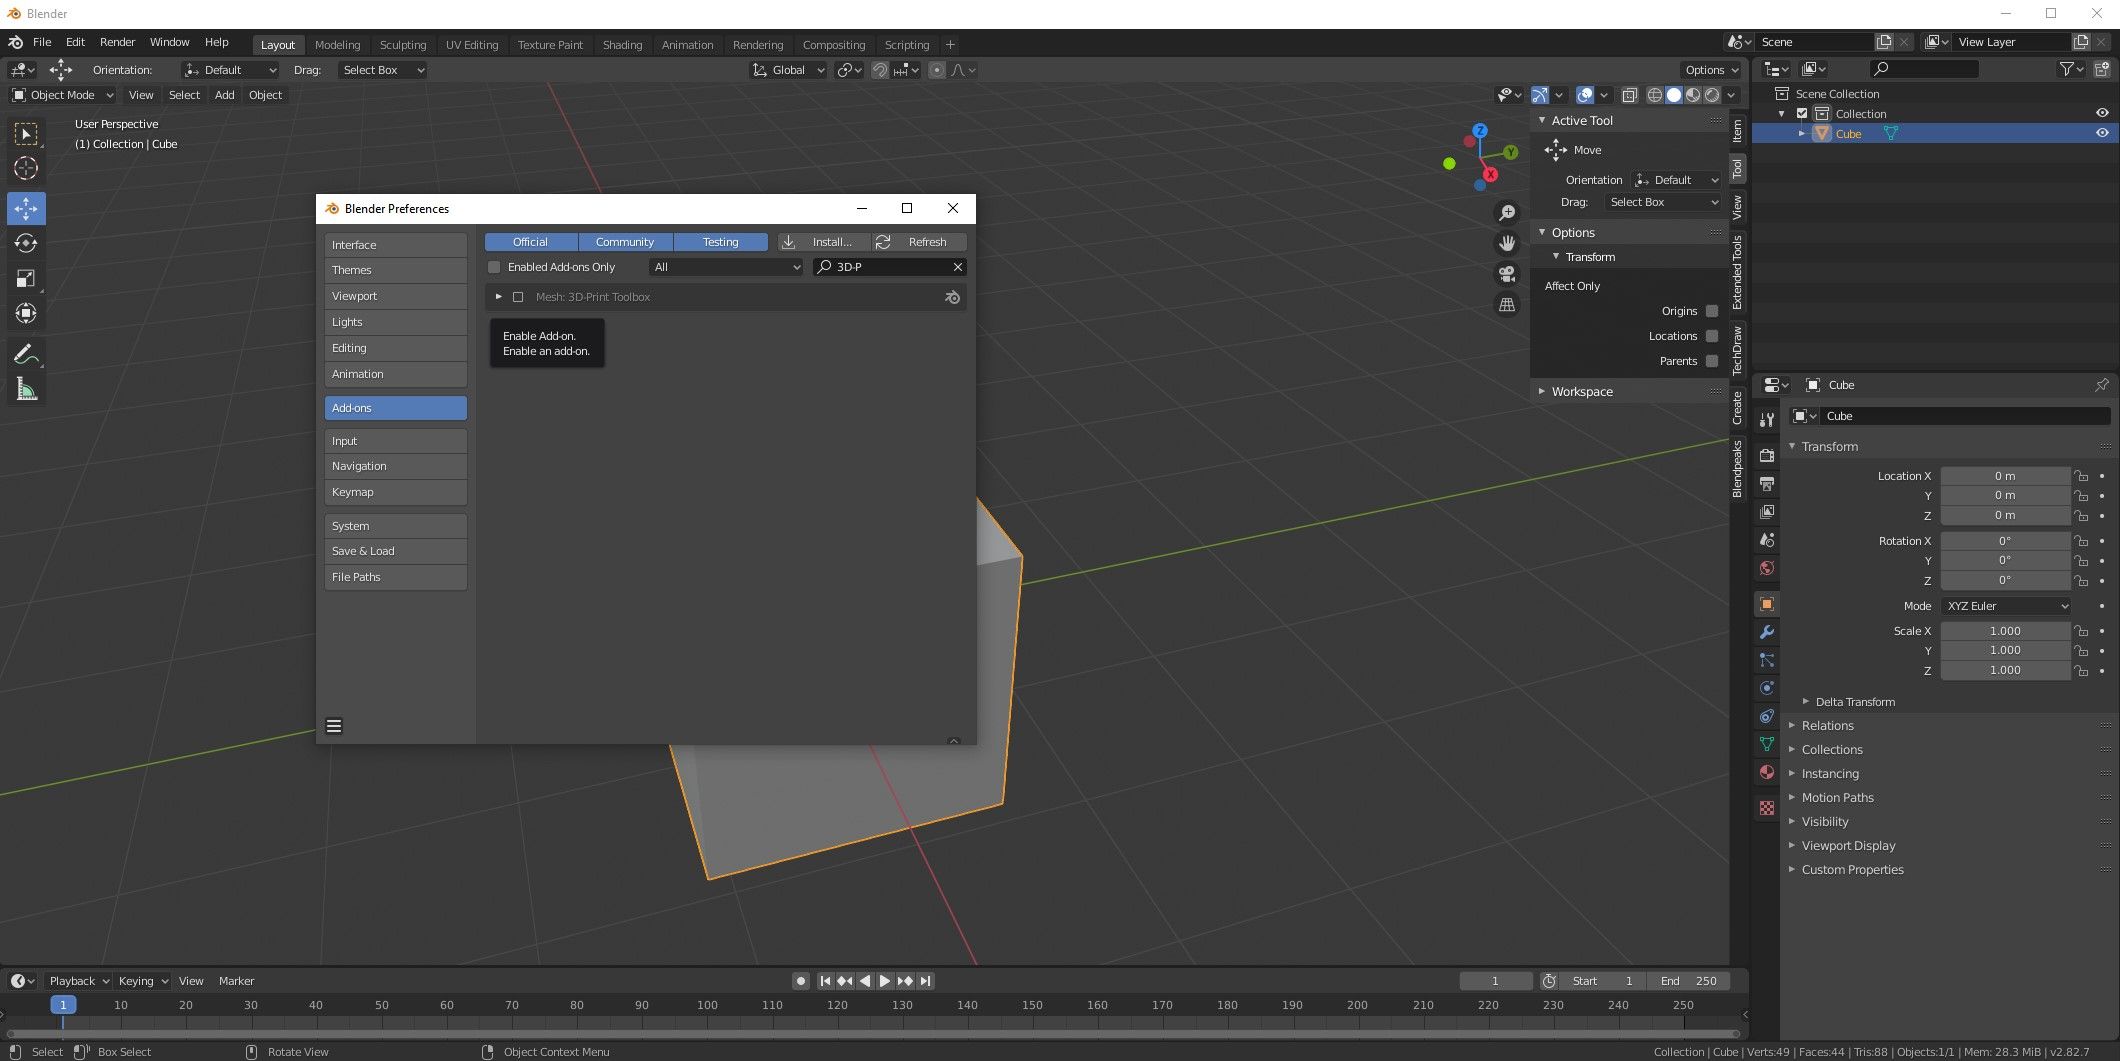
In Blender, you can fix non-manifold 3D models using the 3D-Print Toolkit add-on. Go to Edit > Preferences > Add-ons, and search for 3D-Print Toolkit. Once you can see it, click on the checkbox next to its name to activate it.
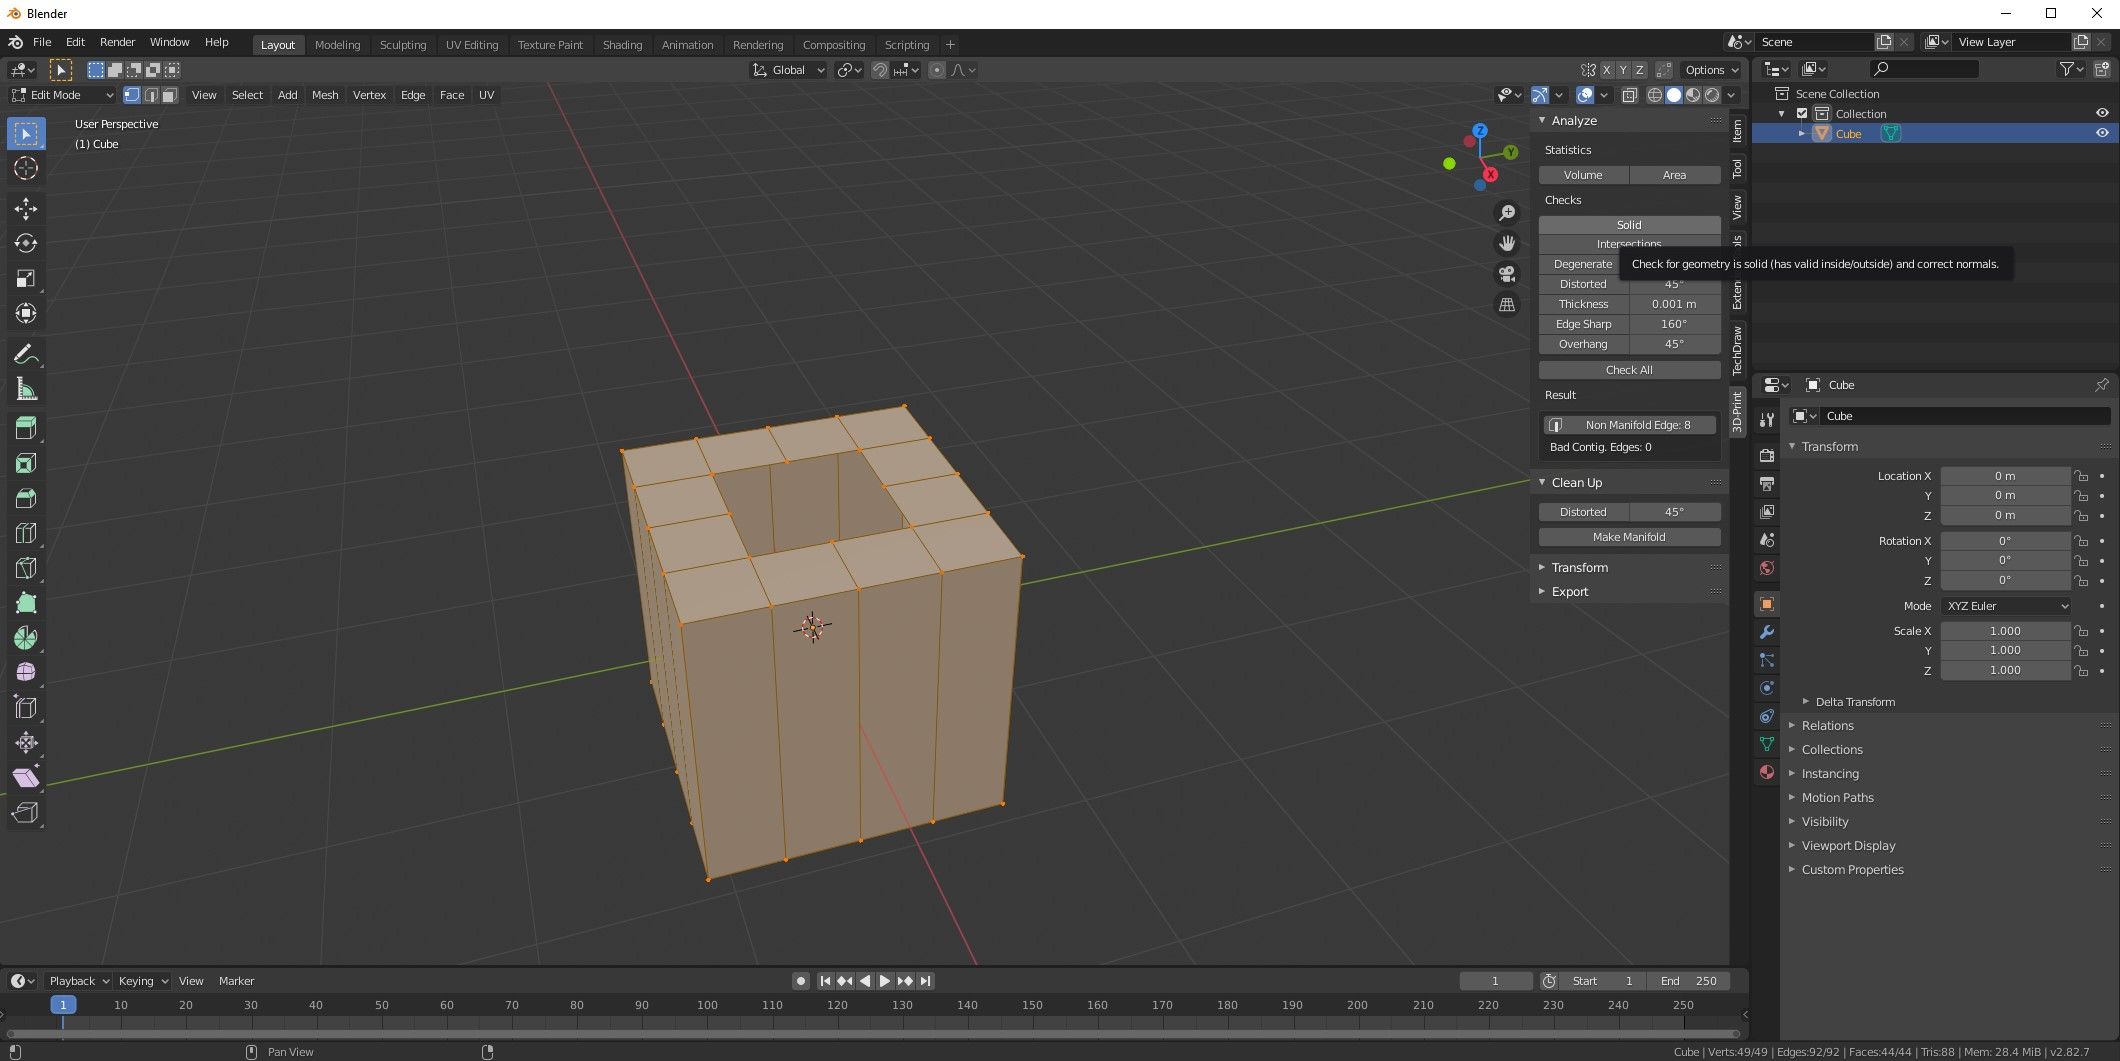
Close the menus and select your 3D model. Hit the Tab key to go into Edit mode and then hit N to open the tool menu. Select the 3D-Print tab and select Solid from the Checks menu. If you have non-manifold edges, you will see them listed in the results section. Click on Non-Manifold Edge to highlight the problem areas.
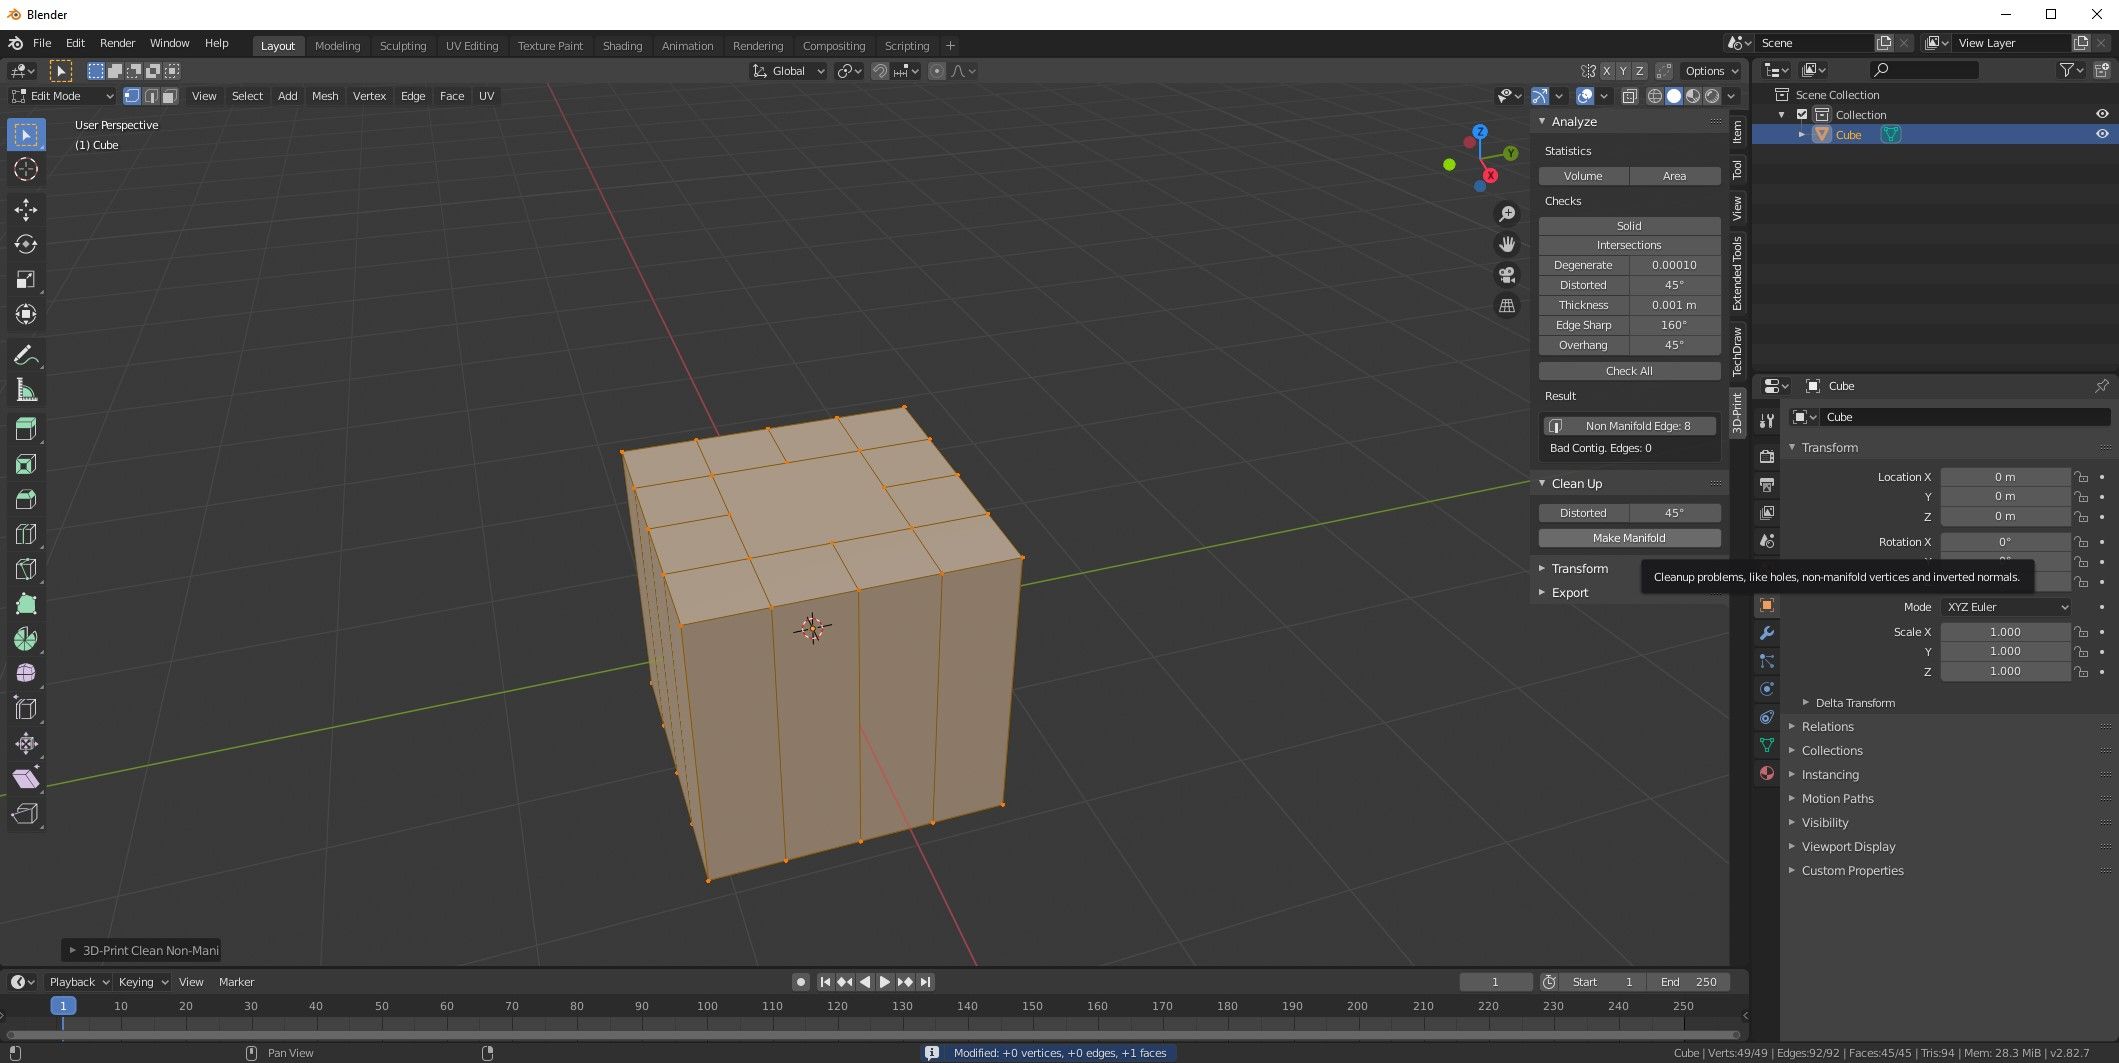
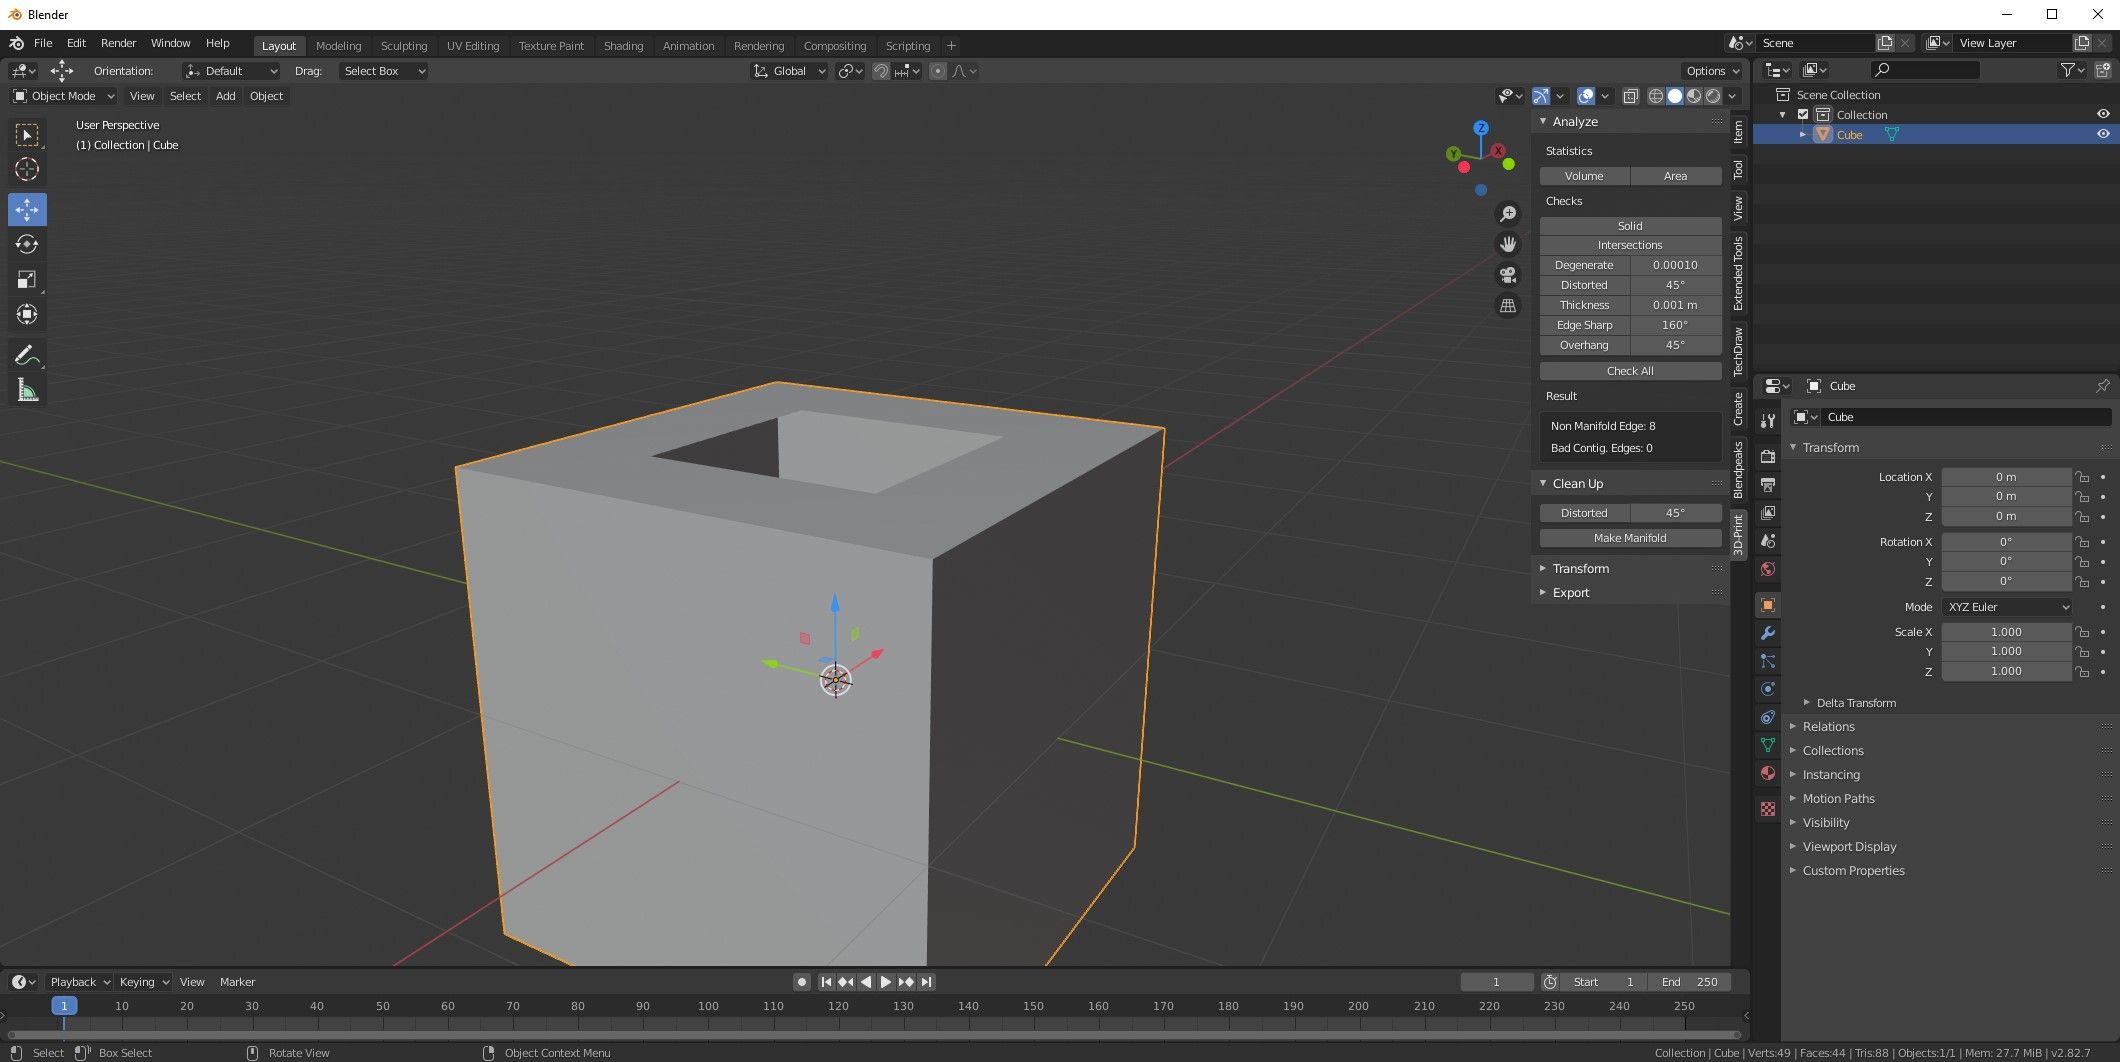
From here, you could either fix your 3D model manually or go to the Clean Up section of the 3D-Print Toolbox and click on Make Manifold. If this breaks your 3D object, press Ctrl + Z and see if you can fix the issue manually.
3. How to Fix 3D Model Not Watertight in Cura
A 3D model that isn’t watertight is also non-manifold, but a non-watertight model error is more specific. This means that you have a hole in your 3D model’s outer mesh that Cura isn’t able to fix automatically. Sometimes holes like this are extremely small, making it hard to see them to make manual repairs.
How to Fix 3D Model Not Watertight with FormWare Online STL Repair
Thankfully, FormWare offers a free online STL repair tool that can easily fix non-watertight errors. In fact, this tool can fix a wide range of complex 3D model issues when you provide it with a broken STL file.
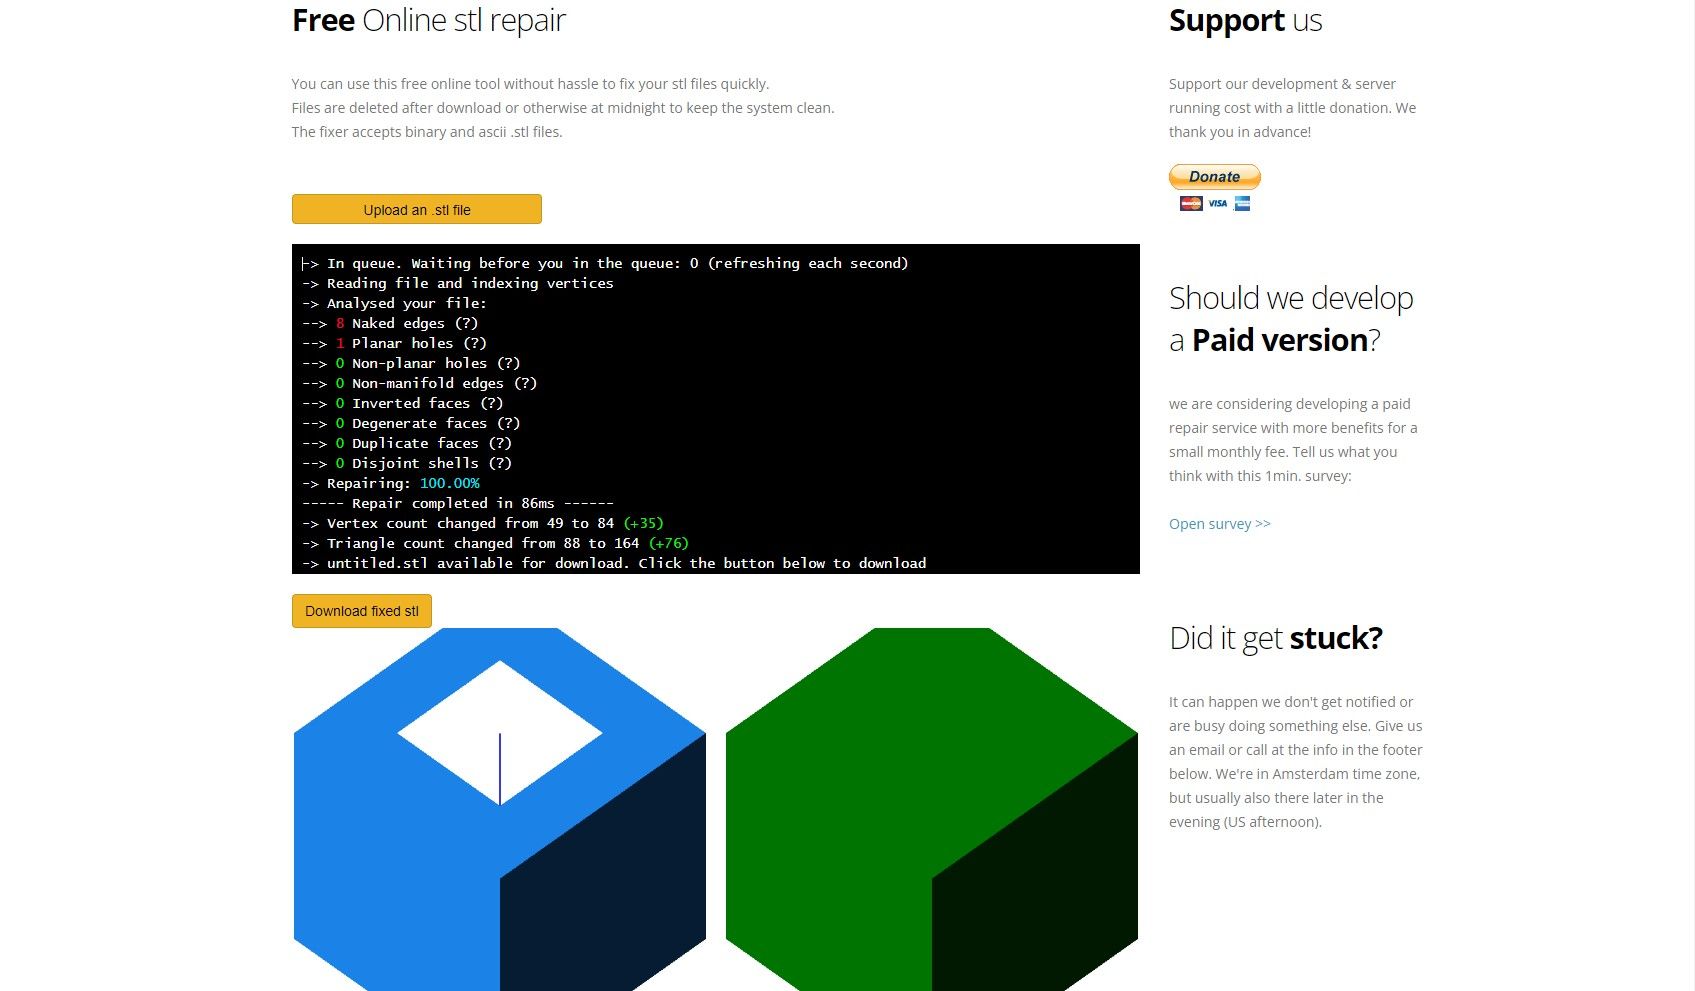
Head to the FormWare website and upload your STL file. You have to wait in a queue, but the repair process is very fast once it starts. Wait for the repair to complete and click on Download Fixed STL to access the new file.
4. How to Fix USB 3D Printing in Cura
Saving your files to a USB drive or SD card each time you want to 3D print something is tedious after a year or two of 3D printing. Thankfully, Cura has the ability to print using a USB cable connected directly to your printer, but it can be a little tricky to get it working.
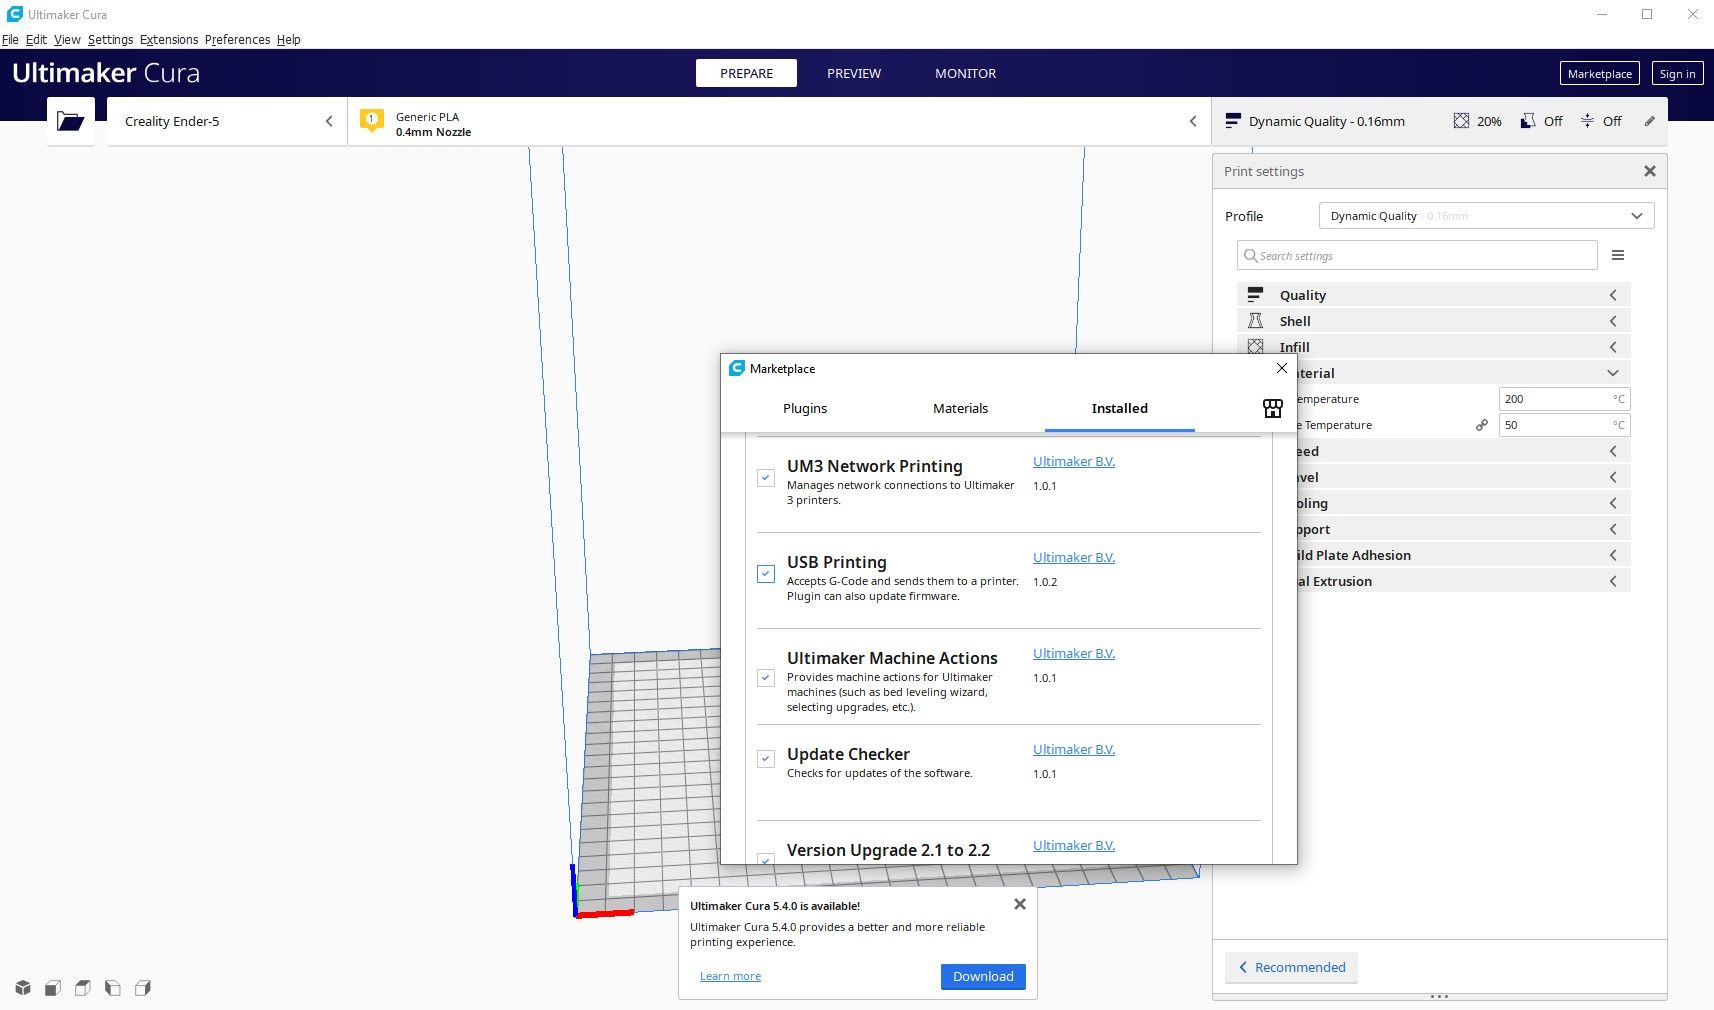
In Cura, click on Marketplace in the top right of the screen. Go to the Installed tab, and scroll down the list until you see the USB Printing option. Make sure it is activated before exiting the menus and Cura itself.
Connect your 3D printer to your computer using a USB cable and turn the 3D printer on. Open Cura, load your 3D model and slice it as normal. Once the slice is complete, wait a few moments to see if the Save to File option turns into a dropdown. If it does, click on it to access the Print Over USB option.
If this fails, repeat the process using a different USB port on your PC. Not every 3D printer is capable of using this feature, so it’s worth checking the manual for your machine to make sure that it is compatible.
5. How to Fix Cura Not Generating Supports
Support structures are vital in 3D printing. They provide a solid base for complex geometry and overhangs so that they print properly, and most modern slicer software can generate supports automatically. Cura has this feature, but you may have to tweak your settings to make it work properly.
It’s important to check your supports before printing whenever you generate them with Cura. Sometimes Cura will generate supports in some places and not others, but it should be easy to see where they are missing. Try the following steps to fix Cura when it won’t generate supports.
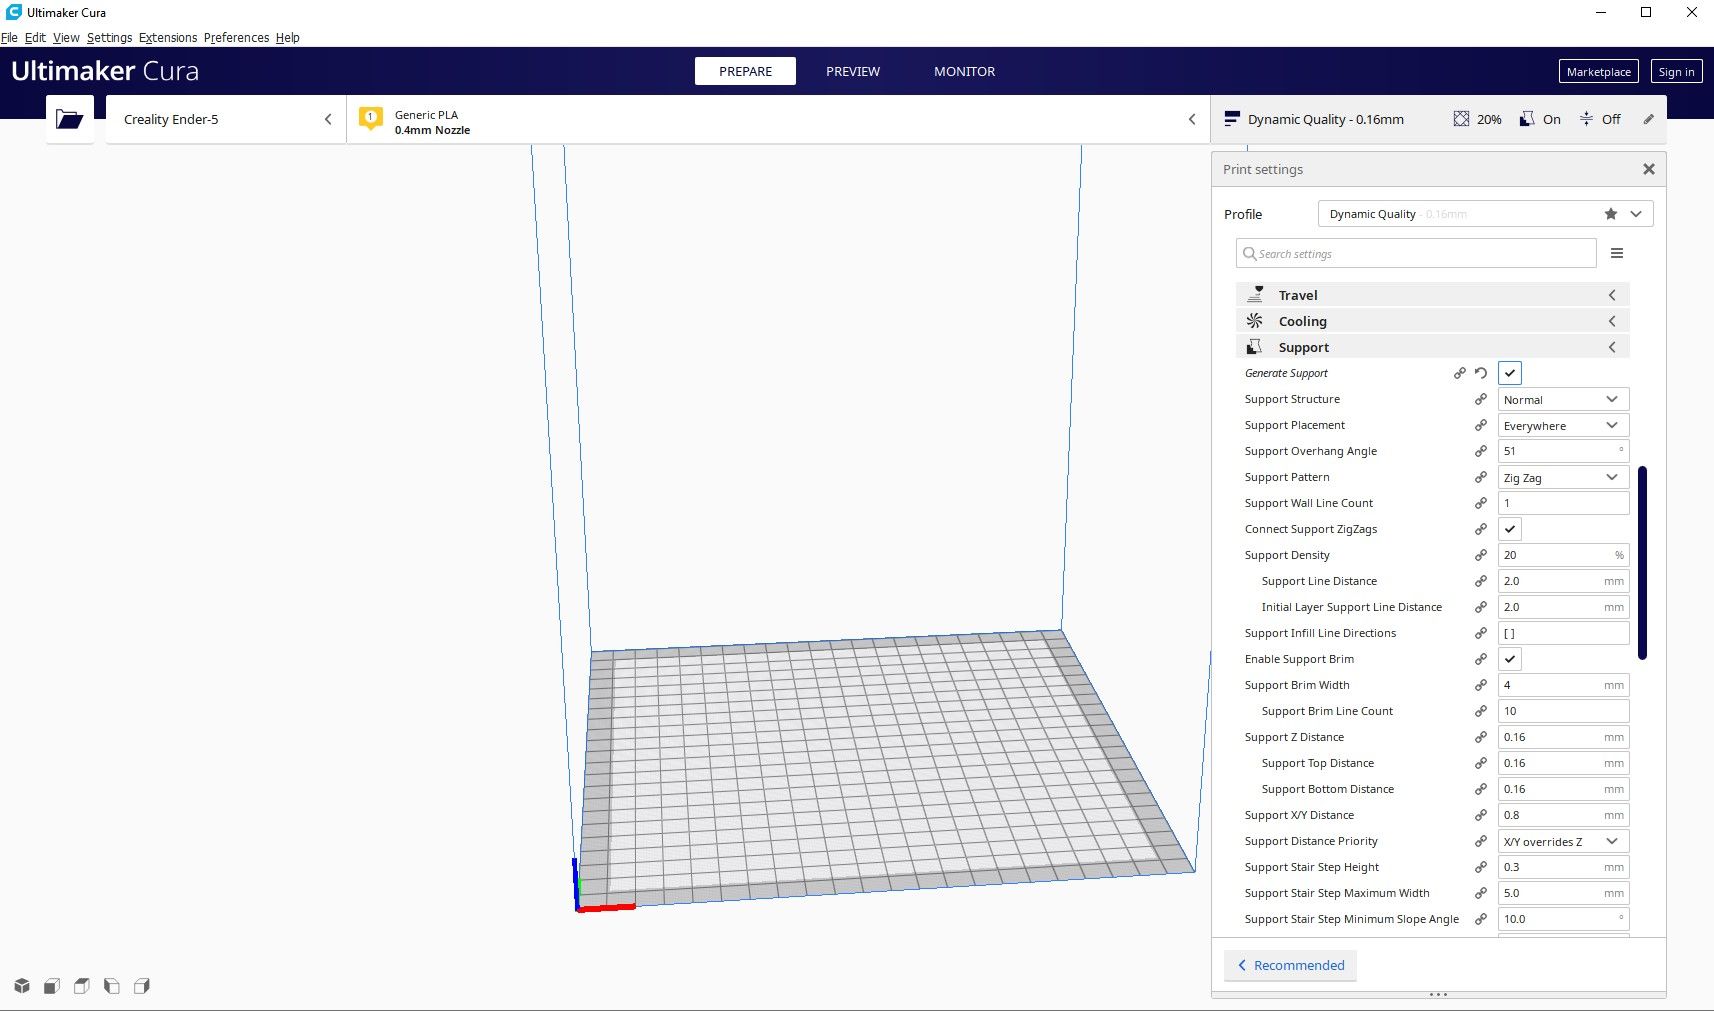
- Support Placement: If Support Placement is set to Touching Buildplate, change it to Everywhere to enable support generation within your 3D model.
- Minimum Support Area: If you need very fine supports, try lowering Minimum Support Area from 2mm² to 0mm². You can also lower the Minimum Support Interface Area setting.
- Lower XY Distance: Lower the XY Distance setting to reduce the required space between supports and your 3D model.
If this doesn’t work and Cura still won’t generate your supports properly, it could be time to try a different slicer. There are plenty of free slicers on the market, and it’s likely that your 3D printer manufacturer makes one for its own range. Take the time to read about the best slicers for 3D printing before you get started.
How to Fix Problems in Cura and Other Slicers
Slicer software has come a long way over the last few years, with loads of companies producing their own offerings. Unfortunately, though, problems with slicers like Cura are common, and this means that you are likely to have to do some troubleshooting if you use it a lot.