
The flashing “Not Allowed” sign usually appears when your input devices aren’t working correctly. But this isn’t always the case; the symbol can bother you even when you’re not spamming any inputs.
Try these tips and tricks to resolve the input issues on your Linux system and banish the Not Allowed alert for good.
Why Does the Not Allowed Sign Appear?

The flashing Not Allowed sign is an alert that appears at the bottom of the screen when invalid inputs are registered. Any input device can trigger it, including—but not limited to—keyboards, mice, and even headphones with control buttons. This alert is usually supposed to appear if you repeatedly enter invalid inputs.
Unfortunately, the alert has a habit of showing up when it isn’t supposed to. It’s common in 2-in-1 laptops, as bugs sometimes cause the laptop to mistakenly register that it’s in tablet mode and disable the keyboard. The cause can also be a faulty input device. Worst of all, it often impairs your ability to type and use your PC. Luckily, it’s a completely fixable issue.
How to Get Rid of the Not Allowed Sign
There are a few troubleshooting methods you can use to get rid of the Not Allowed sign. You should start by checking your input devices and keyboard keys. If that doesn’t work, you may need to troubleshoot potential 5.x kernel bugs; don’t worry, though, this is less scary than it sounds!
Check Your Plug-In Devices and Keyboard
To start, you should check each one of your input devices to determine if it might be at fault. Unplug and replace your keyboard, mouse, and any other devices that provide input. Check whether your system continues to show the Not Allowed alert even after you’ve unplugged those devices.
Disable Keyboard Keys
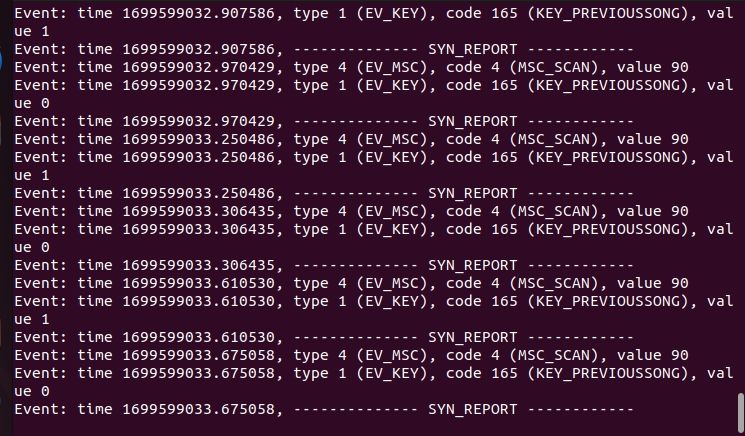
If you’ve narrowed down the cause to your keyboard, try to work out if one of the keys is stuck. Open the Terminal with Ctrl + T and enter the following command to see what inputs are being registered from your keyboard:
sudo evtestThis will print a list of every input device connected to your PC. Enter the device event number associated with your keyboard, then wait to see which inputs your keyboard registers. Next, press Ctrl + C to close the active process.
You’ll need to fix any keyboard keys that evtest reported inputs from when they weren’t pressed. Alternatively, try remapping the key.
Troubleshoot Potential 5.x Kernel Bugs
It’s believed that issues with the flashing Not Allowed alert commonly occur on 2-in-1 laptops due to an incompatibility with the 5.x Linux kernel. Many users have found that this issue is resolvable by blocking intel_vbtn, a driver responsible for supporting the Intel Virtual Button interface. Open the Terminal with Ctrl + T and update your system configuration by entering the following command:
sudo nano /etc/modprobe.d/block-intel_vbtn.confOnce the text editor opens, you’ll need to add the following line to the configuration file, save and exit from the file, and reboot your computer:
# This line disables the intel_vbtn module, which is believed to interfere
# with the keyboard in 5.x.

blacklist intel_vbtn
You may also be able to resolve the input issues by changing the version of Linux you’re using. Reboot your PC and wait for the boot selection loader to appear. Next, select advanced options—if you’re using Ubuntu, your system should automatically boot to a list of options including advanced options for Ubuntu.
Next, select a different version of the Linux kernel from the list provided. Save your new selection and reboot your PC. Once your system starts, you should observe that the issues with the Not Allowed alert completely disappear.
Enjoy Linux Free of Intrusive Pop-Ups
While the Not Allowed alert can serve an important purpose in flagging when invalid inputs are being entered, it can also be a major nuisance. Investigating the cause of this issue—whether it’s faulty keyboard keys or issues with the 5.x Linux kernel—and employing common-sense solutions is a great way to take control of your system and make it easy to use once again.