
It can be extremely frustrating when your MacBook refuses to pick up your voice when you’re in the middle of an important meeting or recording a podcast. Whether it’s a software bug or a simple setting that needs adjustment, we’ve got you covered.
1. Test Your Microphone Using Sound Input Settings
It’s always a good decision to test your MacBook’s microphone to see if it’s working properly and rule out any hardware issues. Here’s what you need to do:
- Click the Apple menu in the menu bar and choose System Settings from the dropdown.
- Select Sound from the sidebar and look for the Output & Input section on the right.
- Select the Input tab. You’ll see the different devices that can be used as a sound input source, including your paired headphones.
- To test out if your MacBook’s microphone is working properly, choose MacBook Speakers from the list.
- Begin by ensuring your input volume is at the maximum level. If not, drag the Input volume slider to the right.
- Now, say something at a normal pace and carefully check whether the Input level bars are filling up.

If the input level bars fill up more as you speak louder, it means your MacBook’s internal microphone is properly configured and is detecting sound.
2. Check Microphone Permissions
Apps and websites prompt you to grant access to your device’s microphone when you first visit them. If your MacBook’s microphone is detecting sound as it should, and you’ve noticed it acting up on one particular app, you may have unknowingly denied it permission. If this is the case, it’s an easy fix. Follow these steps:
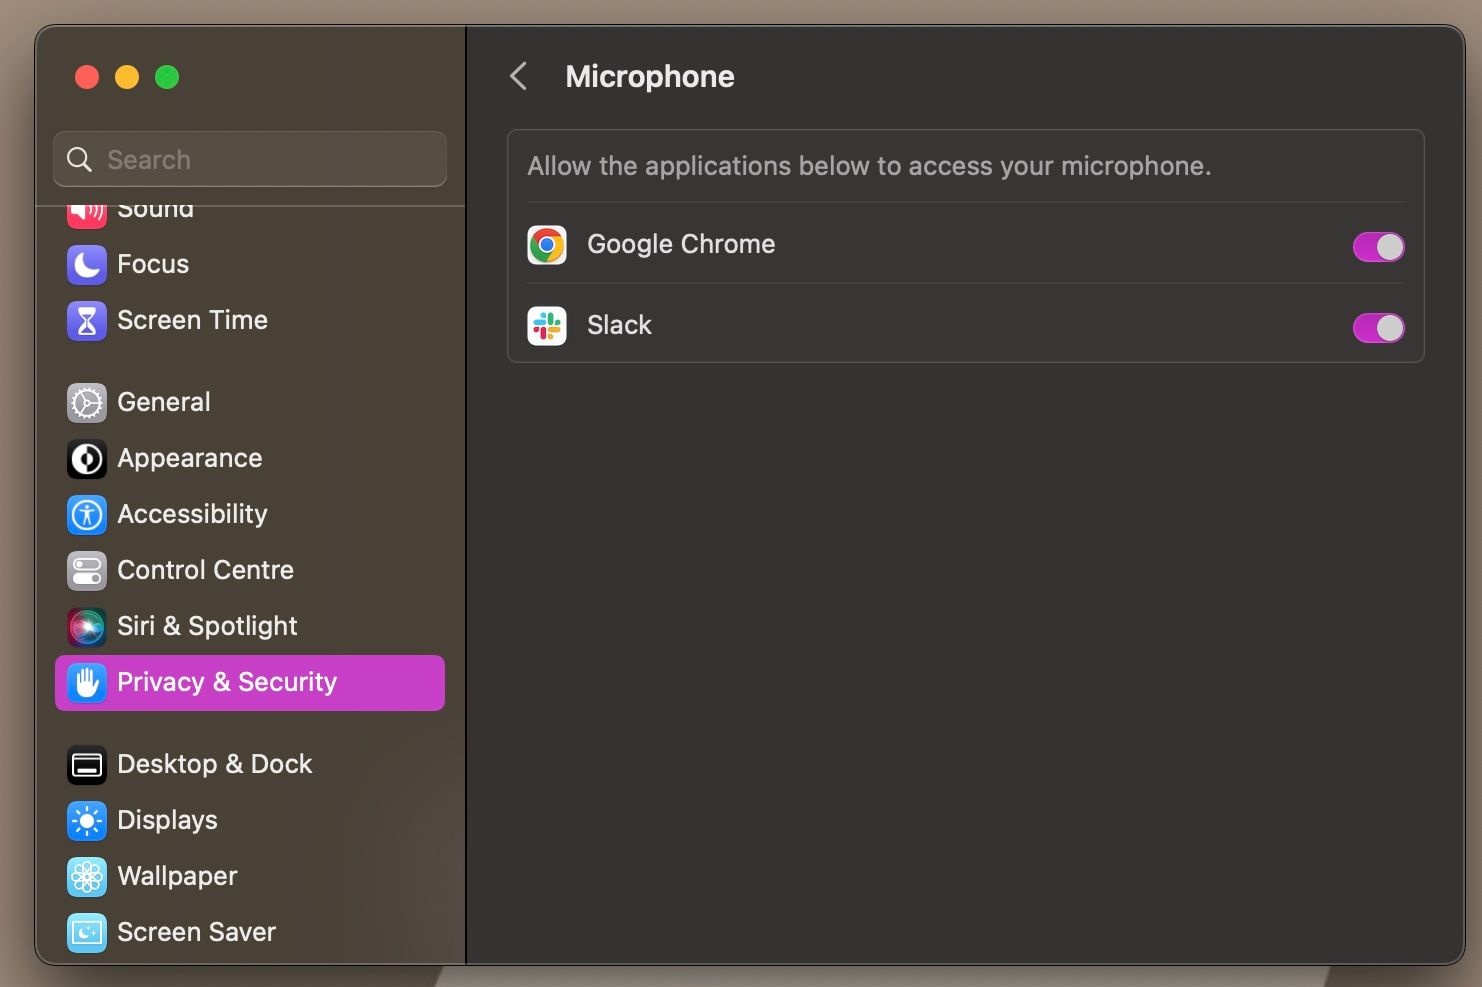
- Go to the Apple Menu > System Settings > Privacy and Security.
- Select Microphone under the Privacy section.
- To allow an app to use your MacBook’s microphone, make sure the toggle next to the app is enabled.
3. Check App-Specific Microphone Settings
If you’ve already granted the app permission to use your device’s microphone, it’s worth heading to the app’s internal settings. While the exact steps vary depending on the app you’re using, look for the application’s Preferences, Settings, or Options menu.
Generally, you can find this in the app’s menu bar or by navigating through the app a bit. Now, look for any microphone-related settings and ensure they’re configured properly.
4. Update Your Mac
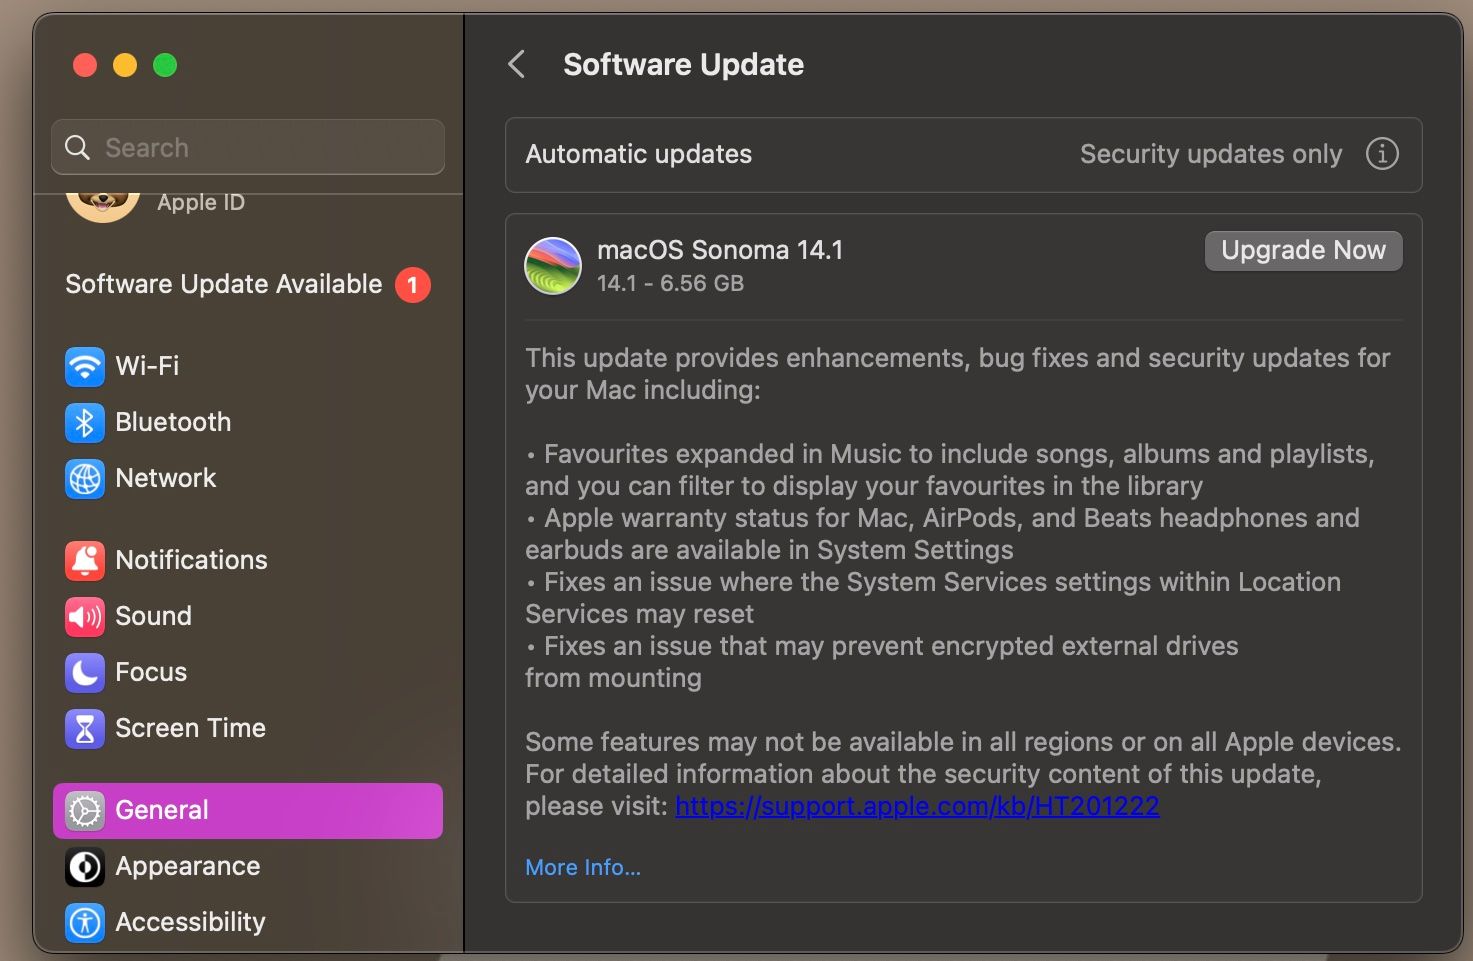
More often than not, microphone-related issues can be nothing more than mere software bugs. If your MacBook’s microphone stopped working right after you updated it, it’s worth waiting around and updating to a newer version of macOS once it’s available.
To do so, head to System Settings > General > Software Update. Your MacBook will now check if any updates are available. If a new update is available, click Upgrade Now to install it.
5. Reset Your MacBook’s NVRAM/PRAM
The NVRAM and PRAM in your MacBook store information like the time zone, control settings, and other configuration settings. If you’ve tried all the fixes above and your microphone still won’t pick up sounds properly, it’s worth resetting your Mac’s NVRAM or PRAM.
If you own an Apple silicon MacBook, you can reset its NVRAM by simply rebooting the machine (Apple menu > Restart). However, if you have an Intel-based MacBook, here’s how to do so:
- Turn off your MacBook and press the power button.
- Simultaneously press the CMD, Option, P, and R keys for about 20 seconds.
- Release the keys.
Fix the Malfunctioning Mic on Your MacBook
Hopefully, your MacBook’s microphone will work properly once you’ve followed all the troubleshooting steps mentioned above. However, if the issue persists despite your best efforts, it’s a clear sign that a deeper problem may be at play.
In such cases, we strongly recommend seeking professional assistance to diagnose and resolve any potential hardware-related issues with your MacBook’s internal microphone.