
I stood under the gallery light and realized the room was offering a choice: four paintings, one strange keyhole icon, and a chest that wouldn’t reveal itself unless I made the right call. My pulse quickened—this was one of those tiny, early-game moments that snowball into real advantage. You’re about to take the shortcut I used, minus the guesswork.
I’m a player who trusts sightlines and small clues; you’ll learn to do the same. The Könstig gallery (yes, Swedish for “weird”) hides a simple environmental puzzle that hands you a high-value chest and some lore if you treat it like a decoding job rather than a guessing game. The keyhole icon is a closed safe you need to open.
I noticed the icon above a frame — Gallery Puzzle solution in CONTROL Resonant’s Evacuation Zone
If you’ve already wandered the Evacuation Zone on Steam, PlayStation, or Xbox you’ve probably seen the icon: a stylized keyhole hovering over one painting. That tells you a secret sits in the room. Don’t ignore it. Walk the gallery, interact with the lighting consoles, and you’ll reveal which paintings the game wants highlighted.
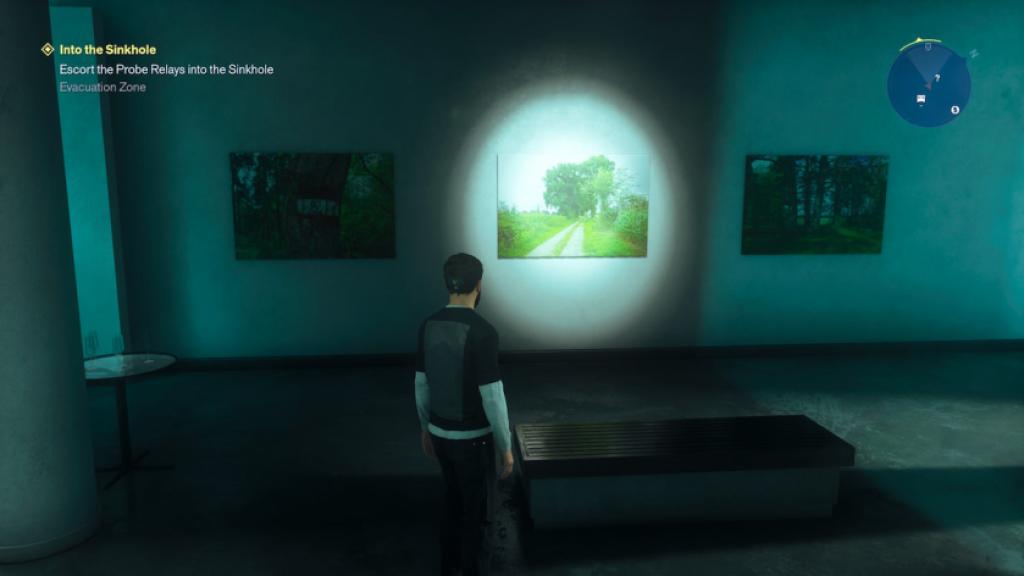
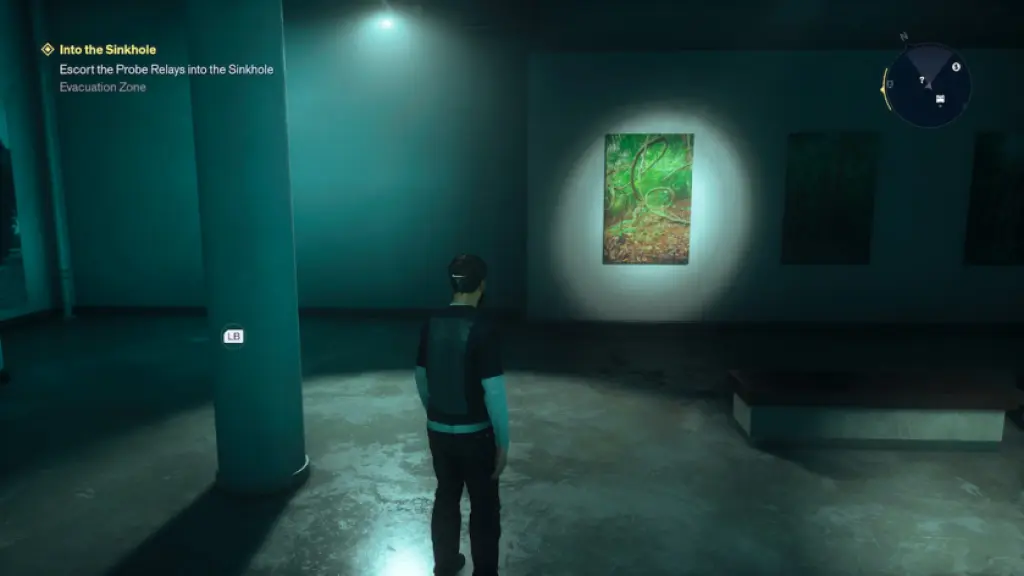
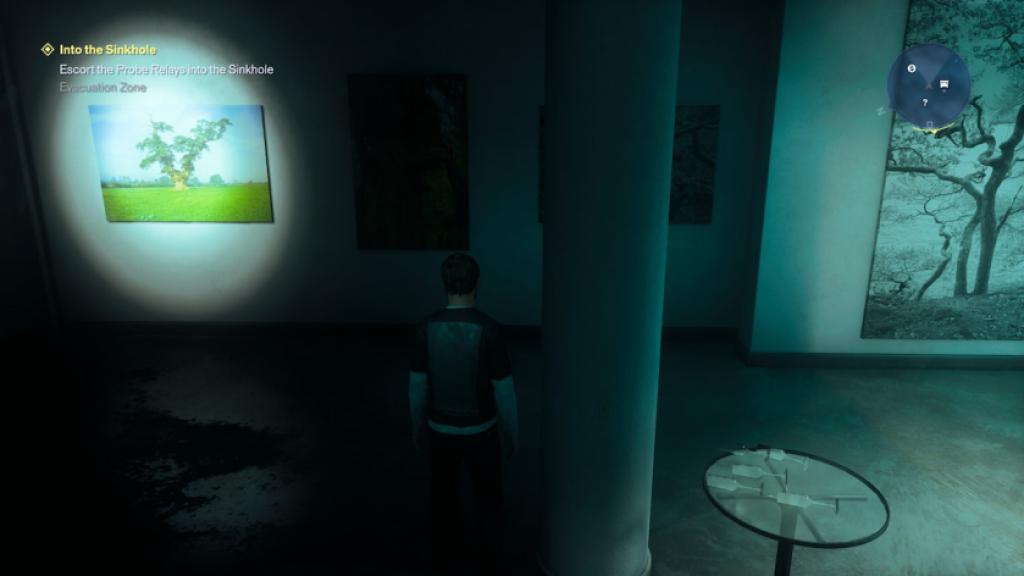
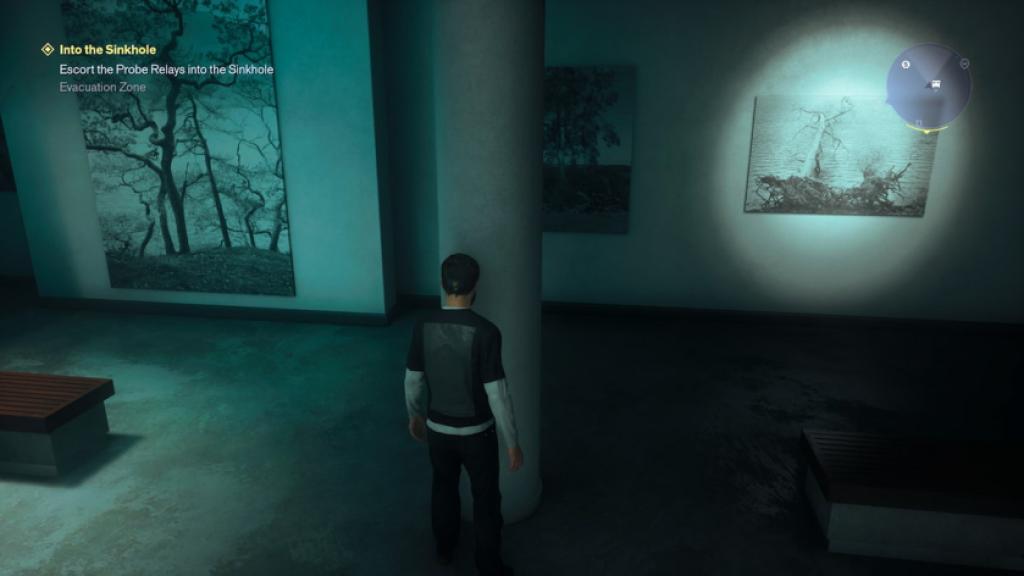
How do you solve the gallery puzzle in CONTROL Resonant?
Straight answer: flip the lights so the four specific paintings light up. The machine in the gallery toggles displays; interact until you have the four correct paintings glowing. If you prefer a shortcut, follow the map below.
- Journey — middle painting on the left wall; the one with the road.
- Windows — first painting on the front wall; circular tree stems make it easy to spot.
- Thunder — first painting on the third display; the tree sits dead center.
- Tides — middle painting on the last wall; water beneath fallen trees.
I tried each switch until the wall opened — What you’ll find and why it matters
Hit the four correct paintings and a secret panel slides aside. The hidden room gives lore and a high-value chest. The chest contains rewards that matter early: upgrades and a Living Shard. The open wall is a secret’s pulse.
Where is the gallery puzzle located in the Evacuation Zone?
It’s in the Könstig gallery inside the Evacuation Zone — head to the gallery counter and you’ll see a note listing the four paintings. If you’ve read guides on Moyens I/O or checked threads on Reddit and IGN, they’ll point you to the same corner. Remedy Entertainment designed this as an early node of optional power; treat it like a small investment in future runs.
What reward do you get for solving it?
Besides lore, you get a chest that often contains upgrade material and a Living Shard. If you haven’t picked up the Fault ability yet, I recommend visiting the Fault in the Evacuation Zone next — it grants a useful traversal trick and another Living Shard. Head north toward the Railyard Street Station to find it; players on Steam and console versions report the same placement.
Play it deliberately. There’s no shame in consulting a guide, but you’ll learn faster if you treat each puzzle as a pattern-recognition exercise—use the gallery lights as your map and the paintings as coordinates. Want to bet whether most players spot this on their first pass or skip it until a second run?