
I remember my first boss fight: I miscast a potion, watched meters drain, and respawned with nothing but embarrassment. You know that squeeze in your chest when a single wrong choice ruins an hour of progress. I learned fast which races, potions, and wands actually move the needle.
I’m going to walk you through every major pick in Wizard Alchemy so you stop wasting rerolls and materials. I’ll tell you what to chase, what to sell, and why I think some choices are straight traps.
A lot of players treat race picks like a flair option before realizing numbers matter
Races in Wizard Alchemy change how you feel in combat: more damage, faster skills, or extra mobility can flip a losing run into a clean clear. Below is the straightforward tier table I use when I reroll—if you want fast gains, read the S–A tier notes first.
| Tier | Race |
|---|---|
| S Tier | Thestrals |
| A Tier | Stellar Ambassador, Fiendish Demon, Ice Crystal |
| B Tier | Death Eater, Werewolf |
| C Tier | Undead, Tree Spirit, Elf |
| D Tier | Human |
How I rank races and why you should care
- Thestrals (S Tier): Thestrals are a Swiss Army knife for your stats—Dark Damage, Attack Power, Skill Speed, and mobility all in one package. I pick them for nearly every build because they cover weak spots without forcing sacrifice.
- Stellar Ambassador (A Tier): Solid attack and skill-speed boosts. The on-hit movement burst helps aggressive playstyles stay in rhythm.
- Fiendish Demon (A Tier): Massive Fire damage bonus; the trade is a small Max HP drop. Works best if you pair it with fire-focused potions and a careful playstyle.
- Ice Crystal (A Tier): Defensive and spell-focused—extra HP comes at the cost of speed. Choose this if you like playing slow and steady.
- Death Eater (B Tier): Heals on kill and boosts Attack Power, but lower HP regen means you can get caught out in long fights.
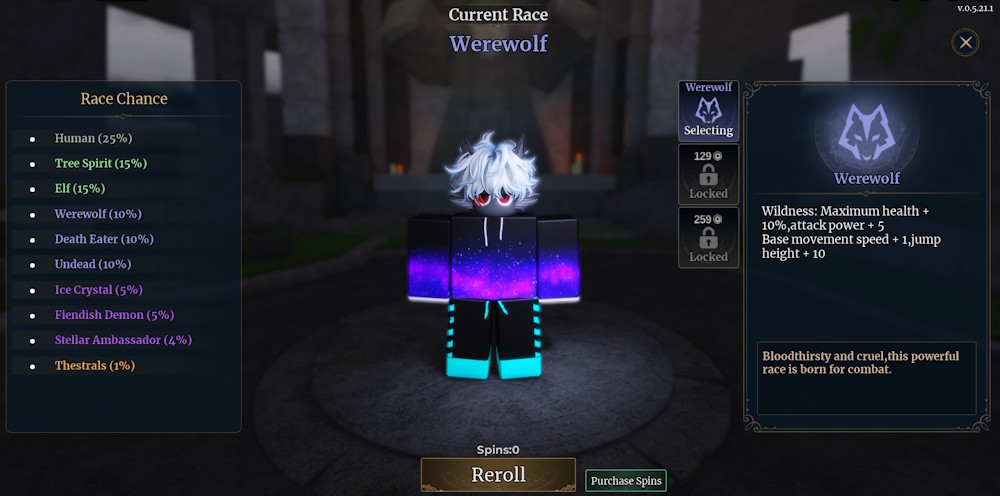
- Werewolf (B Tier): Balanced stat spread with modest mobility. No glaring downsides, just fewer standout bonuses.
- Undead (C Tier): Revival passive is flashy, but losing 30% Max HP is a heavy tax against tougher enemies.
- Tree Spirit (C Tier): Great for sustain, poor for damage. You’ll feel safer but slower to farm.
- Elf (C Tier): Movement perks only—useful early, forgettable late game.
- Human (D Tier): No passive bonuses. Reroll ASAP.
You’ll notice potions define how quickly you clear groups in a real run
Potions = spells. Brew the wrong ones and you fight hard for little return. Brew the right ones and progression feels inevitable. Below is the table I trust for both farming and boss killing.
| Tier | Potion (Spell) |
|---|---|
| S Tier | Night Wraith Potion, Frost Thorns Potion |
| A Tier | Dragon Breath Potion, Radiant Sword Potion, Tornado Potion, Earth Spike Potion |
| B Tier | Lotus Bloom Potion, Fire Arrow Potion, Wind Blade Potion, Meteorite Potion |
| C Tier | Ice Spike Potion, Earth Shield Potion, Ice Turtle Potion |
| D Tier | Lithe Potion, Rock Blast Potion |
Which potion is best for farming in Wizard Alchemy?
Frost Thorns Potion is the farming king. It balances damage, range, and cooldowns so you can chain clears without constant movement-cancels. Frost Thorns is a scythe across mobpacks—easy to refine and even easier to rely on when time is money.
- Night Wraith (S Tier): Highest raw damage and range, but refinement requirements are steep. If you have the patience to grind, this becomes a late-game staple.
- Dragon Breath (A Tier): Explosive burst damage and tiny cooldowns. Pair it with Fiendish Demon for terrifying results.
- Radiant Sword (A Tier): Massive numbers, slightly finicky animations. Very strong but a bit more demanding to use well.
- Tornado (A Tier): Low cooldown, consistent pressure—great for fast loops.
- Earth Spike (A Tier): High base damage and excellent scaling. A reliable choice from mid-game onward.
- B-tier spells: Useful transitional options; clear okay but fade later.
- C and D tiers: Mostly utility or poor scaling—fine for practice, not for competitive farming.
You can feel the difference between wands in two fights: once you swap, damage or cooldowns change instantly
Wands shape your cast rhythm. Some are expensive in the in-game shop but return that cost every run. If you ever check Roblox threads or YouTube guides, the same two wands keep popping up.
| Tier | Wand |
|---|---|
| S Tier | Ember Staff Wand, Ice Star Wand |
| A Tier | Demon Trident Wand |
| B Tier | Azure Wand |
| C Tier | Wingbird Wand |
| D Tier | Twisted Wand |
What is the strongest wand in Wizard Alchemy?
Ember Staff Wand is the raw-damage monster—big Attack and Critical Rate bonuses. It’s expensive in terms of gold or shop price; think of the sticker shock as roughly $10 (≈€9) in perceived value for many players. If you crave immediate numbers, Ember Staff is the pain-point you pay for.
- Ice Star Wand (S Tier): Sacrifices some raw damage for major cooldown reduction. If your build spam-casts, this is often the better pick.
- Demon Trident (A Tier): Best value-per-cost. If you’re frugal or new, pick this and save your materials for later upgrades.
- Lower tiers: Useful early stops, not endgame contenders.
I often see players treat robes as aesthetics until they die to an avoidable hit
Robes are simple: more HP equals more room for mistakes. If you’re farming for gold or running bosses in groups, pick a robe that gives the HP margin you need.
| Tier | Robe |
|---|---|
| A Tier | Starlight Robe, Golden Reverie Robe |
| B Tier | Starmoon Robe |
- Starlight Robe (A): One of the highest HP boosts; my go-to when I’m soloing difficult bosses.
- Golden Reverie Robe (A): Same HP boost—choose by aesthetics or vendor availability.
- Starmoon Robe (B): Good early buy; replace it when you can.
Hats are small buys that prevent big wipes in real sessions
Hats add HP. That’s it. But a small buffer can be the difference between a quick save and a costly restart.
| Tier | Hat |
|---|---|
| A Tier | Golden Reverie Hat, Starlight Hat |
| B Tier | Starmoon Hat |
- Golden Reverie & Starlight Hats (A): Big HP bump; both are interchangeable for survivability builds.
- Starmoon Hat (B): Budget option that holds you over.
How do you get better races in Wizard Alchemy?
You get better races through Race Rerolls, event rewards, some in-game shops, and sometimes community giveaways on Discord and YouTube streams. If you’re active in the Roblox community around this game, I recommend watching creators who publish reroll guides—those clips save hours of trial-and-error.
Final practical note: if you’re choosing between a spell or a wand upgrade, prioritize the item that directly fixes your weakest run metric—damage for slow clearing, cooldowns for spam loops, HP for survivability. Which of these changes will you swear by—or sell for scrap?