
The zipline groaned under my weight as I crested Pilgrim’s Peak. Three attachments, three maps, and a single clear objective from Celeste—this felt like a make-or-break moment. You can either rush it and respawn empty-handed, or play it smart and walk away with the Renegade.
I’ve run this quest enough times on PC and PlayStation to spot the choke points that trip players up. I’ll show you the shortest route, the reliable loot sources, and the small movement tricks that turn a frustrating three-map slog into a quick, repeatable run. Follow the order and you’ll waste less time in match queues and more time enjoying ConCon community runs or solo clears on Steam.
Rooftops are where most teams get stuck — How to Complete the Wires Crossed Quest in Arc Raiders
Wires Crossed sends you to three maps: Blue Gate, Spaceport, and Buried City. The goal is simple on paper: attach three ARC parts to three antennas, one per map. In practice you’ll need to plan loadout, raid order, and where to climb.
What you must bring: a Snitch Scanner, Surveyor Vault, and Sentinel Firing Core in your loadout—plus a zipline for rooftop access. If those parts aren’t in your inventory, farm the ARCs: Snitch, ARC Surveyor, and Sentinels drop them reliably. An ARC Courier can drop parts too, but it’s a gamble.
My advice: queue a raid and clear all three ARCs in that session so you leave with every piece in hand. The three attachments are like keys on a janitor’s ring—bring them all or you’ll be back for another trip. Treat the run like a loop: secure parts, equip them, and hit the antennas in a single sweep.
How do I complete the Wires Crossed quest in Arc Raiders?
- Queue for a multi-raid run and prioritize getting Snitch, Surveyor, and Sentinel parts before you travel to the maps needing them.
- Equip one of the required parts in your loadout per raid stop, plus a zipline and an optional smoke for defensive cover.
- Visit Blue Gate, Spaceport, and Buried City in any order that minimizes travel time—I prefer Blue Gate → Spaceport → Buried City for vertical flow.
- At each map, reach the antenna, interact, and attach the part; the objective completes once all three are attached.
Where do I attach the Snitch Scanner?
- Map: Blue Gate.
- Target: Pilgrim’s Peak on the north side.
- Method: approach the building, take the zipline to the roof, then head left toward the bulky microphones and interact with the machine to attach the Snitch Scanner.
Where do I attach the Surveyor Vault?
- Map: Spaceport.
- Target: Launch Tower at the map center.
- Method: ride the zipline to the tower’s top room, exit and take the left stairs to the peak, then interact with the antenna on your right to attach the Surveyor Vault.
Where do I attach the Sentinel Firing Core?
- Map: Buried City.
- Target: Grandioso Apartments on the southwest side.
- Method: set a zipline to the roof, climb up, find the antenna and attach the Sentinel Firing Core.
Observing real runs shows the gap between theory and practice — Quick movement and loadout tips that save time
Most players lose time on roof-to-antenna transitions and inventory fiddling. Equip parts before you drop into each raid so you don’t have to swap while under fire. A zipline and smoke grenade are more valuable than you think—smoke buys seconds on exposed antenna interactions.
When you need parts, prioritize killing the ARC that drops the piece you’re missing: Snitch for Snitch Scanner, Surveyor for Surveyor Vault, Sentinels for Firing Core. An ARC Courier sometimes spawns with parts, but don’t bank on it—farm the mobs instead.
The map rotation can feel like a carnival carousel, but planning your path and sticking to one order makes the circus stop sooner.
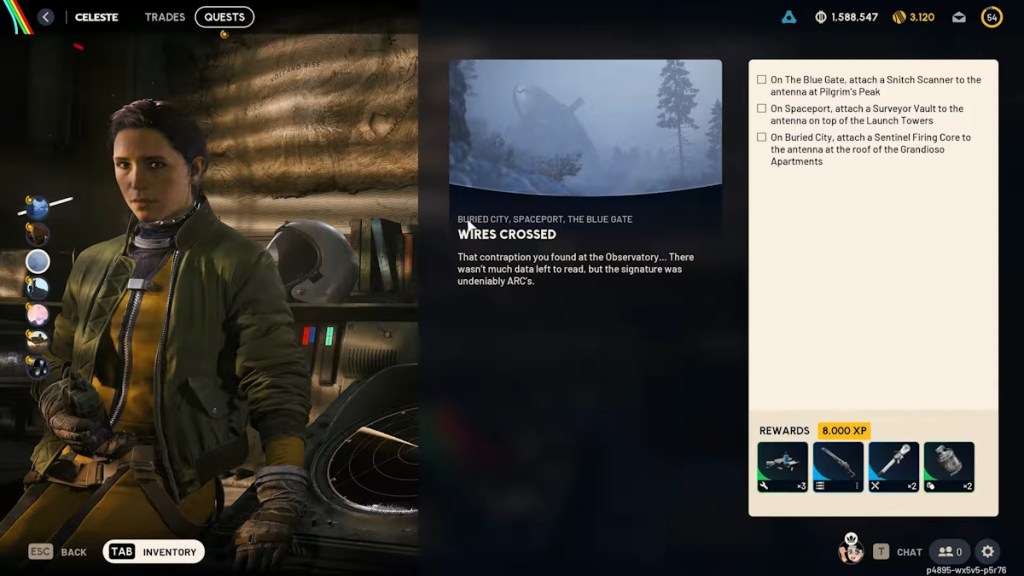
Reward drops are visible in-game and on community trackers — Arc Raiders Wires Crossed Quest Rewards
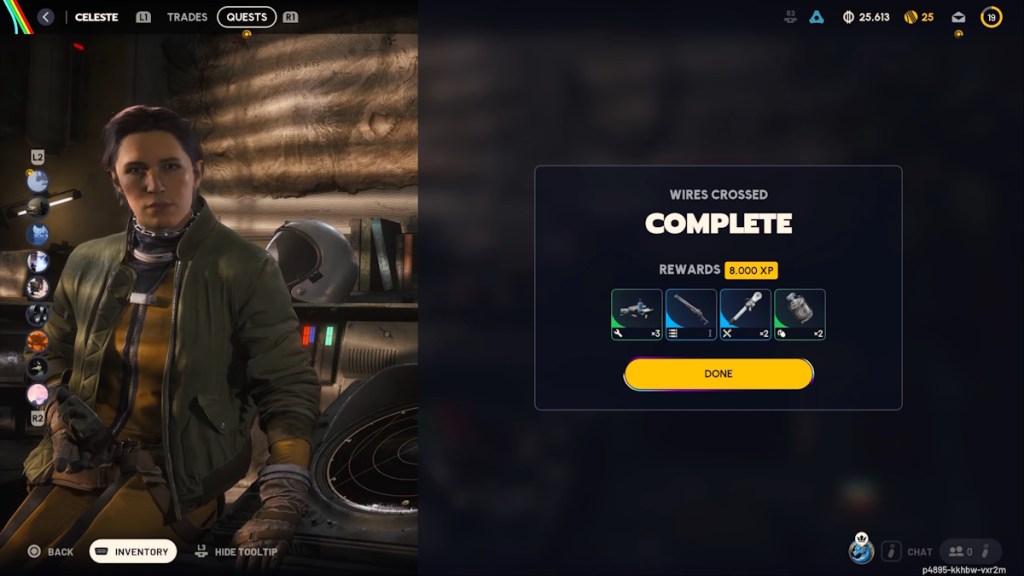
Complete the three attachments and you get the quest payouts. That payoff is the reason you run the three-map loop instead of dropping into random raids.
- 3x Electrical Parts
- 1x Renegade
- 2x Zipline
- 2x Smoke Grenade
Claiming the Renegade plus extra utility items makes this quest worth the effort if you want to expand your loadout options early. If you play on Steam, check community trackers and ConCon posts for recent spawn patterns and part drop rates—community data often beats gut instinct.
Ready to run it with me next time, or do you think solo clears are faster—what’s your strategy?