
I landed the parry with half a heartbeat to spare and watched the boss stagger. I felt every second of the decision I’d made before the fight began. You can win or spend another hour on the same gate depending on one Seal.
I’ve been testing every Seal across dozens of runs so you don’t have to guess in the heat of a boss room. This guide tells you which Seals carry the load, which ones are situational, and which you should quietly stop relying on. Read it fast; the next ambush won’t wait.
Mortal Shell 2 hands you four Seals that shape how you face enemies. Some grant surgical timing, others buy you breathing room. Changing a Seal can turn your melee build from brittle to relentless.
Most players treat Seals like emergency gear they only notice when the fight goes sideways — now let’s separate the carries from the fillers.
I sort Seals into four practical tiers so you know what to equip before you ever load into a zone. Short list: S-tier is the one you want on hand; A-tier are reliable backups; B-tier fits certain builds; avoid anything below unless you enjoy self-imposed challenge.
- S-tier — the most consistently game-changing choices.
- A-tier — strong when you need them and easy to pair with common builds.
- B-tier — niche tools that shine in specific fights or hybrid setups.
Which Seal is best in Mortal Shell 2?
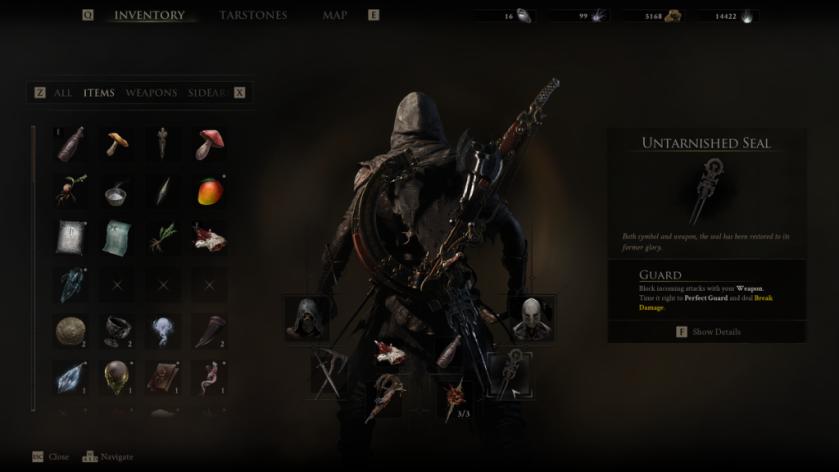
The short answer: the Untarnished Seal sits alone at the top for most melee players. The Untarnished Seal gives Perfect Guard, letting you block at the precise moment to inflict Break Damage and open enemies. Its timing window rewards practice and punishes sloppy defense, but once you learn the rhythm it feels like a scalpel — precise, surgical, and capable of removing a boss’s defenses in a single clean motion.
If you stream or study builds on Steam Workshop threads, Untarnished shows up in the most successful melee guides and on high-level Twitch runs for a reason.
How do Seals work in Mortal Shell 2?
Seals modify defensive options and resource recovery, and each one changes the way you engage. Some widen your safety margins, others demand perfect timing for big payoffs. You can think of them as small rule-changes to your combat loop: parry windows, single-attack nullifies, periodic regen, and variable Break Damage.
S-tier
- Untarnished Seal: Perfect Guard: timed parry that deals Break Damage. If you favor melee engagements, this Seal converts your defensive reads into offensive windows and pairs cleanly with heavy-hitting weapons.
A-tier
- Infinite Seal: Works like Untarnished but with a narrower parry window and higher Break reward. It’s a high-risk, higher-reward option that rewards players who study attack patterns carefully in the same way top creators on YouTube refine frame-perfect counters.
- Slayer Seal: Periodic health and energy restoration tied to certain actions. It flattens difficulty spikes and lets you play more aggressively — the Slayer Seal acts as a safety net woven of glass: it can catch you, but it will shatter under sustained pressure.
B-tier
- Vatra’s Seal: Completely nullifies one attack. Simple and forgiving, but it only covers a single hit and has a cooldown that limits its utility in crowded fights. Use it if your playstyle centers on bait-and-punish against heavy hitters or when you need a reliable escape tool.
Match your Seal to your Shell and weapon. A powerful Seal paired with the wrong Shell or slow weapon will feel awkward; the right Seal can turn an underperforming build into a cheat sheet for boss patterns.
For further testing, check community resources: Steam discussions and the Mortal Shell 2 subreddit host build threads; Twitch runs and YouTube guides show how creators chain Seals into boss strategies. Moyens I/O’s screenshot above captures a moment where a single Perfect Guard decided the fight.
Which Seal are you trying next, and are you ready to stop guessing and start winning?