The hangar door thumps shut behind me, metal echoing like a drumbeat. I freeze, listening to boots on tarmac and the distant clink of a safe—this is the moment loot decides whether you leave richer or barely alive. You can feel the map contracting around that one crate, your pulse like a broken metronome.
I’ve spent nights running Hajin, trading theory for hits and screenshots for mistakes. You and I both want the same thing: the Legendary guns, weapon manuals, and 3D Printer resources that let a single successful raid rewrite your loadout. I’ll show you where risk yields reward and how other players, Reddit threads, and Twitch guides miss the small moves that actually pay off.
Best hot spots and loot locations in Modern Warfare 4 DMZ
The Hajin map funnels players toward a handful of predictable choke points every rotation.
Not every loot spawn matters equally. Some rooms spit out Weapon Manuals and blueprints on a reliable cadence; others are decoys with one or two mid-tier items and a grenade waiting at the door. Below I break down the places that actually move the needle, what you should bring, and the behavior patterns to watch for so you don’t walk into someone else’s payday.
Where are Legendary weapons found in DMZ?
Legendary drops are rare—so you chase the locations that statistically tilt the odds. Start by visiting compound safes and the larger POIs: Chang-San Airbase, major Compounds, and the Train when it’s between stops. Weapon Manuals and blueprints appear more frequently in Citadel operations and in the houses near the airbase I mark below. Watch for AI patrol patterns; high-tier AI often indicates richer loot inside.
How do you farm 3D Printer resources quickly?
3D Printer parts stack up fastest from moving targets and resource-rich containers: the Train, electronics racks inside the Peak Array (Cheownwang), and the lockers in Compounds. Run with a compact, fast kit—suppressor, quick mags, and a throwaway pistol—and clear smartly: open prone, breach one room at a time, and pull only what you need. Many streamers on Twitch and creators on YouTube focus on combat but miss the timing windows when a train passes through two hot spots in under three minutes.
Chang-San Airbase
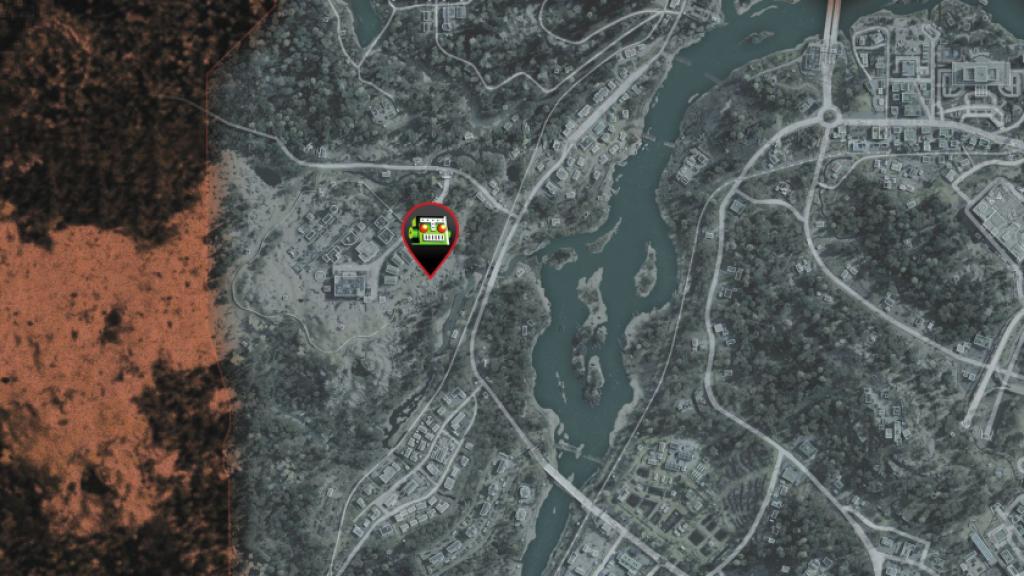
I’ve cleared this cluster dozens of times. If you enter from the marked approach, you get three same-sized houses clustered together—each house is a short sweep and often yields Weapon Manuals and blueprints, especially during Citadel operations. Loot quality has been variable with map rotations, but the airbase still beats wandering aimlessly.
Tip: move fast, open doors quietly, and keep an eye on the perimeter. Players who drone or ping from a distance tend to steal spawns before you can finish a double sweep.
Compounds
On several runs I watched squads set up a perimeter and then clear the compound like a timed drill.
Compounds are inconsistent but high-upside. They rarely have a single fixed pool, so lockers and hidden rooms sometimes cough up 3D Printer parts and safes. The best outcome is a safe—don’t expect it every time, but when present it can contain manuals or rare components. Compounds are usually guarded by competent AI; bring a loadout that can deal with waves and a friend who can cover flank routes.
Strategy: breach slow, check for secret doors and lockers first, and leave the heavy fights if you don’t need to grind XP. If you find a safe, consider calling it in via Discord or voice to coordinate extra pairs of hands.
Cheownwang (Peak Array)
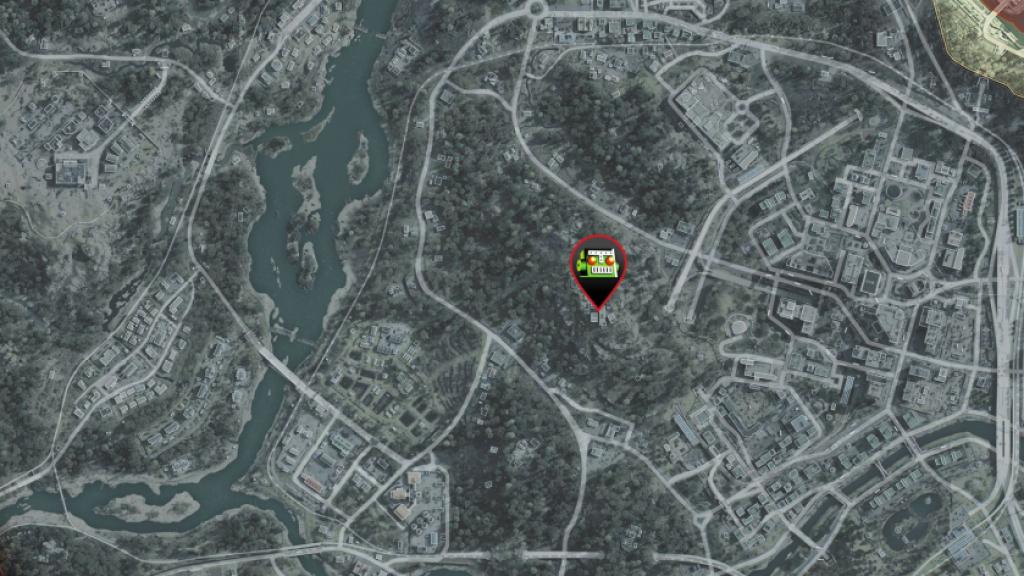
One run I walked into the Peak Array and found only light AI—no elite spawns—and a cluster of electronics racks that paid out 3D Printer parts.
Cheownwang is small but efficient: fewer high-tier AI, reasonable loot, and a chance at safes. If you’re solo and cautious, this is one of the safer places to harvest components without getting bogged down in a full-scale fight.
Train
I once timed the Train for three passes and filled two 3D Printer slots before anyone else arrived.
The Train doesn’t sit still—follow its track. It’s one of the richest mobile sources for 3D Printer materials and electronics. Expect contact: it runs through hot zones and players treat it like a moving loot magnet, so be ready to fight or slip away. The Train moves across Hajin like a steel artery; when it stops, the map contracts around it.
What I run with: an agile primary for close quarters, a suppressed sidearm for clean finishes, and a backpack heavy on inventory. I check Reddit threads for recent rotation notes, skim YouTube clips for procedural approaches, and follow a couple of Activision patch notes so I’m not chasing nerfed spawns.
Loot will always be probabilistic—your job is to stack the odds by choosing the right POIs, timing, and teammates. Will you take the safe and slow sweep for Printer parts, or sprint into the airbase for blueprints with two partners and pray the Train doesn’t steal your thunder?