
I froze the first time Scrooge asked me to make a preset and realized I’d been spending hours rearranging the same picnic blanket. You breathe faster when a quest requires a new UI trick, and you want to finish it without trawling menus. The Preset menu is a cheat code for time.
I’m going to walk you through this so you finish Scrooge’s Developed Decorating quest fast, place polished sets across your valley, and stop wasting Star Coins on back-and-forth fiddling. You can do this on Nintendo Switch, PlayStation, Xbox, Steam, or the Epic Games Store — the interface is the same across platforms.
The living room often decides mood — How to create decor presets in Disney Dreamlight Valley
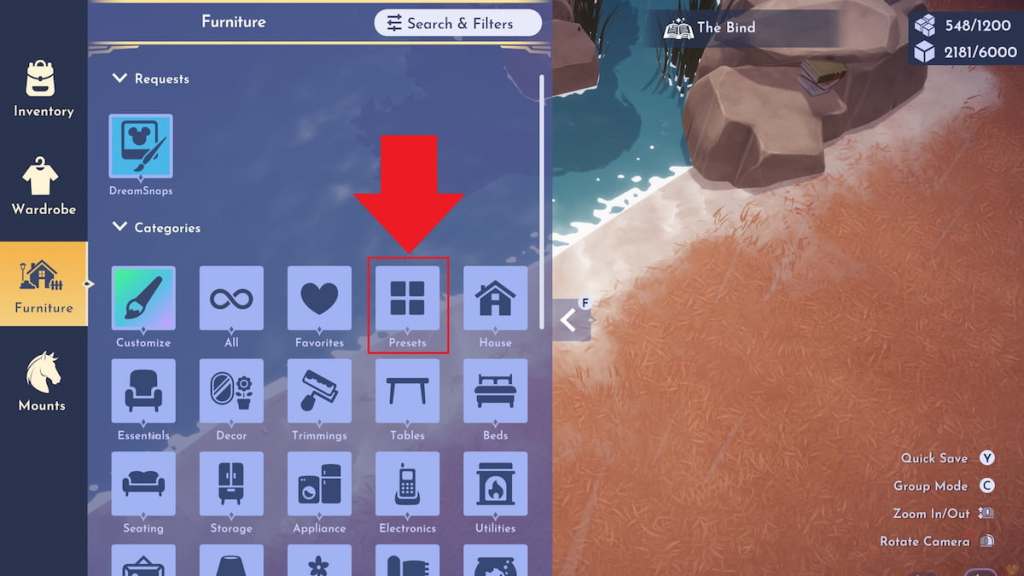
Open Furniture mode and go straight to the Presets tab — it sits between Favorites and House. Making a preset is a three-act scene: pick, save, and reuse. Do it well once and you’ll stop reconstructing the same mood on repeat.
- Open Furniture mode. This is the only place you can create a preset, so start here.
- Find Presets. The icon is the fourth in the first row; select it to open the Presets page.
- Choose “Add new.” Hit that option near the top to begin a selection sweep.
- Highlight the items you want included. Click and drag over the props and furniture you want in your set. Think of grouping by use — a picnic cluster, a cozy reading nook, or a vendor stall.
- Save preset. Name it, confirm, and it lands on your Presets page under your collection.
If you prefer to watch, there’s a short video that follows these exact steps: you select, save, and verify the preset before leaving Furniture mode.
How do I create a decor preset in Disney Dreamlight Valley?
You create a preset inside Furniture mode, not the map or build menus. After pressing Add new on the Presets page, drag to select all items you want, then choose Save preset and give it a name. If you’re cleaning up an area for Scrooge’s quest, keep the selection compact — smaller groups are cheaper to repair if some pieces become Mirages.
Most quests nudge you through steps — Developed Decorating quest walkthrough in Disney Dreamlight Valley
Scrooge McDuck gives you a clear path through the steps, and if you pay attention he’ll explain the quirks of Presets along the way. I’ll go over the sequence you’ll run while you’re talking to him.
Talk to Scrooge McDuck
Approach Scrooge and accept Developed Decorating. Skip the dialogue only if you hate saving time — he explains why certain parts of the preset process exist and which screens to use.
Create and reuse a decor preset
Make your preset following the steps above, then return to Furniture mode to place your saved preset from the Presets page. You can delete or overwrite it later if you want to experiment.
What happens if I don’t have the materials to place a preset?
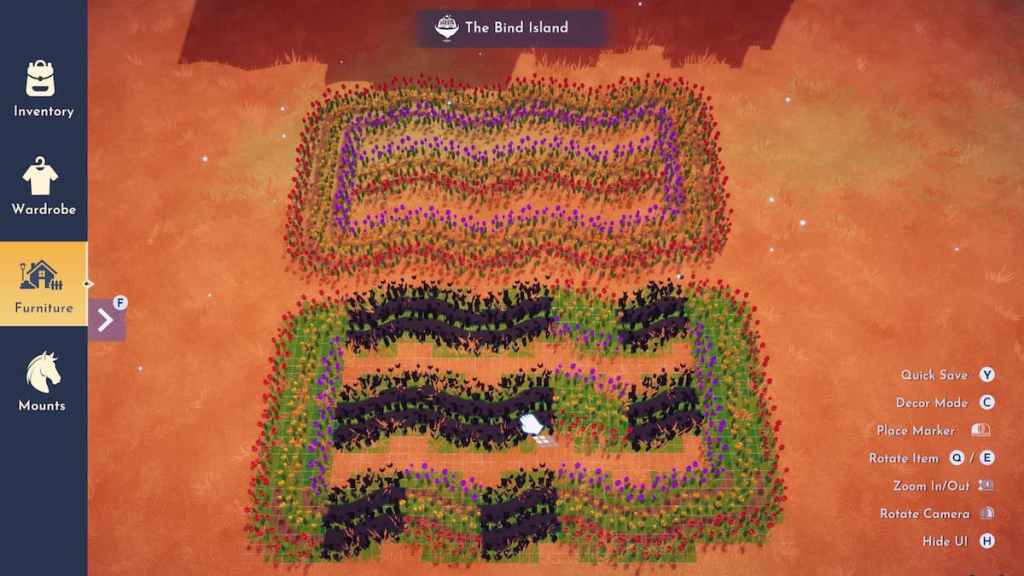
If some items are missing, their spots appear black — these are Mirages. You can pay with Star Coins or craft the item if you have the materials. Star Coins are the in-game currency and prices vary per item; if you’re short, consider replacing expensive pieces with cheaper alternates before saving the preset.
Decorate using Scrooge’s Picnic Decor Preset
After you’ve reused a preset for the quest, talk to Scrooge again. He’ll give you a Picnic Decor Preset found under Premade on the Presets page. Place it somewhere, then repair any Mirage sections by spending crafting resources or Star Coins.
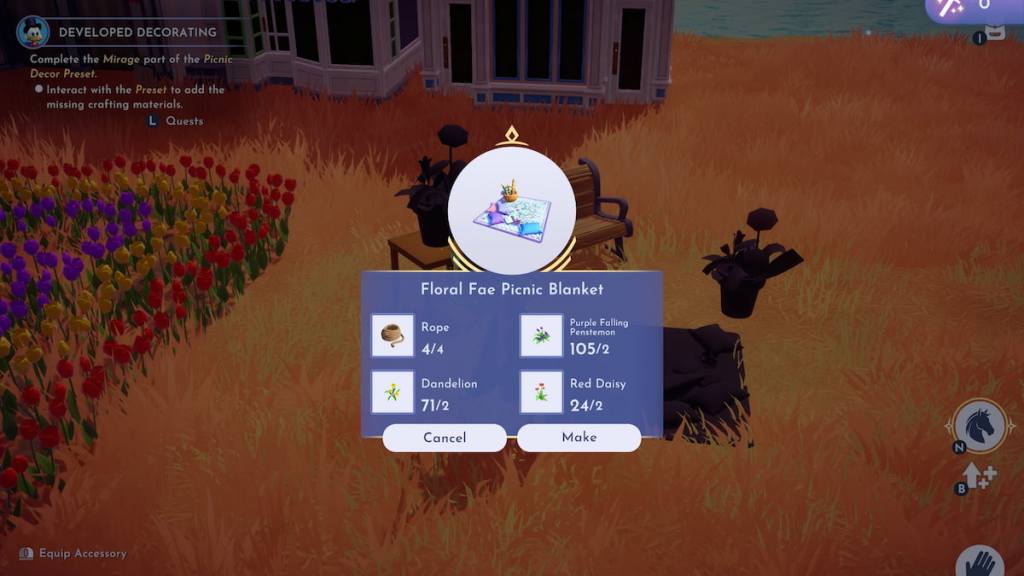
For the quest you only need to repair one Mirage to complete the objective. After that, return to Scrooge and claim your progress.
The cluttered desk shows your habits — Tips to keep presets tidy and useful
If your saved sets are a mess, you’ll avoid them. Treat presets as small toolkits: name them clearly, keep group sizes reasonable, and test-place them in an empty area before saving.
- Use clear names like “Picnic — Lakeside” rather than “Preset 1.”
- Group by function: vendor stalls, seating clusters, or decorative borders.
- Swap out rare or craft-expensive items for cheaper alternatives if you plan to place often.
A preset is a time-saver and a manager of expectations; placing one is a stamp on the map.
If you’re still tweaking, watch creators on YouTube or streamers on Twitch who demo placement tricks — many show how they combine presets with stalls or Dream Castle skins. Disney Dreamlight Valley is sold across platforms (example price on Steam: $29.99 (€28)), and community guides on Steam or the official Discord often surface clever preset combos.
Which preset will you save first and why?